Introduction
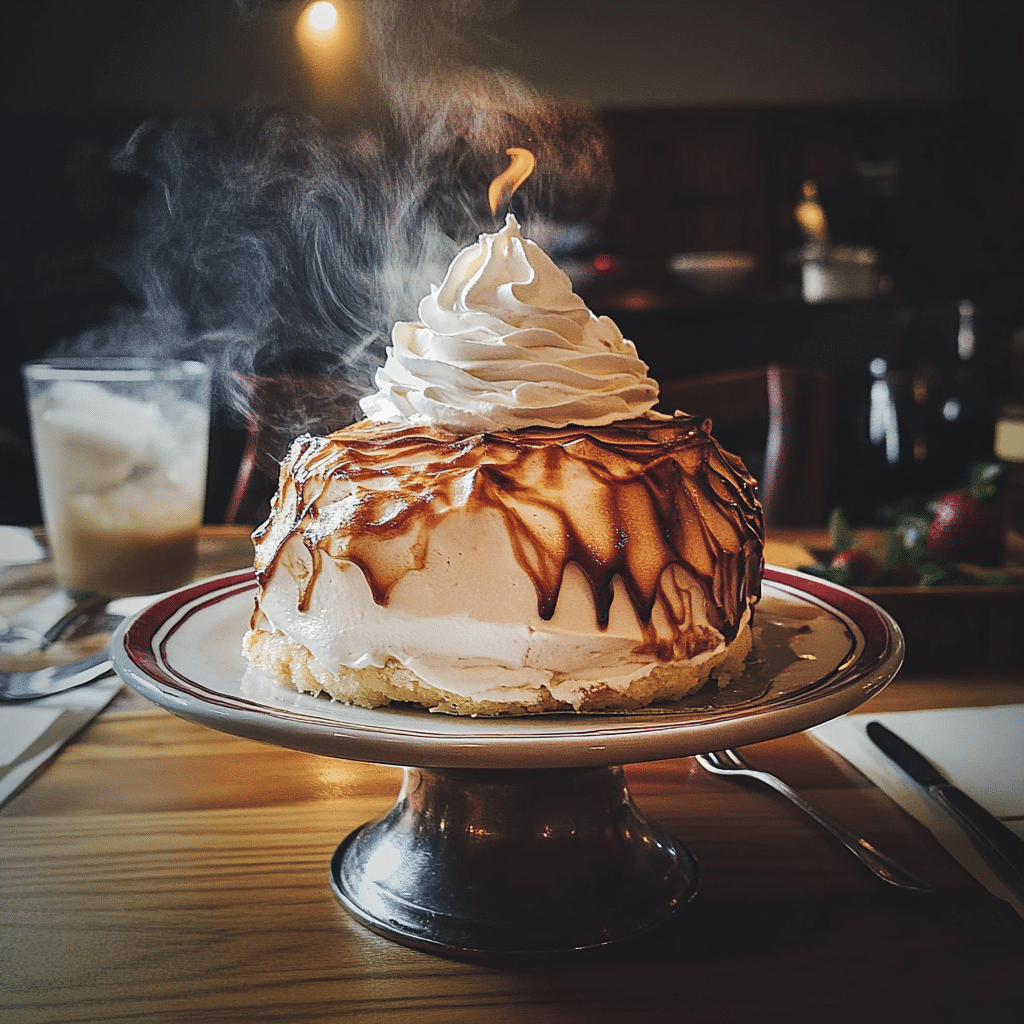
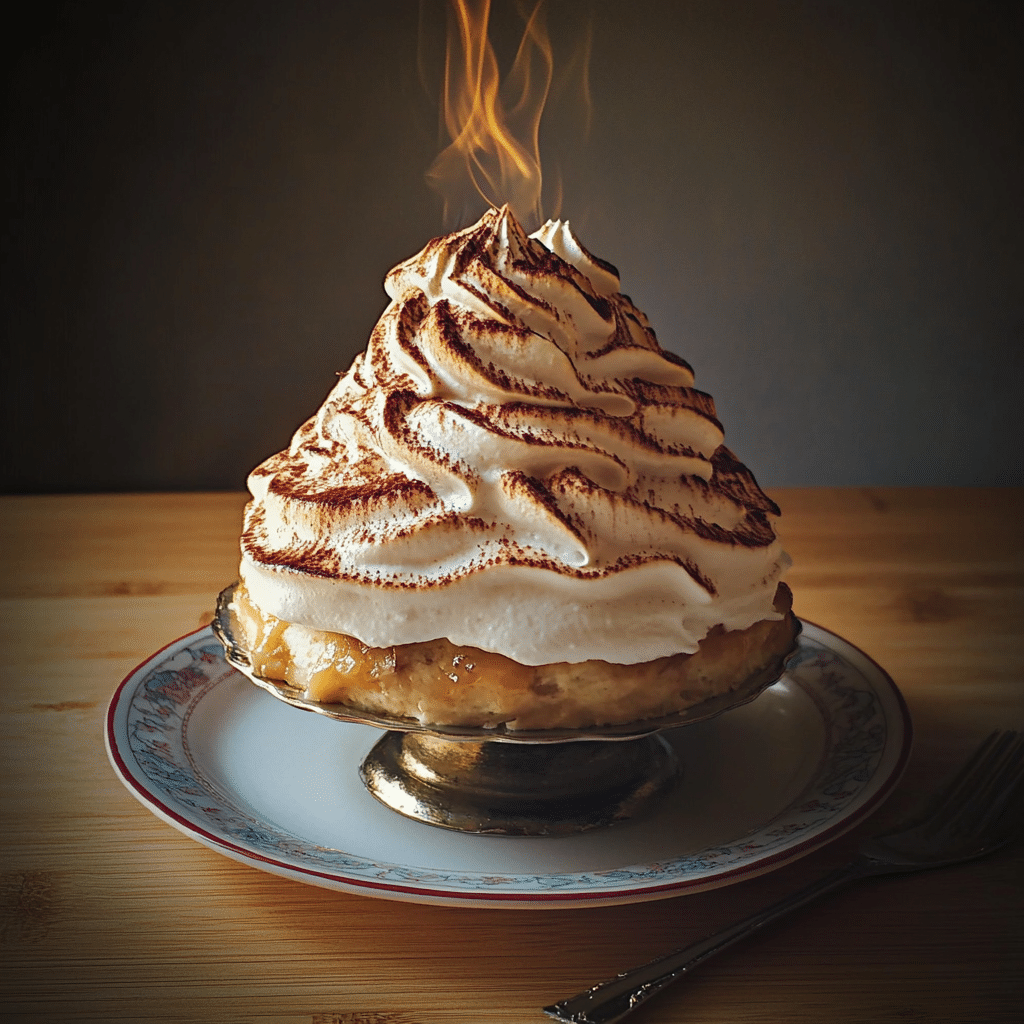
If you’re looking to create a dessert that wows your guests and takes center stage, Baked Alaska is the way to go. This delightful treat combines cake, ice cream, and meringue into one unforgettable dessert that’s as impressive as it is delicious. Picture this: a layer of fluffy cake, a generous scoop of ice cream, all topped off with a golden, lightly toasted meringue shell. It’s like a sweet and creamy dream that melts in your mouth. Plus, it’s easier to make than you might think! Whether you’re hosting a special celebration or just want to wow your family, Baked Alaska will surely be the highlight of your gathering.
Why You’ll Love This Recipe
Here are a few reasons why Baked Alaska is the perfect dessert to try:
- Impressive Presentation: This dessert looks as dramatic as it tastes, making it the perfect showstopper for any party or celebration.
- Unique Flavor Combination: The contrast of warm, toasted meringue and cold, creamy ice cream is pure magic.
- Customizable: You can use your favorite ice cream and cake flavor to personalize the dessert to your liking.
- Fun to Make: The process of assembling and baking is fun and can be a great activity to do with friends or family.
- Simple Ingredients: You don’t need any fancy ingredients—just some good-quality ice cream, cake, and eggs for the meringue.
- A Blast to Serve: The “wow” factor when you serve Baked Alaska is unmatched. It’s bound to impress every time.
- Great for Special Occasions: Whether it’s a birthday, holiday, or dinner party, Baked Alaska is a treat that makes any occasion feel extra special.
- Make-Ahead Option: This dessert can be assembled ahead of time and frozen, making it ideal for stress-free entertaining.
Preparation Time and Cook Time
- Total Time: 2 hours
- Preparation Time: 1 hour
- Cook Time: 15 minutes
- Chill Time: 1 hour
- Servings: 8-10
- Calories per serving: Approximately 350 calories
- Key Nutrients: Carbohydrates: 45g, Protein: 4g, Fat: 20g, Fiber: 2g
Ingredients
Gather these simple ingredients to create your own Baked Alaska:
For the Cake:
- 1 store-bought sponge cake or 1 recipe of your favorite cake (around 8-9 inches)
the Ice Cream:
- 1 quart of your favorite ice cream (vanilla, chocolate, or any flavor you like)
For the Meringue:
- 4 large egg whites
- 1 cup granulated sugar
- 1/4 teaspoon cream of tartar
- 1/2 teaspoon vanilla extract
Ingredient Highlights
- Sponge Cake: A light and airy cake that serves as the perfect base for the ice cream and meringue.
- Ice Cream: You can go classic with vanilla or chocolate, or get creative with flavors like strawberry, pistachio, or coffee.
- Meringue: The fluffy, sweet meringue adds the perfect contrast to the cold ice cream and warm cake beneath it.
Step-by-Step Instructions
Follow these easy steps to make your Baked Alaska:
Prepare the Cake Base
- Preheat Oven: Preheat your oven to 350°F (175°C).
- Bake the Cake: If you’re baking your cake, prepare your favorite recipe and bake it in an 8-9 inch round cake pan. Allow it to cool completely.
- Slice the Cake: Once cooled, slice the cake into a flat, even layer that will fit the base of your bowl or plate. If using store-bought cake, simply slice it to the desired thickness.
the Ice Cream Layer
- Soften the Ice Cream: Take the ice cream out of the freezer and let it soften for about 10 minutes. This will make it easier to work with.
- Form the Ice Cream Dome: Scoop the softened ice cream into a bowl that is slightly larger than your cake. Use the back of a spoon to smooth it into a dome shape. Place the bowl in the freezer for about 30 minutes to firm up.
Prepare the Meringue
- Whisk the Egg Whites: In a large mixing bowl, beat the egg whites with an electric mixer until soft peaks form. This should take about 2-3 minutes.
- Add Sugar: Gradually add the granulated sugar, one tablespoon at a time, and continue to beat until stiff peaks form.
- Flavor the Meringue: Add the vanilla extract and cream of tartar to stabilize the meringue and give it a subtle flavor.
Assemble the Baked Alaska
- Layer the Cake: Place the sliced cake onto a heatproof serving plate or baking dish. Make sure the cake fits the base of your ice cream dome.
- Add the Ice Cream: Gently invert the ice cream dome onto the cake. Press it down lightly to ensure a good seal.
- Top with Meringue: Spread the meringue over the ice cream and cake, covering it completely. Be sure to spread the meringue all the way to the edges to seal in the ice cream.
- Create Peaks: Use the back of a spoon to create peaks and swirls in the meringue, which will help it brown beautifully in the oven.
Bake the Alaska
- Preheat Broiler: Preheat your oven’s broiler to high.
- Bake: Place the assembled Baked Alaska in the oven under the broiler for 5-7 minutes, or until the meringue is golden brown. Keep a close eye on it to prevent burning.
- Serve Immediately: Once the meringue is perfectly golden, remove the Baked Alaska from the oven and serve right away.
How to Serve
Here are a few ways to serve your Baked Alaska:
- Slice and Serve: Cut into wedges, ensuring you get a piece of cake, ice cream, and meringue in each slice.
- Serve with Sauces: Drizzle chocolate or caramel sauce over the top for added flavor.
- Garnish: Add fresh berries or mint leaves as a garnish to bring a pop of color and freshness to the plate.
- Pair with Coffee or Tea: The richness of Baked Alaska pairs beautifully with a cup of coffee or a warm cup of tea.
Additional Tips
Maximize your enjoyment of Baked Alaska with these helpful tips:
- Freeze for Best Results: Make sure the ice cream is firm before assembling to avoid melting during baking.
- Use a High-Quality Cake: Whether homemade or store-bought, choose a light, fluffy cake to balance the richness of the ice cream and meringue.
- Customize the Flavors: Experiment with different cake and ice cream flavors to make the dessert your own. Chocolate cake with mint ice cream or yellow cake with strawberry ice cream are delicious combos!
- Prevent Melting: Work quickly when assembling the dessert and keep it frozen until ready to bake.
- Use a Torch: If you have a kitchen torch, you can use it to brown the meringue instead of the broiler, giving you more control over the browning process.
Recipe Variations
Here are some creative twists on the classic Baked Alaska:
- Flavored Meringue: Add a hint of lemon zest or almond extract to the meringue for extra flavor.
- Mini Baked Alaskas: Create individual portions by using small cake rounds and scoops of ice cream in cupcake pans.
- Chocolate Cake Base: Swap the sponge cake for a rich chocolate cake for a decadent twist.
- Vegan Version: Use dairy-free ice cream and aquafaba (chickpea water) to create a vegan-friendly meringue.
- Layered Ice Cream: For a colorful and fun twist, layer different flavors of ice cream inside the dome before freezing.
Freezing and Storage
To store your Baked Alaska:
- Freeze the Assembled Dessert: You can freeze the fully assembled Baked Alaska (before baking) for up to 2 days. Just cover it with plastic wrap and foil.
- Freeze Leftovers: If you have leftover Baked Alaska, store it in the freezer in an airtight container for up to 3 days. Just let it soften a little before serving.
Special Equipment
You may need these tools for the best results:
- Electric Mixer: For whipping the meringue to perfection.
- Cake Pan: To bake the cake or to shape the ice cream.
- Broiler or Kitchen Torch: For toasting the meringue.
- Serving Plate: A large, heatproof plate or dish for assembling and serving.
FAQ Section
Here are answers to common questions about Baked Alaska:
- Can I use homemade cake instead of store-bought?
Yes! A homemade sponge cake works wonderfully. - Can I use any flavor of ice cream?
Absolutely! Choose your favorite flavor of ice cream or mix and match. - How do I avoid the meringue from being too runny?
Make sure to beat the egg whites until they form stiff peaks and add the sugar gradually.
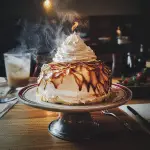
Baked Alaska
- Total Time: 2 hrs.
Ingredients
For the Cake:
- 1 store-bought sponge cake or 1 recipe of your favorite cake (around 8–9 inches)
For the Ice Cream:
- 1 quart of your favorite ice cream (vanilla, chocolate, or any flavor you like)
For the Meringue:
- 4 large egg whites
- 1 cup granulated sugar
- 1/4 teaspoon cream of tartar
- 1/2 teaspoon vanilla extract
Instructions
Prepare the Cake Base
- Preheat Oven: Preheat your oven to 350°F (175°C).
- Bake the Cake: If you’re baking your cake, prepare your favorite recipe and bake it in an 8-9 inch round cake pan. Allow it to cool completely.
- Slice the Cake: Once cooled, slice the cake into a flat, even layer that will fit the base of your bowl or plate. If using store-bought cake, simply slice it to the desired thickness.
Prepare the Ice Cream Layer
- Soften the Ice Cream: Take the ice cream out of the freezer and let it soften for about 10 minutes. This will make it easier to work with.
- Form the Ice Cream Dome: Scoop the softened ice cream into a bowl that is slightly larger than your cake. Use the back of a spoon to smooth it into a dome shape. Place the bowl in the freezer for about 30 minutes to firm up.
Prepare the Meringue
- Whisk the Egg Whites: In a large mixing bowl, beat the egg whites with an electric mixer until soft peaks form. This should take about 2-3 minutes.
- Add Sugar: Gradually add the granulated sugar, one tablespoon at a time, and continue to beat until stiff peaks form.
- Flavor the Meringue: Add the vanilla extract and cream of tartar to stabilize the meringue and give it a subtle flavor.
Assemble the Baked Alaska
- Layer the Cake: Place the sliced cake onto a heatproof serving plate or baking dish. Make sure the cake fits the base of your ice cream dome.
- Add the Ice Cream: Gently invert the ice cream dome onto the cake. Press it down lightly to ensure a good seal.
- Top with Meringue: Spread the meringue over the ice cream and cake, covering it completely. Be sure to spread the meringue all the way to the edges to seal in the ice cream.
- Create Peaks: Use the back of a spoon to create peaks and swirls in the meringue, which will help it brown beautifully in the oven.
Bake the Alaska
- Preheat Broiler: Preheat your oven’s broiler to high.
- Bake: Place the assembled Baked Alaska in the oven under the broiler for 5-7 minutes, or until the meringue is golden brown. Keep a close eye on it to prevent burning.
- Serve Immediately: Once the meringue is perfectly golden, remove the Baked Alaska from the oven and serve right away.
- Prep Time: 1 hour
- Chill Time: 1 hour
- Cook Time: 15 min.
Nutrition
- Serving Size: 8-10 servings
- Calories: 350 kcal
- Fat: 20g
- Carbohydrates: 45g
- Fiber: 2g
- Protein: 4g
Conclusion
There’s no better way to finish a special meal than with a showstopping Baked Alaska. With its layers of cake, ice cream, and golden meringue, it’s a dessert that looks as incredible as it tastes. The combination of warm, toasted meringue and cold, creamy ice cream creates an unforgettable contrast in every bite. And the best part? You can make it your own by customizing the flavors to fit your tastes—whether you go with classic vanilla or get creative with chocolate, fruit, or even a mix of your favorite flavors.
Baked Alaska may look like a challenge, but with a little planning and patience, it’s surprisingly doable. You can assemble the layers in advance, and when it’s time to serve, simply pop it in the oven for a quick bake to toast the meringue to perfection. It’s a dramatic and impressive dessert that will wow your guests, but it’s also surprisingly manageable once you break it down into steps.
Whether you’re a seasoned baker or just looking to impress your family, Baked Alaska is sure to become your new favorite go-to dessert for any celebration. It’s festive, fun, and deliciously indulgent.
Give this recipe a try—I’d love to hear what you think! Don’t forget to snap a photo and tag me on social media—I love seeing your delicious creations! Happy baking!

