Introduction
Looking for a dessert that’s indulgent, creamy, and utterly irresistible? Let me introduce you to Biscoff Mousse, a treat that combines the velvety richness of mousse with the caramelized spice of Biscoff cookies. This mousse is light yet luxurious, making it perfect for any occasion, from casual get-togethers to sophisticated dinner parties. If you’ve never tried Biscoff cookies, prepare yourself for a delightful surprise. The buttery, spiced flavor of these cookies brings a unique twist to the classic mousse, creating a dessert that’s as comforting as it is impressive.
This dessert is sure to be a hit wherever it’s served, thanks to its smooth texture and distinctive flavor. It’s a beautiful option for anyone who loves the combination of creamy and crunchy, and the best part? It’s simple to make. So, let’s dive in and learn how to whip up this delicious dessert that’s bound to win over anyone who tries it!
Why You’ll Love This Recipe
Here are just a few reasons why Biscoff Mousse will become your new favorite dessert:
- Indulgent yet Light: This mousse has a creamy, airy texture that’s rich but not too heavy.
- Biscoff Flavor: If you love the spicy, caramelized taste of Biscoff cookies, this mousse captures that flavor perfectly.
- Easy to Make: With just a few ingredients and minimal effort, you can have a show-stopping dessert ready in no time.
- No-Bake: No need for the oven—just chill and serve!
- Perfect for Any Occasion: Whether you’re hosting a dinner party, celebrating a special occasion, or just indulging in a treat at home, this mousse fits the bill.
- Customizable: You can easily adjust the flavor profile by adding other mix-ins or toppings, like chocolate shavings, whipped cream, or extra cookie crumbs.
- No Special Equipment Needed: You don’t need a pastry bag or fancy gadgets to create this mousse—just a whisk and a bowl will do.
- Makes a Great Gift: Packaged in cute jars or glasses, this mousse makes a wonderful homemade gift for loved ones.
- Great for All Skill Levels: Whether you’re a novice or an experienced baker, this recipe is easy to follow and yields impressive results.
- Versatile Serving Options: You can serve this mousse in individual cups, parfait glasses, or in a large dish for a more casual presentation.
Preparation Time and Cook Time
- Total Time: 30 minutes
- Preparation Time: 20 minutes
- Chill Time: 2-3 hours
- Servings: 6 servings
- Calories per Serving: Approximately 280 calories
- Key Nutrients: Fat: 19g, Carbohydrates: 22g, Protein: 3g
Ingredients
Before you start, make sure you have these ingredients ready to create your Biscoff Mousse:
For the Mousse:
- 1 cup heavy whipping cream
- 1/2 cup Biscoff spread (also known as cookie butter)
- 1/2 cup powdered sugar
- 8 oz cream cheese, softened
- 1/2 tsp vanilla extract
For the Biscoff Crumble:
- 6 Biscoff cookies, crushed into small crumbs
Ingredient Highlights
- Heavy Whipping Cream: Provides the mousse with its rich, creamy texture. Whipped to perfection, it adds lightness to the mousse.
- Biscoff Spread: This delicious, creamy spread made from Biscoff cookies brings the signature flavor of caramelized spice to the mousse, elevating the dessert to something extraordinary.
- Cream Cheese: Cream cheese gives the mousse a smooth, velvety texture and a slight tang to balance the sweetness of the Biscoff spread.
- Vanilla Extract: Adds depth of flavor, rounding out the taste profile of the mousse.
- Biscoff Cookies: Used as a crunchy topping, they enhance the texture of the mousse and amplify the iconic Biscoff flavor.
Step-by-Step Instructions
Here’s how to make your Biscoff Mousse from start to finish:
1: Whip the Cream
- Chill the Mixing Bowl: Begin by chilling your mixing bowl and whisk in the freezer for 10-15 minutes. This helps the cream whip up faster and more effectively.
- Whip the Cream: Once your bowl is chilled, pour the heavy whipping cream into the bowl and whip it on medium-high speed until soft peaks form. This means the cream should hold its shape but still be slightly wobbly when you lift the whisk. Be careful not to overwhip.
2: Prepare the Cream Cheese Mixture
- Mix the Cream Cheese and Biscoff Spread: In a separate mixing bowl, beat the softened cream cheese with the Biscoff spread until smooth and well-combined. This step is essential for creating that perfectly creamy mousse base.
- Add Powdered Sugar and Vanilla: Add the powdered sugar and vanilla extract to the cream cheese mixture. Beat again until everything is smooth and combined. The sugar will sweeten the mixture while the vanilla adds an extra layer of flavor.
3: Fold in the Whipped Cream
- Combine the Mixtures: Gently fold the whipped cream into the Biscoff mixture. Use a spatula to incorporate the whipped cream without deflating it too much. The goal is to maintain the light, airy texture of the whipped cream.
- Check Consistency: The mousse should be light and fluffy, with a smooth, creamy consistency. If it feels too runny, you can refrigerate it for 10-15 minutes to firm up before serving.
4: Assemble the Mousse
- Prepare Serving Dishes: Spoon the mousse into individual serving cups or one large dish, depending on your preference. Make sure not to overfill each cup—leave some room for the crumble topping.
- Chill: Cover the mousse with plastic wrap and refrigerate for at least 2-3 hours, or until it firms up. The chilling time helps the flavors meld together and gives the mousse its signature light, airy texture.
5: Add the Biscoff Crumble
- Crush the Biscoff Cookies: While the mousse is chilling, crush the Biscoff cookies into small, uneven crumbs. You can do this by placing the cookies in a ziplock bag and gently crushing them with a rolling pin, or by using a food processor for a finer crumble.
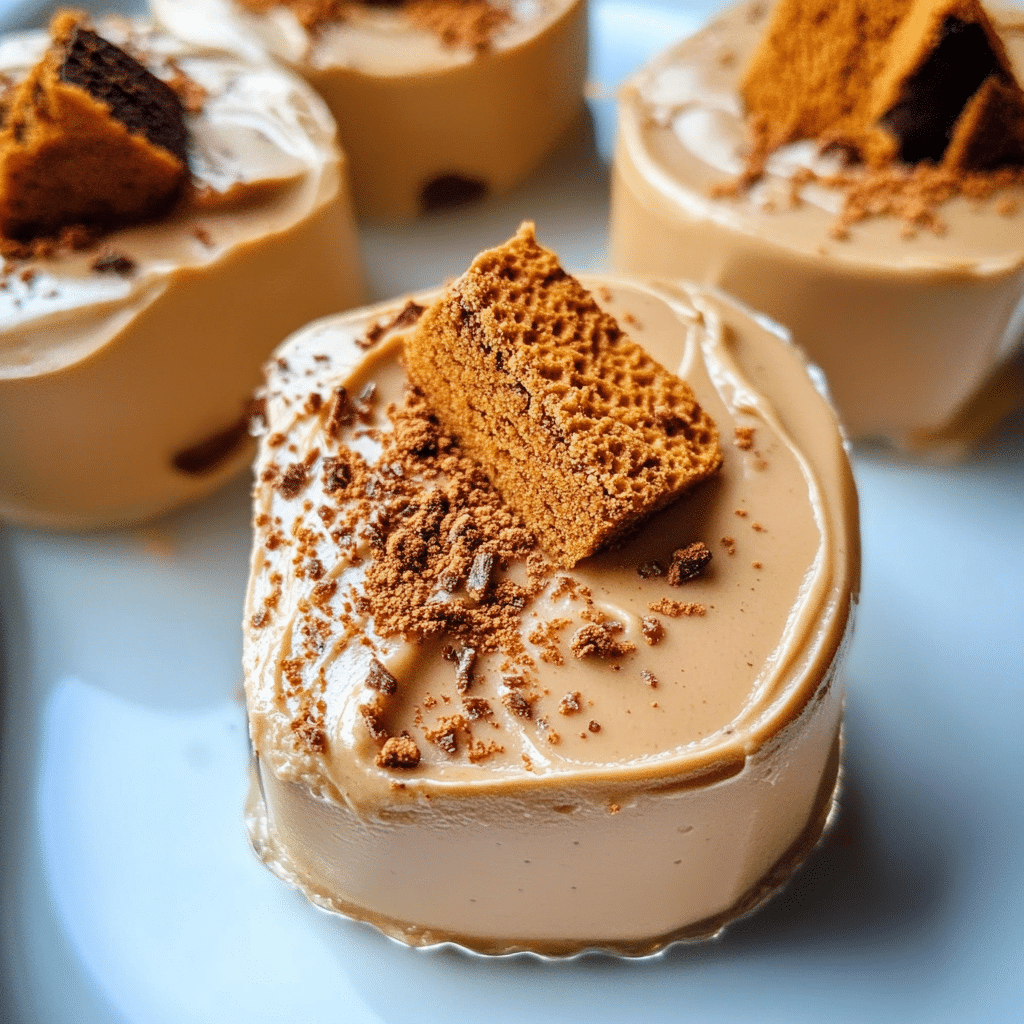
- Top the Mousse: Once the mousse is ready to serve, sprinkle the crushed Biscoff cookies over the top of each serving. The crunchy topping adds texture and intensifies the flavor, creating a perfect balance between smooth and crispy.
How to Serve
Here are some creative serving ideas for your Biscoff Mousse:
- Individual Cups: Serve the mousse in small glasses or mason jars for a charming and personal touch.
- Layered Parfaits: Layer the mousse with extra Biscoff crumbs for a more dramatic presentation.
- Garnish with Whipped Cream: Add a dollop of whipped cream on top of each serving, then finish with a sprinkle of cookie crumbs for an extra indulgent touch.
- Serve with Fruit: Pair the mousse with fresh fruit like berries for a refreshing contrast to the rich dessert.
- Make it a Dessert Bar: Set up a mousse bar with different toppings like chocolate shavings, nuts, and caramel sauce for guests to customize their servings.
Additional Tips
Maximize your mousse-making experience with these handy tips:
- Use Cold Ingredients: For the best results, make sure your cream cheese and whipping cream are both cold. This will help them whip up more effectively.
- Don’t Overmix: When folding the whipped cream into the Biscoff mixture, be gentle. Overmixing can cause the mousse to lose its light, fluffy texture.
- Chill for Flavor: Let the mousse chill for at least 2-3 hours. This allows the flavors to fully develop and results in a firmer texture.
- Double the Recipe: If you’re expecting a crowd, it’s easy to double the ingredients and make a larger batch.
- Use a Piping Bag: For a more elegant presentation, pipe the mousse into your cups using a piping bag.
Recipe Variations
Consider these creative twists on your Biscoff Mousse:
- Add Chocolate: Swirl in some melted chocolate to the mousse for a rich chocolate-Biscoff combo.
- Caramel Sauce: Drizzle some caramel sauce on top for an extra layer of sweetness and depth of flavor.
- Add Nuts: Top with chopped hazelnuts or almonds for added crunch and flavor.
- Make it Vegan: Use coconut cream in place of heavy cream and dairy-free cream cheese for a vegan version of this mousse.
- Add Spices: For a little extra warmth, try adding a pinch of cinnamon or nutmeg to the mousse mixture.
Freezing and Storage
To store your Biscoff Mousse properly:
- Storage: Keep mousse covered in the refrigerator for up to 3-4 days.
- Freezing: Freezing mousse is not recommended due to its delicate texture. It’s best enjoyed fresh.
- Make-Ahead: You can prepare the mousse a day ahead and store it in the fridge. The flavors will continue to develop and deepen.
faq section
Before you dive into making your Biscoff Mousse, here are some frequently asked questions that can help you along the way. If you’re wondering about any specifics or need a little extra guidance, check out these helpful tips:
- How do I know if my whipped cream is at the right consistency?
- Soft Peaks: When whipping cream, you’ll want it to reach soft peaks, which means the cream holds its shape but gently falls over when you lift the whisk. If you go past this point, it can become butter-like.
- Tip: Use chilled equipment and cream for the best results.
- Can I make this mousse ahead of time?
- Yes! This mousse is perfect for making in advance. You can prepare it up to a day before serving, just make sure to cover it tightly and store it in the fridge. The mousse will actually taste better after the flavors have had a chance to meld together.
- What can I use instead of Biscoff spread?
- If you can’t find Biscoff spread, try using another cookie butter spread or even Nutella for a different flavor profile. You can also try blending crushed cookies (like speculoos or graham crackers) with melted butter to make your own cookie butter substitute.

Biscoff Mousse
- Total Time: 30 min.
Ingredients
For the Mousse:
- 1 cup heavy whipping cream
- 1/2 cup Biscoff spread (also known as cookie butter)
- 1/2 cup powdered sugar
- 8 oz cream cheese, softened
- 1/2 tsp vanilla extract
For the Biscoff Crumble:
- 6 Biscoff cookies, crushed into sma
Instructions
Step 1: Whip the Cream
- Chill the Mixing Bowl: Begin by chilling your mixing bowl and whisk in the freezer for 10-15 minutes. This helps the cream whip up faster and more effectively.
- Whip the Cream: Once your bowl is chilled, pour the heavy whipping cream into the bowl and whip it on medium-high speed until soft peaks form. This means the cream should hold its shape but still be slightly wobbly when you lift the whisk. Be careful not to overwhip.
Step 2: Prepare the Cream Cheese Mixture
- Mix the Cream Cheese and Biscoff Spread: In a separate mixing bowl, beat the softened cream cheese with the Biscoff spread until smooth and well-combined. This step is essential for creating that perfectly creamy mousse base.
- Add Powdered Sugar and Vanilla: Add the powdered sugar and vanilla extract to the cream cheese mixture. Beat again until everything is smooth and combined. The sugar will sweeten the mixture while the vanilla adds an extra layer of flavor.
Step 3: Fold in the Whipped Cream
- Combine the Mixtures: Gently fold the whipped cream into the Biscoff mixture. Use a spatula to incorporate the whipped cream without deflating it too much. The goal is to maintain the light, airy texture of the whipped cream.
- Check Consistency: The mousse should be light and fluffy, with a smooth, creamy consistency. If it feels too runny, you can refrigerate it for 10-15 minutes to firm up before serving.
Step 4: Assemble the Mousse
- Prepare Serving Dishes: Spoon the mousse into individual serving cups or one large dish, depending on your preference. Make sure not to overfill each cup—leave some room for the crumble topping.
- Chill: Cover the mousse with plastic wrap and refrigerate for at least 2-3 hours, or until it firms up. The chilling time helps the flavors meld together and gives the mousse its signature light, airy texture.
Step 5: Add the Biscoff Crumble
- Crush the Biscoff Cookies: While the mousse is chilling, crush the Biscoff cookies into small, uneven crumbs. You can do this by placing the cookies in a ziplock bag and gently crushing them with a rolling pin, or by using a food processor for a finer crumble.
- Top the Mousse: Once the mousse is ready to serve, sprinkle the crushed Biscoff cookies over the top of each serving. The crunchy topping adds texture and intensifies the flavor, creating a perfect balance between smooth and crispy.
- Prep Time: 20 min.
- Chill Time: 2-3 hours
Nutrition
- Serving Size: 6 servings
- Calories: 280 kcal
- Fat: 19g
- Carbohydrates: 22g
- Protein: 3g
Conclusion
With its creamy texture, delightful Biscoff flavor, and simple preparation, this mousse is guaranteed to be a hit wherever you serve it. Whether you’re treating yourself or impressing guests, this dessert is sure to satisfy every sweet tooth. Don’t forget to snap a photo and tag me on social media – I love seeing your delicious creations!

