Introduction
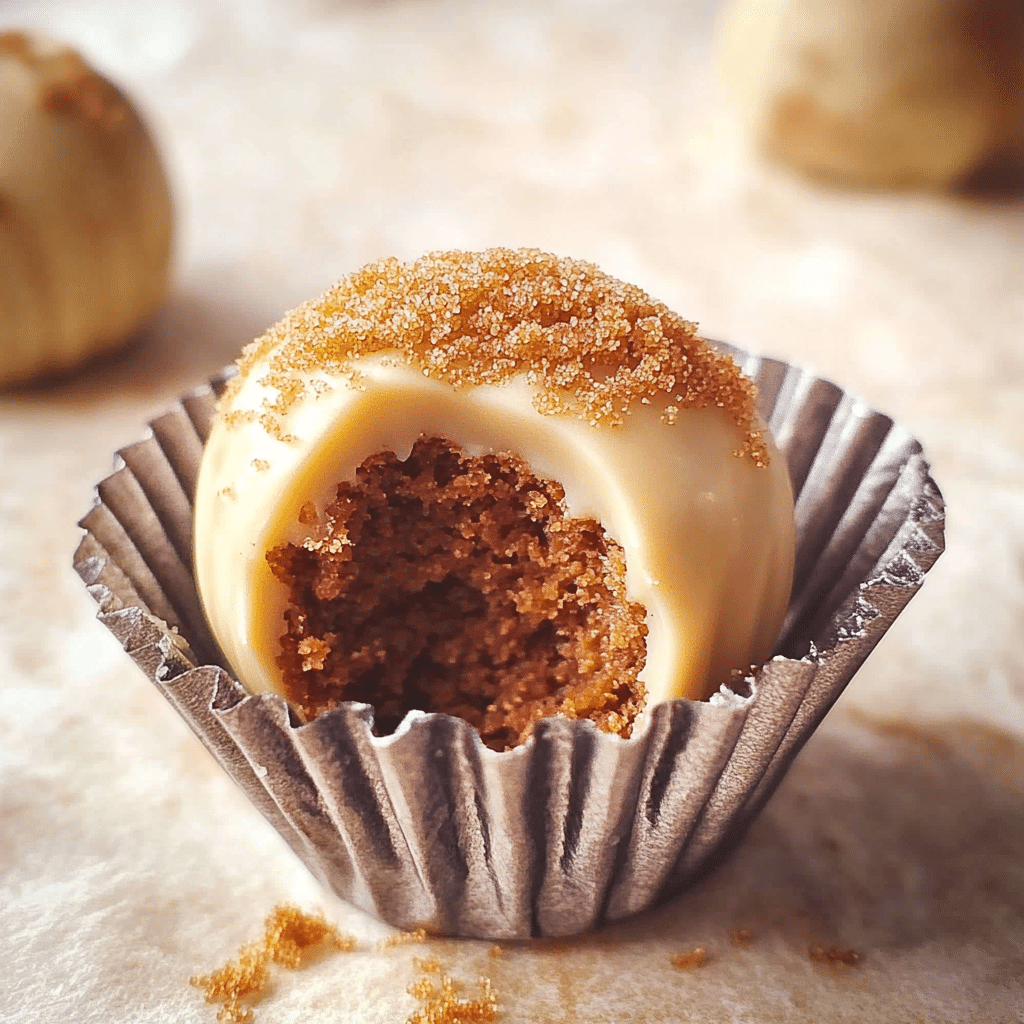
Biscoff Truffles: A Sweet Indulgence
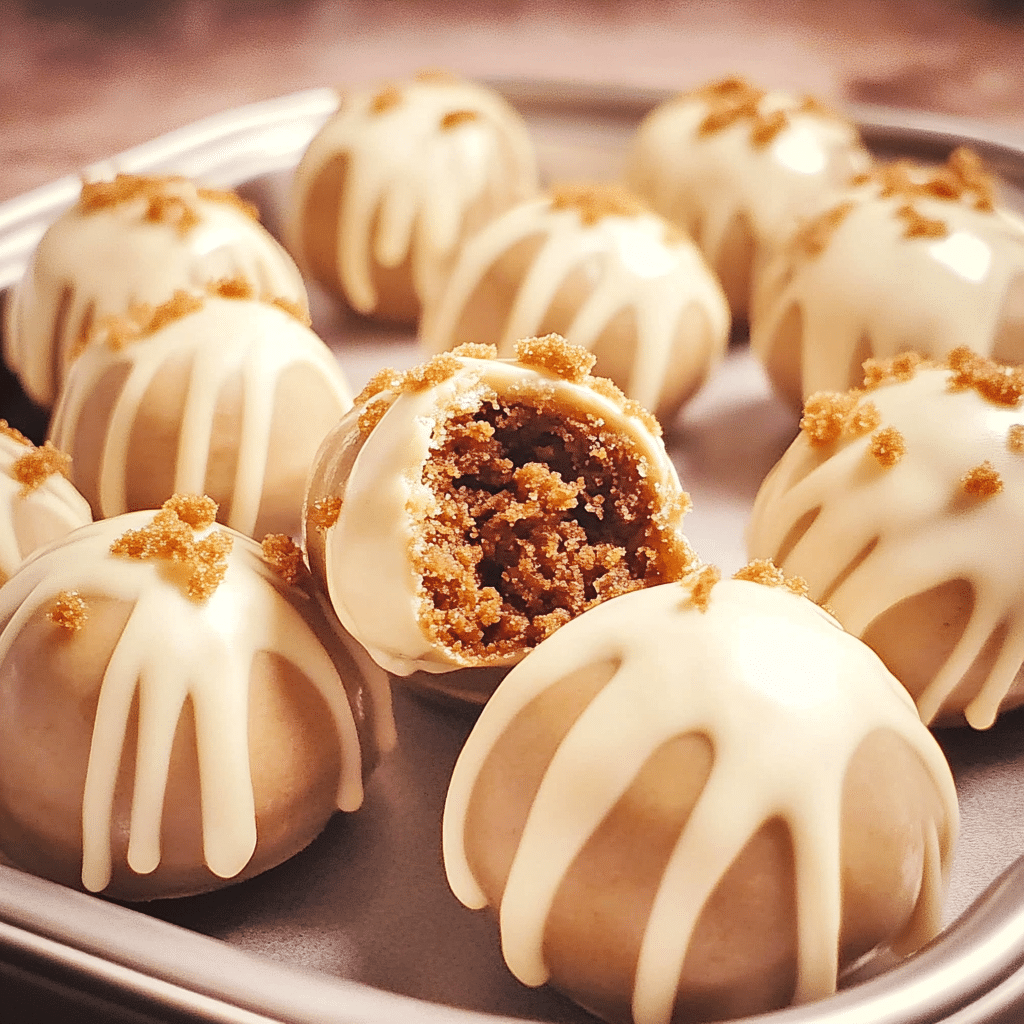
Hey there! If you’re looking for a fun and delicious treat that’ll impress your friends and family, then Biscoff Truffles are your answer! I mean, who can resist the incredible combination of creamy chocolate and the spiced goodness of Biscoff cookies? I first discovered these truffles at a holiday gathering a few years ago, and they quickly became a staple in my home. There’s something so comforting about that warm, cozy flavor that reminds me of holiday baking with my family.
Making these truffles is super easy, even if you’re not a seasoned chef. Seriously, if I can do it, you can too! The best part? You only need a handful of ingredients—Biscoff cookies, cream cheese, and chocolate. It’s like a mini baking project that feels fancy but is totally approachable. Plus, you can customize them with your favorite toppings, whether it’s crushed cookies, sprinkles, or even a drizzle of caramel.
I love whipping up a batch of these truffles to share during get-togethers or just to keep at home for a sweet snack. They’re perfect for gifting, too—who wouldn’t love a jar full of these little delights? So, gather your ingredients, roll up those sleeves, and let’s dive into this recipe together! And don’t forget to snap a photo and tag me on social media—I love seeing your delicious creations! You’ve got this!
Why You’ll Love This Recipe
Here are several reasons to fall in love with Biscoff Truffles:
- Easy to Make: No baking required! Simply mix, roll, and dip.
- Decadent Flavor: The combination of Biscoff cookies and chocolate creates a rich and delightful treat.
- Customizable: Roll them in various coatings like crushed nuts, sprinkles, or cocoa powder for a personalized touch.
- Perfect for Gifting: These truffles make wonderful homemade gifts for friends and family.
- Great for Any Occasion: Whether it’s a holiday, birthday, or just a regular day, they fit any celebration.
- Kid-Friendly: Kids will love helping to crush cookies and roll the truffles.
- Make Ahead: Prepare them in advance and store in the fridge until you’re ready to serve.
- Elegant Presentation: Dressed in chocolate and toppings, they make a beautiful addition to dessert tables.
- Versatile: Enjoy them as a snack, dessert, or even as a coffee companion.
- No Special Equipment Needed: You can create these truffles with basic kitchen tools.
Preparation Time and Cook Time
- Total Time: 1 hour
- Preparation Time: 15 minutes
- Chilling Time: 45 minutes
- Servings: 24 truffles
- Calories per truffle: Approximately 120 calories
- Key Nutrients: Fiber: 1g, Fat: 7g, Carbohydrates: 14g, Protein: 1g
Ingredients
Gather the following ingredients to create your Biscoff Truffles:
For the Truffle Mixture:
- 1 cup Biscoff cookies (about 12 cookies)
- 4 oz cream cheese, softened
- 1 teaspoon vanilla extract
For the Coating:
- 8 oz semi-sweet chocolate, chopped or chocolate chips
- Optional toppings: crushed Biscoff cookies, sprinkles, cocoa powder, or chopped nuts
Ingredient Highlights
- Biscoff Cookies: The star ingredient, offering a unique caramelized flavor that makes these truffles special.
- Cream Cheese: Adds a rich creaminess that binds the cookies and enhances the overall taste.
- Chocolate Coating: Provides a delicious outer layer that perfectly complements the Biscoff filling.
Step-by-Step Instructions
Follow these steps to create your Biscoff Truffles:
Prepare the Truffle Mixture
- Crush the Cookies: Place the Biscoff cookies in a food processor and pulse until they turn into fine crumbs.
- Mix the Ingredients: In a mixing bowl, combine the crushed cookies, softened cream cheese, and vanilla extract. Mix until well combined and smooth.
- Chill the Mixture: Refrigerate the mixture for about 30 minutes to make it easier to handle.
Form the Truffles
- Shape the Truffles: Once chilled, use your hands to scoop out about a tablespoon of the mixture and roll it into a ball. Place the balls on a parchment-lined baking sheet.
- Chill Again: Return the truffles to the refrigerator for another 15 minutes to firm up.
Coat the Truffles
- Melt the Chocolate: In a microwave-safe bowl, melt the chocolate in 30-second intervals, stirring in between until smooth.
- Dip the Truffles: Using a fork, dip each truffle into the melted chocolate, allowing any excess to drip off.
- Add Toppings: While the chocolate is still wet, sprinkle your desired toppings on top of the truffles.
How to Serve
Here are some fun serving ideas for your Biscoff Truffles:
- Display on a Platter: Arrange the truffles on a decorative serving platter for an elegant touch.
- Gift in Jars: Fill small mason jars with truffles and tie with a ribbon for a charming gift.
- Add to Dessert Tables: Include them as part of a dessert spread for parties and gatherings.
- Pair with Coffee: Serve with a cup of coffee or tea for a delightful afternoon treat.
- Use Decorative Boxes: Package truffles in decorative boxes for a beautiful presentation.
- Serve with Fresh Fruit: Pair with strawberries or raspberries for a contrasting flavor.
- Make Mini Versions: Roll smaller truffles for bite-sized delights.
- Create a Candy Bar: Include truffles in a DIY candy bar at your next event.
- Top with Sea Salt: Add a sprinkle of flaky sea salt on top for a sweet and salty flavor.
- Use for Celebrations: Incorporate truffles in birthday or holiday celebrations for a special touch.
Additional Tips
Maximize your enjoyment of Biscoff Truffles with these helpful tips:
- Use Room Temperature Cream Cheese: Ensure cream cheese is softened for easy mixing.
- Experiment with Flavors: Try adding spices like cinnamon or nutmeg for extra warmth.
- Chill for Better Shape: Keep the truffles in the fridge if they become too soft to handle.
- Try White Chocolate: Use white chocolate for a different flavor profile and visual appeal.
- Decorate Creatively: Use different toppings to customize each truffle.
- Store Properly: Keep truffles in an airtight container in the refrigerator for freshness.
- Let Chocolate Set: Allow the chocolate coating to set at room temperature for the best texture.
- Double the Recipe: Make a larger batch to share at parties or events.
- Get the Kids Involved: Let kids help with rolling the truffles and adding toppings.
- Try Different Cookies: Experiment with other flavored cookies for varied results.
Recipe Variations
Consider these creative variations for your Biscoff Truffles:
- Peanut Butter Swirl: Add a swirl of peanut butter to the truffle mixture for a nutty flavor.
- Coconut Coating: Roll truffles in shredded coconut for a tropical twist.
- Chocolate Orange: Incorporate orange zest into the mixture for a citrusy note.
- Dark Chocolate Coating: Use dark chocolate for a richer taste.
- Spiced Pumpkin: Mix in some pumpkin puree and spices for a fall-inspired treat.
- Nutty Crunch: Roll in crushed nuts for added texture and flavor.
- Drizzle Topping: Drizzle melted chocolate over the coated truffles for a decorative touch.
- Mint Chocolate: Add a few drops of mint extract to the mixture for a refreshing flavor.
- Cookie Butter Variation: Use cookie butter instead of cream cheese for a different consistency.
- Matcha Biscoff: Mix in matcha powder for a unique twist and color.
Freezing and Storage
Ensure proper storage to maintain the quality of your Biscoff Truffles:
- Storage: Keep truffles in an airtight container in the fridge for up to 1 week.
- Freezing: Freeze uncoated truffles for up to 3 months. Just make sure to wrap them tightly.
- Thawing: Thaw frozen truffles in the refrigerator before serving.
- Maintain Freshness: Always store in a cool place away from direct sunlight.
Special Equipment
You may need these kitchen tools to create your Biscoff Truffles:
- Food Processor: For crushing cookies into fine crumbs.
- Mixing Bowl: For combining the truffle mixture.
- Baking Sheet: To hold the truffles while they chill.
- Microwave-Safe Bowl: For melting chocolate.
- Fork: For dipping the truffles in chocolate.
FAQ Section
Here are answers to common questions about Biscoff Truffles:
- Can I use a different type of cookie?
Yes, feel free to experiment with other flavored cookies or biscuits. - How long can I store the truffles?
They can be stored in the refrigerator for up to 1 week or frozen for up to 3 months. - Can I use vegan cream cheese?
Absolutely! Vegan cream cheese works perfectly for a dairy-free version. - What if my truffles are too soft?
Chill them for a bit longer to firm up before rolling or dipping. - Can I make these gluten-free?
Yes, use gluten-free Biscoff cookies to make a gluten-free version.
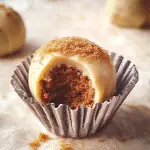
Biscoff Truffles
- Total Time: 1 hour
Ingredients
For the Truffle Mixture:
- 1 cup Biscoff cookies (about 12 cookies)
- 4 oz cream cheese, softened
- 1 teaspoon vanilla extract
For the Coating:
- 8 oz semi-sweet chocolate, chopped or chocolate chips
- Optional toppings: crushed Biscoff cookies, sprinkles, cocoa powder, or chopped nuts
Instructions
Prepare the Truffle Mixture
- Crush the Cookies: Place the Biscoff cookies in a food processor and pulse until they turn into fine crumbs.
- Mix the Ingredients: In a mixing bowl, combine the crushed cookies, softened cream cheese, and vanilla extract. Mix until well combined and smooth.
- Chill the Mixture: Refrigerate the mixture for about 30 minutes to make it easier to handle.
Form the Truffles
- Shape the Truffles: Once chilled, use your hands to scoop out about a tablespoon of the mixture and roll it into a ball. Place the balls on a parchment-lined baking sheet.
- Chill Again: Return the truffles to the refrigerator for another 15 minutes to firm up.
Coat the Truffles
- Melt the Chocolate: In a microwave-safe bowl, melt the chocolate in 30-second intervals, stirring in between until smooth.
- Dip the Truffles: Using a fork, dip each truffle into the melted chocolate, allowing any excess to drip off.
- Add Toppings: While the chocolate is still wet, sprinkle your desired toppings on top of the truffles.
- Prep Time: 15 min.
- Cook Time: 45 min.
Nutrition
- Serving Size: 24 truffles
- Calories: 120 kcal
- Fat: 7g
- Carbohydrates: 14g
- Fiber: 1g
- Protein: 1g
Conclusion
I can’t wait for you to try making your own Homemade Peppermint Patties! They’re not just delicious but also a fun and rewarding project that brings a festive spirit into your kitchen. Whether you’re whipping these up for a holiday gathering, giving them as thoughtful gifts, or just treating yourself, I promise you’ll be thrilled with how they turn out.
As you create these sweet treats, remember to get creative with the chocolate coating and the peppermint filling! Feel free to share your own twists and ideas—I’d love to hear how you personalize your patties. And once you’ve got them all made, don’t forget to snap a photo and tag me on Instagram. I genuinely enjoy seeing your delicious creations and all the variations you come up with!
So roll up your sleeves, enjoy the process, and have fun! I can’t wait to see your peppermint patties and hear about your candy-making adventures. Happy cooking, and may your kitchen be filled with the wonderful aroma of peppermint and chocolate!

