Introduction
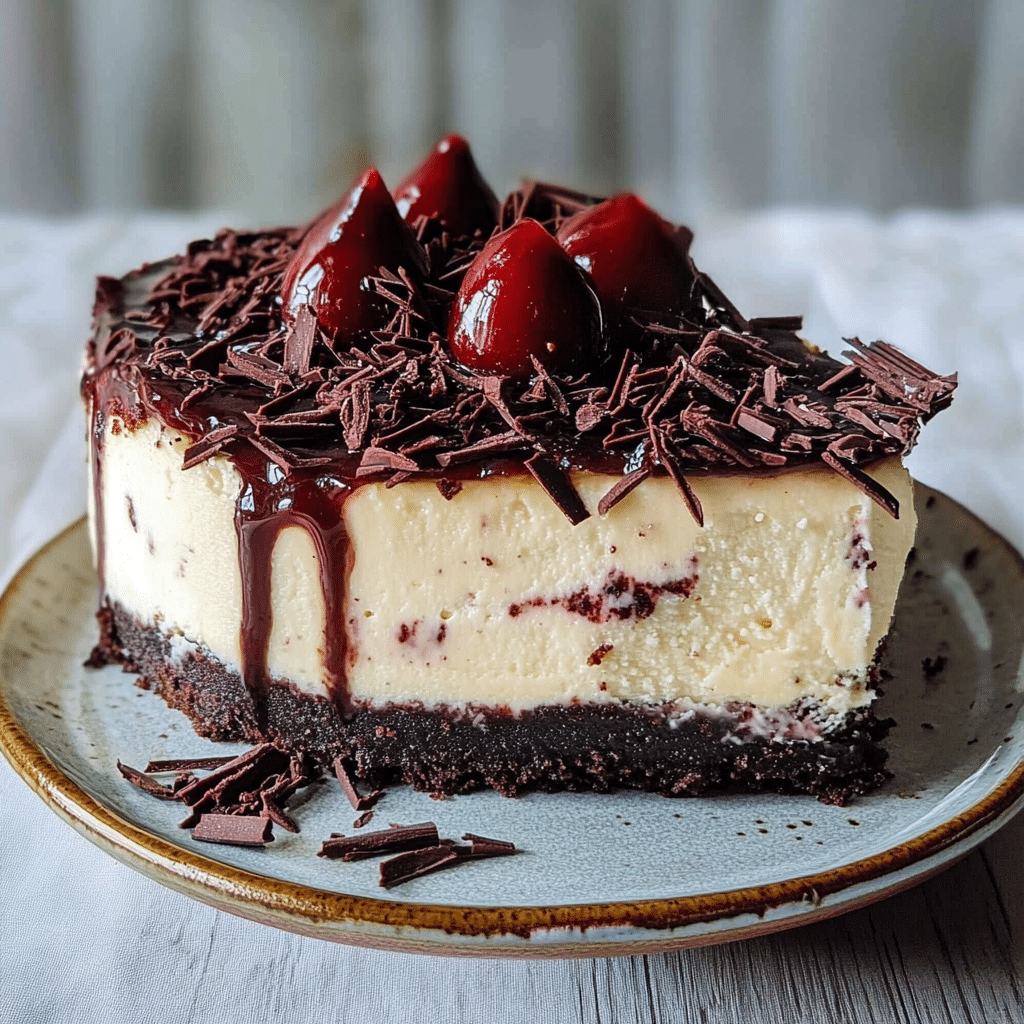
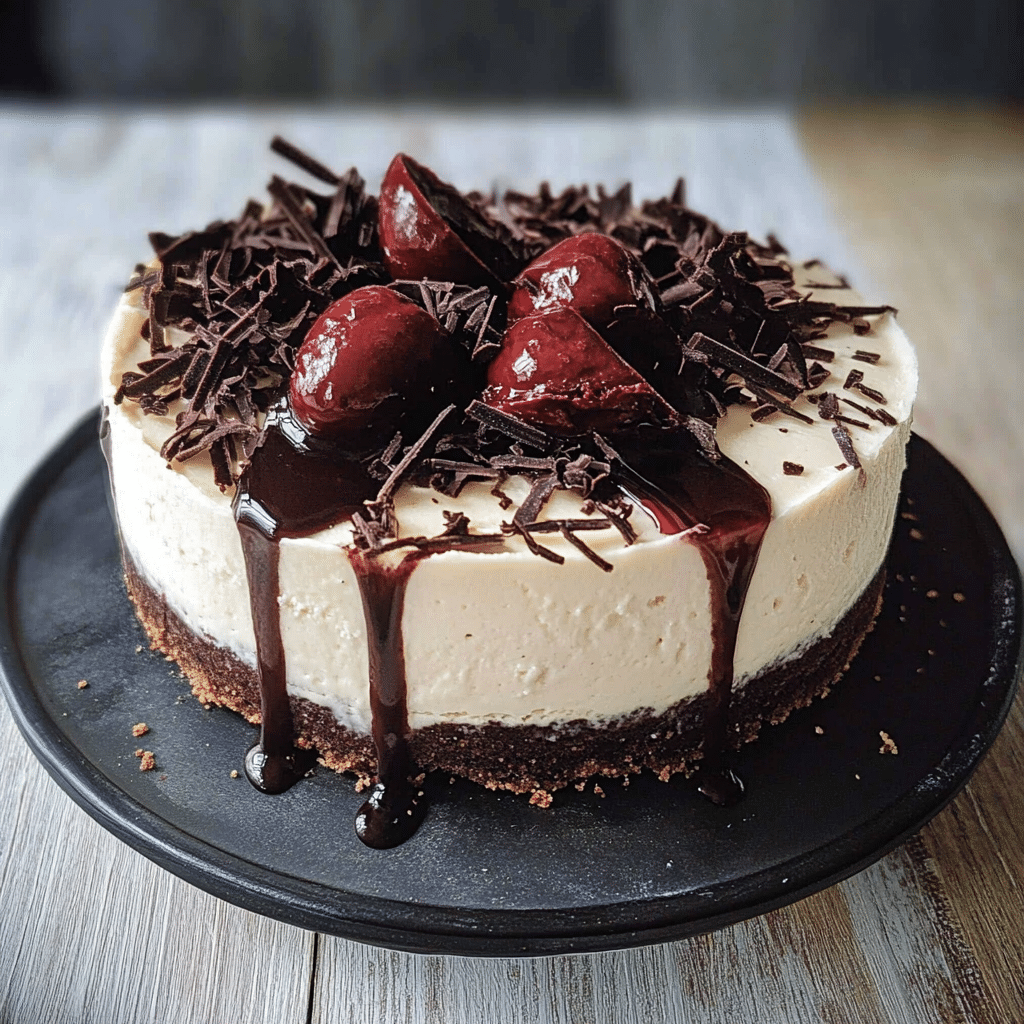
Looking for a dessert that’s as impressive as it is delicious? Look no further than this Black Forest Frozen Cheesecake! This showstopping treat combines the richness of creamy cheesecake with the decadent flavors of chocolate, cherries, and whipped cream. Imagine slicing into a frozen cheesecake layered with a rich, tangy filling, complemented by the sweetness of cherry topping and the deep, indulgent taste of cocoa. Whether you’re hosting a summer party, celebrating a special occasion, or just craving a dessert that wows, this cheesecake is the perfect choice.
The best part? This cheesecake is no-bake, making it the ultimate stress-free dessert! It comes together with minimal prep time and chills in the freezer, leaving you to relax and enjoy your time with family and friends. No complicated steps or tricky techniques—just a simple, flavorful treat that’s sure to become a favorite.
Why You’ll Love This Recipe
Here are a few reasons why this Black Forest Frozen Cheesecake is sure to win you over:
- No-Bake Convenience: With no baking involved, it’s a perfect dessert for warmer months when you want something cool and refreshing.
- Rich and Creamy: The luscious cheesecake filling is velvety smooth, creating a satisfying contrast with the crunchy chocolate crust.
- Perfectly Balanced: The sweet, tart cherry topping adds the perfect finishing touch, creating that signature Black Forest flavor profile.
- Customizable: Feel free to get creative with the toppings—swap out cherries for other fruit or add some extra chocolate chips for a more indulgent treat.
- Great for Make-Ahead: You can make it ahead of time and keep it in the freezer until you’re ready to serve.
- Simple Ingredients: You don’t need fancy equipment or hard-to-find ingredients—everything you need is easy to find at your local store.
Preparation Time and Freezing Time
- Total Time: 20 minutes (plus 4 hours freezing time)
- Servings: 10-12
- Calories per Serving: Approximately 300 calories
- Key Nutrients: Fat: 22g, Carbohydrates: 28g, Protein: 4g
Ingredients
Here’s everything you’ll need to create this decadent Black Forest Frozen Cheesecake:
For the Crust:
- 1 1/2 cups chocolate graham cracker crumbs
- 1/4 cup sugar
- 1/2 cup unsalted butter, melted
the Cheesecake Filling:
- 3 (8 oz) packages cream cheese, softened
- 1 cup powdered sugar
- 1 teaspoon vanilla extract
- 1/2 cup heavy cream
- 1/2 cup sour cream
For the Cherry Topping:
- 2 cups canned cherries in syrup (or fresh cherries, pitted)
- 1/4 cup sugar
- 1 tablespoon cornstarch
- 1 tablespoon lemon juice
Topping:
- Whipped cream (optional)
- Chocolate shavings or cocoa powder (optional)
Step-by-Step Instructions
Follow these simple steps to create your Black Forest Frozen Cheesecake:
Prepare the Crust
- Crush the Crackers: In a food processor or using a plastic bag and rolling pin, crush the chocolate graham crackers into fine crumbs. You should have about 1 1/2 cups of crumbs.
- Mix the Crust: In a medium bowl, combine the graham cracker crumbs, sugar, and melted butter. Stir until the mixture is evenly moistened and resembles wet sand.
- Press into Pan: Press the crust mixture into the bottom of a 9-inch springform pan or pie dish, making sure it’s even and compact. You can use the back of a spoon to press it down tightly.
- Chill the Crust: Place the crust in the freezer while you prepare the filling, so it sets and firms up.
Make the Cheesecake Filling
- Beat the Cream Cheese: In a large mixing bowl, beat the softened cream cheese with an electric mixer until smooth and creamy.
- Add the Sugar and Vanilla: Add the powdered sugar and vanilla extract to the cream cheese and continue to beat until well combined.
- Whip the Cream: In a separate bowl, whip the heavy cream until stiff peaks form. This can take about 2-3 minutes with a hand mixer.
- Fold in the Sour Cream: Gently fold the sour cream into the cream cheese mixture, making sure everything is well combined and smooth.
- Combine the Mixtures: Carefully fold the whipped cream into the cream cheese mixture until everything is fully incorporated and light in texture.
Assemble the Cheesecake
- Fill the Crust: Spoon the cheesecake filling onto the prepared crust, spreading it out evenly with a spatula. Smooth the top to create a flat surface.
- Freeze: Cover the pan with plastic wrap or aluminum foil and place the cheesecake in the freezer. Allow it to chill for at least 4 hours, or until it’s firm and fully set.
Make the Cherry Topping
- Cook the Cherries: In a small saucepan, combine the cherries (with syrup if using canned), sugar, cornstarch, and lemon juice. Stir well and cook over medium heat for about 5-7 minutes, until the mixture thickens and becomes syrupy.
- Cool the Topping: Remove from heat and allow the cherry topping to cool completely before using it to top the cheesecake. The syrup will thicken further as it cools.
Serve the Cheesecake
- Top the Cheesecake: Once the cheesecake is set and the cherry topping has cooled, spoon the cherry mixture generously over the top of the cheesecake.
- Add Final Touches: If desired, add a dollop of whipped cream around the edges and sprinkle with chocolate shavings or dust with cocoa powder for an extra indulgent touch.
- Slice and Serve: Slice the cheesecake into 10-12 servings and enjoy the creamy, frozen delight!
How to Serve
Here are some creative ways to serve your Black Forest Frozen Cheesecake:
- Garnish with Extra Toppings: Add extra chocolate shavings or fresh cherries to make the cheesecake even more festive.
- Serve with Coffee: Pair a slice of cheesecake with a cup of coffee or hot chocolate for a comforting dessert experience.
- Impress with a Layered Presentation: For an extra wow factor, you can make individual portions in small glass jars or cups for a layered, personal touch.
- Serve at Parties: This cheesecake is perfect for a party, served on a beautiful platter with a decorative border of whipped cream and cherries.
Additional Tips
Make your Black Forest Frozen Cheesecake even better with these helpful tips:
- Make Ahead: This cheesecake can be made up to 2 days in advance and stored in the freezer. Just add the cherry topping right before serving.
- Change Up the Fruit: If cherries aren’t in season or you want a twist, you can swap them out for other fruits like strawberries or raspberries.
- Use a Different Crust: For a change, use an Oreo or digestive biscuit crust for a different flavor that still pairs beautifully with the cheesecake.
- Keep It Frozen: Always store this cheesecake in the freezer to maintain its perfect frozen texture. Let it thaw slightly before serving for easy slicing.
- Layer Flavors: Add layers of melted chocolate or caramel between the cheesecake filling and the crust for extra richness.
Recipe Variations
Want to switch things up a bit? Try these variations:
- Mint Chocolate Version: Add mint extract to the filling for a minty twist that complements the chocolate flavor.
- Dark Chocolate Cheesecake: Use dark chocolate in the crust and incorporate it into the filling for an extra chocolatey experience.
- Nutty Topping: Top the cheesecake with toasted almonds or hazelnuts for a bit of crunch.
- Boozy Twist: Add a splash of kirsch (cherry liqueur) to the cherry topping for a classic Black Forest dessert flavor.
- Mini Cheesecakes: Make mini versions in cupcake liners or small tart pans for individual servings.
Freezing and Storage
Proper storage ensures that your Black Forest Frozen Cheesecake stays fresh:
- Store in the Freezer: Keep the cheesecake in the freezer until ready to serve. Wrap it tightly in plastic wrap or foil to prevent freezer burn.
- Store Leftovers: Leftovers can be stored in the freezer for up to 1 week. Just make sure to cover them tightly.
- Thawing: Let the cheesecake sit at room temperature for about 10-15 minutes before slicing for easy cutting.
Special Equipment
While this recipe doesn’t require much special equipment, here are a few tools that can make the process easier:
- Springform Pan: For a professional-looking cheesecake, a springform pan is ideal for easy removal.
- Food Processor: To easily crush the graham crackers or chocolate cookies for the crust.
- Electric Mixer: To beat the cream cheese and whip the heavy cream quickly and smoothly.
- Saucepan: For making the cherry topping.
FAQ Section
Here are answers to some common questions about this recipe:
- Can I make this with a different fruit topping?
Absolutely! You can swap the cherries for strawberries, raspberries, or blueberries. Just cook them down with a bit of sugar for a flavorful topping. - Can I make this cheesecake in a different pan?
Yes, you can use a pie dish, tart pan, or even individual serving cups. Just adjust the freezing time as needed. - Can I use a store-bought crust?
Yes, if you’re short on time, a pre-made chocolate crust works perfectly fine!
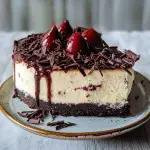
Black Forest Frozen Cheesecake
- Total Time: 20 min.
Ingredients
For the Crust:
- 1 1/2 cups chocolate graham cracker crumbs
- 1/4 cup sugar
- 1/2 cup unsalted butter, melted
For the Cheesecake Filling:
- 3 (8 oz) packages cream cheese, softened
- 1 cup powdered sugar
- 1 teaspoon vanilla extract
- 1/2 cup heavy cream
- 1/2 cup sour cream
For the Cherry Topping:
- 2 cups canned cherries in syrup (or fresh cherries, pitted)
- 1/4 cup sugar
- 1 tablespoon cornstarch
- 1 tablespoon lemon juice
Topping:
- Whipped cream (optional)
- Chocolate shavings or cocoa powder (optional)
Instructions
Prepare the Crust
- Crush the Crackers: In a food processor or using a plastic bag and rolling pin, crush the chocolate graham crackers into fine crumbs. You should have about 1 1/2 cups of crumbs.
- Mix the Crust: In a medium bowl, combine the graham cracker crumbs, sugar, and melted butter. Stir until the mixture is evenly moistened and resembles wet sand.
- Press into Pan: Press the crust mixture into the bottom of a 9-inch springform pan or pie dish, making sure it’s even and compact. You can use the back of a spoon to press it down tightly.
- Chill the Crust: Place the crust in the freezer while you prepare the filling, so it sets and firms up.
Make the Cheesecake Filling
- Beat the Cream Cheese: In a large mixing bowl, beat the softened cream cheese with an electric mixer until smooth and creamy.
- Add the Sugar and Vanilla: Add the powdered sugar and vanilla extract to the cream cheese and continue to beat until well combined.
- Whip the Cream: In a separate bowl, whip the heavy cream until stiff peaks form. This can take about 2-3 minutes with a hand mixer.
- Fold in the Sour Cream: Gently fold the sour cream into the cream cheese mixture, making sure everything is well combined and smooth.
- Combine the Mixtures: Carefully fold the whipped cream into the cream cheese mixture until everything is fully incorporated and light in texture.
Assemble the Cheesecake
- Fill the Crust: Spoon the cheesecake filling onto the prepared crust, spreading it out evenly with a spatula. Smooth the top to create a flat surface.
- Freeze: Cover the pan with plastic wrap or aluminum foil and place the cheesecake in the freezer. Allow it to chill for at least 4 hours, or until it’s firm and fully set.
Make the Cherry Topping
- Cook the Cherries: In a small saucepan, combine the cherries (with syrup if using canned), sugar, cornstarch, and lemon juice. Stir well and cook over medium heat for about 5-7 minutes, until the mixture thickens and becomes syrupy.
- Cool the Topping: Remove from heat and allow the cherry topping to cool completely before using it to top the cheesecake. The syrup will thicken further as it cools.
Serve the Cheesecake
- Top the Cheesecake: Once the cheesecake is set and the cherry topping has cooled, spoon the cherry mixture generously over the top of the cheesecake.
- Add Final Touches: If desired, add a dollop of whipped cream around the edges and sprinkle with chocolate shavings or dust with cocoa powder for an extra indulgent touch.
- Slice and Serve: Slice the cheesecake into 10-12 servings and enjoy the creamy, frozen delight!
- Freezing time: 4 hours
Nutrition
- Serving Size: 10-12 servings
- Calories: 300 kcal
- Fat: 22g
- Carbohydrates: 28g
- Protein: 4g
Conclusion
This Black Forest Frozen Cheesecake is a delicious and elegant treat that’s perfect for any occasion. With its creamy, no-bake filling, crunchy chocolate crust, and luscious cherry topping, it’s guaranteed to impress your family and friends. Don’t forget to snap a photo and tag me on social media—I love seeing your delicious creations!

