
Introduction
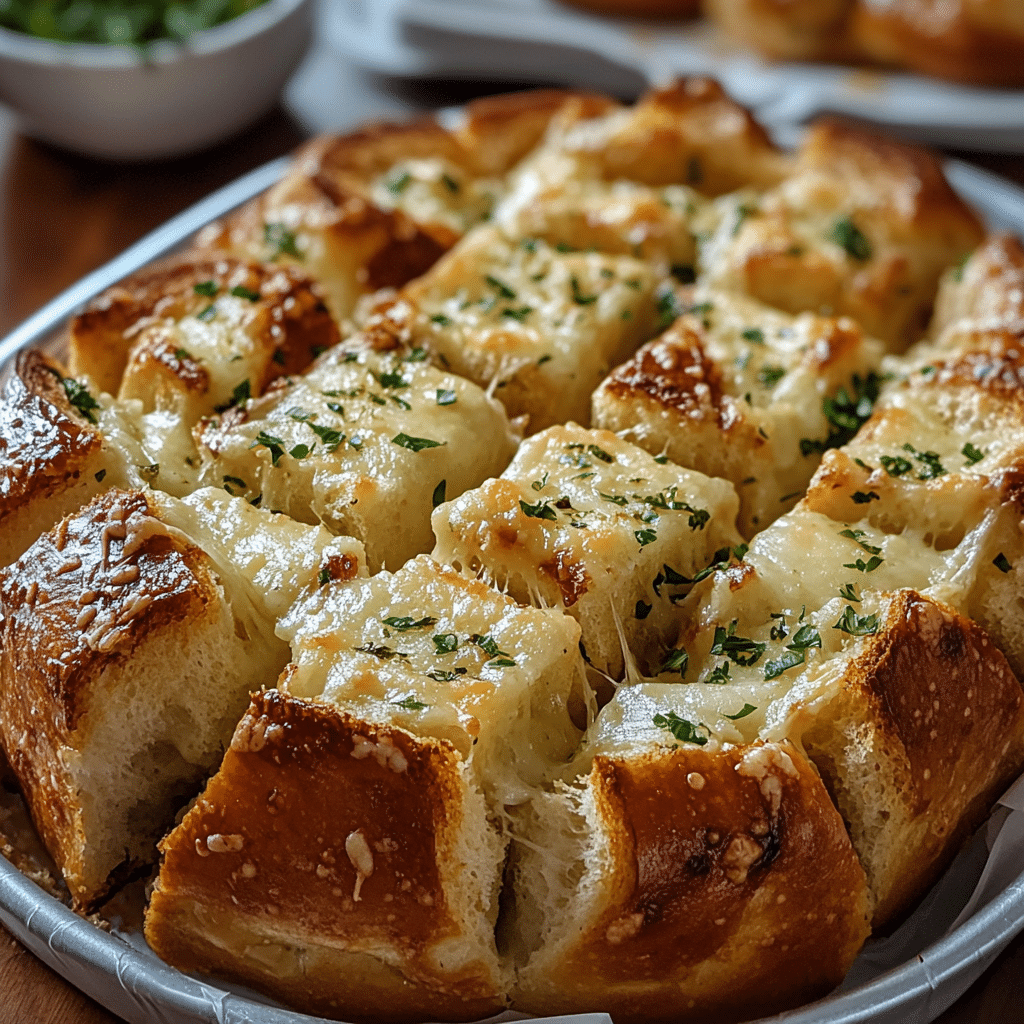
Imagine this: a warm, golden loaf of bread, fresh out of the oven, oozing with melty cheese and rich, garlicky goodness. Sounds like a dream, right? Well, it’s not! Cheesy Garlic Pull-Apart Bread brings that dream to life in the most irresistible way. This bread is perfect for any occasion, whether it’s a cozy family dinner, a party appetizer, or just a snack when you want something indulgent and comforting. Each piece pulls away with ease, enveloped in gooey cheese and the aromatic embrace of garlic butter. And the best part? It’s so easy to make, even your kids can help pull it apart!
If you’re a fan of garlic bread, this recipe is a game changer. It combines the flavors you love with the fun of pull-apart bread, creating a dish that will quickly become a family favorite. It’s ideal for sharing, making it a great choice for gatherings. Plus, the crispy, cheesy exterior and soft, fluffy interior make each bite pure bliss. So, grab your ingredients and let’s dive into this cheesy, garlicky masterpiece that will wow your taste buds!
Why You’ll Love This Recipe
Here are a few reasons why you’ll fall in love with Cheesy Garlic Pull-Apart Bread:
- Gooey and Cheesy: Who can resist the pull of melted cheese in every bite?
- Garlicky Goodness: The combination of garlic butter and cheese is simply irresistible.
- Pull-Apart Fun: This bread is made for sharing, with each piece pulling away easily.
- Quick and Easy: With minimal prep and no kneading required, this bread is a breeze to make.
- Perfect for Any Occasion: Whether it’s a family dinner, game night, or party appetizer, this bread is always a hit.
- Customizable: Feel free to adjust the garlic and cheese levels to suit your tastes.
- Ideal for Beginners: No fancy skills needed—if you can handle a knife and brush, you’re good to go!
- Great for Leftovers: Leftover bread can be easily reheated and is just as delicious the next day.
Preparation Time and Cook Time
- Total Time: 45 minutes
- Preparation Time: 15 minutes
- Cook Time: 30 minutes
- Servings: 8-10 servings
- Calories per serving: Approximately 300 calories
- Key Nutrients: Carbohydrates: 35g, Fat: 18g, Protein: 7g, Fiber: 1g
Ingredients
Here’s what you’ll need to make this cheesy, garlicky bread:
For the Bread:
- 1 loaf of Italian bread (a round or square loaf works best)
- 2 cups shredded mozzarella cheese (or your favorite melting cheese)
- 1/2 cup grated Parmesan cheese
- 1/4 cup melted butter
For the Garlic Butter:
- 1/4 cup unsalted butter, melted
- 4-5 cloves garlic, minced
- 1 tablespoon chopped fresh parsley
- 1/2 teaspoon salt
- 1/4 teaspoon black pepper
Ingredient Highlights
- Italian Bread: The sturdy texture of Italian bread is perfect for pull-apart bread. It holds the cheese and garlic butter well, creating the ultimate bread experience.
- Mozzarella Cheese: This melty cheese is the star of the show, stretching with each pull.
- Parmesan Cheese: Adds a nice, savory kick and enhances the overall flavor.
- Garlic Butter: The combination of butter, garlic, and parsley brings everything together, making this bread absolutely mouthwatering.
Step-by-Step Instructions


Follow these simple steps to create your Cheesy Garlic Pull-Apart Bread:
Prepare the Bread
- Preheat Oven: Preheat your oven to 375°F (190°C). Line a baking sheet with parchment paper for easy cleanup.
- Cut the Bread: Take the loaf of Italian bread and use a serrated knife to slice it into a grid pattern. Make horizontal cuts and then vertical cuts to form squares, being careful not to slice all the way through—leave the bottom intact so the bread holds together.
- Stuff with Cheese: Gently pull apart the cuts in the bread and stuff the mozzarella and Parmesan cheese into the openings, making sure the cheese is evenly distributed.
Make the Garlic Butter
- Prepare the Garlic Butter: In a small bowl, combine the melted butter, minced garlic, chopped parsley, salt, and pepper. Stir well to combine.
- Brush the Bread: Use a pastry brush to generously coat the top and between the cuts of the bread with the garlic butter mixture. Make sure to get the butter in all the crevices for maximum flavor.
Bake the Bread
- Wrap and Bake: Wrap the stuffed bread loosely in aluminum foil and bake in the preheated oven for 15 minutes.
- Unwrap and Continue Baking: After 15 minutes, unwrap the bread and continue baking for an additional 10-15 minutes, or until the cheese is fully melted and the bread is golden brown and crispy.
Serve and Enjoy
- Serve Warm: Once the bread is done, remove it from the oven and let it cool for a couple of minutes. Serve it warm for the best experience!
- Pull Apart: Encourage everyone to tear off pieces of the cheesy bread and enjoy! The cheesy, garlicky goodness will be irresistible.

How to Serve
Here are some fun ways to serve your Cheesy Garlic Pull-Apart Bread:
- As an Appetizer: Serve it as a starter at your next dinner party or game night. It’s perfect for sharing and will have everyone coming back for more.
- Pair with Soup: This bread makes a great side to soups and stews, especially creamy ones like tomato soup or a hearty vegetable soup.
- As a Side Dish: Serve alongside your favorite pasta dishes, grilled meats, or a fresh salad.
- At a Barbecue: This bread will be the star of your next barbecue or cookout. It pairs wonderfully with grilled burgers or BBQ chicken.
- Gift it: Wrap the bread in parchment paper and gift it to friends or family for a thoughtful homemade treat.
- With Dips: Serve it with your favorite dips, like marinara sauce, ranch dressing, or a creamy spinach dip.
- For Breakfast: Reheat leftover bread and enjoy it with a cup of coffee for a savory breakfast.
Additional Tips
Here are a few tips to make your Cheesy Garlic Pull-Apart Bread even better:
- Choose Fresh Bread: Fresh Italian bread will work best for this recipe. If your bread is a day or two old, it might not hold the cheese as well.
- Use Fresh Garlic: Freshly minced garlic will give a much stronger and better flavor than pre-minced garlic from a jar.
- Experiment with Cheese: While mozzarella and Parmesan are classic choices, feel free to mix it up! Try adding cheddar, gouda, or even a spicy pepper jack for a fun twist.
- Don’t Overstuff: Be careful not to overstuff the bread with too much cheese. You want it to melt and ooze through the cuts, but not spill out too much.
- Make Ahead: You can prepare the bread and stuff it with cheese and garlic butter the night before. Just wrap it up and refrigerate it until you’re ready to bake the next day.
- Double the Recipe: If you’re serving a crowd, don’t hesitate to make two loaves! You can also prepare mini versions for individual servings.
- Add Some Heat: For a spicy kick, add red pepper flakes or a dash of hot sauce to the garlic butter mixture.
- Freeze for Later: This bread can be frozen before baking. Simply wrap it well in plastic wrap and aluminum foil, then bake it when you’re ready to enjoy it.
Recipe Variations
Here are some creative variations of Cheesy Garlic Pull-Apart Bread you can try:
- Bacon Cheddar: Add cooked bacon bits to the cheese mixture for a smoky twist.
- Herb Infused: Add other fresh herbs like thyme or rosemary to the garlic butter for a more aromatic flavor.
- Stuffed with Spinach: Mix cooked spinach with the cheese to create a spinach and cheese pull-apart bread.
- Sun-Dried Tomatoes: Add chopped sun-dried tomatoes to the cheese mixture for a tangy flavor boost.
- Vegan Version: Use dairy-free cheese and plant-based butter for a vegan-friendly option.
- Cheese and Sausage: Add crumbled cooked sausage to the cheese stuffing for a heartier version.
- Pesto Garlic: Mix pesto with the garlic butter for an Italian twist on this cheesy bread.
Freezing and Storage
To keep your Cheesy Garlic Pull-Apart Bread fresh:
- Storage: Leftover bread can be stored in an airtight container for up to 2-3 days at room temperature.
- Reheating: To reheat, wrap the bread in foil and warm it in the oven at 350°F (175°C) for 10-15 minutes, or until the cheese is melty again.
- Freezing: Freeze the unbaked stuffed bread for up to 2 months. To bake, simply thaw it overnight in the fridge and then bake as directed.
faq section
Curious about making Cheesy Garlic Pull-Apart Bread or have some questions before you dive into the recipe? I’ve got you covered! Here are some frequently asked questions to help guide you as you prepare this cheesy, garlicky masterpiece.
- Can I use any type of bread?
- While Italian bread works best for its sturdy texture, you can use other types of bread, like French baguette or a sourdough loaf. Just be mindful that softer breads may not hold the cheese as well.
- Can I prepare the bread in advance?
- Yes! You can prepare the bread by stuffing it with cheese and garlic butter the night before. Just wrap it tightly and refrigerate it until you’re ready to bake. It saves you time on the day you’re serving it!
- Can I use pre-minced garlic?
- Fresh garlic definitely has the best flavor, but if you’re in a pinch, pre-minced garlic will work. Just be sure to adjust the amount according to your taste.
- How do I store leftovers?
- Store any leftover bread in an airtight container at room temperature for up to 2-3 days. To reheat, wrap it in foil and bake at 350°F (175°C) for about 10-15 minutes until the cheese is melty again.
- Can I freeze this bread?
- Absolutely! You can freeze the stuffed bread before baking. Wrap it tightly in plastic wrap and aluminum foil, then freeze for up to 2 months. When you’re ready to bake, simply thaw it overnight in the fridge and bake as directed.

Cheesy Garlic Pull-Apart Bread
- Total Time: 45 min.
Ingredients
For the Bread:
- 1 loaf of Italian bread (a round or square loaf works best)
- 2 cups shredded mozzarella cheese (or your favorite melting cheese)
- 1/2 cup grated Parmesan cheese
- 1/4 cup melted butter
For the Garlic Butter:
- 1/4 cup unsalted butter, melted
- 4–5 cloves garlic, minced
- 1 tablespoon chopped fresh parsley
- 1/2 teaspoon salt
- 1/4 teaspoon black pepper
Instructions
Prepare the Bread
- Preheat Oven: Preheat your oven to 375°F (190°C). Line a baking sheet with parchment paper for easy cleanup.
- Cut the Bread: Take the loaf of Italian bread and use a serrated knife to slice it into a grid pattern. Make horizontal cuts and then vertical cuts to form squares, being careful not to slice all the way through—leave the bottom intact so the bread holds together.
- Stuff with Cheese: Gently pull apart the cuts in the bread and stuff the mozzarella and Parmesan cheese into the openings, making sure the cheese is evenly distributed.
Make the Garlic Butter
- Prepare the Garlic Butter: In a small bowl, combine the melted butter, minced garlic, chopped parsley, salt, and pepper. Stir well to combine.
- Brush the Bread: Use a pastry brush to generously coat the top and between the cuts of the bread with the garlic butter mixture. Make sure to get the butter in all the crevices for maximum flavor.
Bake the Bread
- Wrap and Bake: Wrap the stuffed bread loosely in aluminum foil and bake in the preheated oven for 15 minutes.
- Unwrap and Continue Baking: After 15 minutes, unwrap the bread and continue baking for an additional 10-15 minutes, or until the cheese is fully melted and the bread is golden brown and crispy.
Serve and Enjoy
- Serve Warm: Once the bread is done, remove it from the oven and let it cool for a couple of minutes. Serve it warm for the best experience!
- Pull Apart: Encourage everyone to tear off pieces of the cheesy bread and enjoy! The cheesy, garlicky goodness will be irresistible.
- Prep Time: 15 minutes
- Cook Time: 30 min.
Nutrition
- Serving Size: 8-10 servings
- Calories: 300 kcal
- Fat: 18g
- Carbohydrates: 35g
- Fiber: 1g
- Protein: 7g
Conclusion
Cheesy Garlic Pull-Apart Bread is the ultimate comfort food, offering a perfect balance of gooey cheese, garlicky goodness, and crispy bread. It’s a crowd-pleaser, simple to make, and can be customized to suit any occasion. Whether you’re serving it as an appetizer, side dish, or snack, it’s sure to disappear in no time. So, gather your ingredients, preheat that oven, and get ready to indulge in this cheesy, garlicky masterpiece.
Don’t forget to snap a photo and tag me on social media – I love seeing your delicious creations! Happy baking!