

Introduction
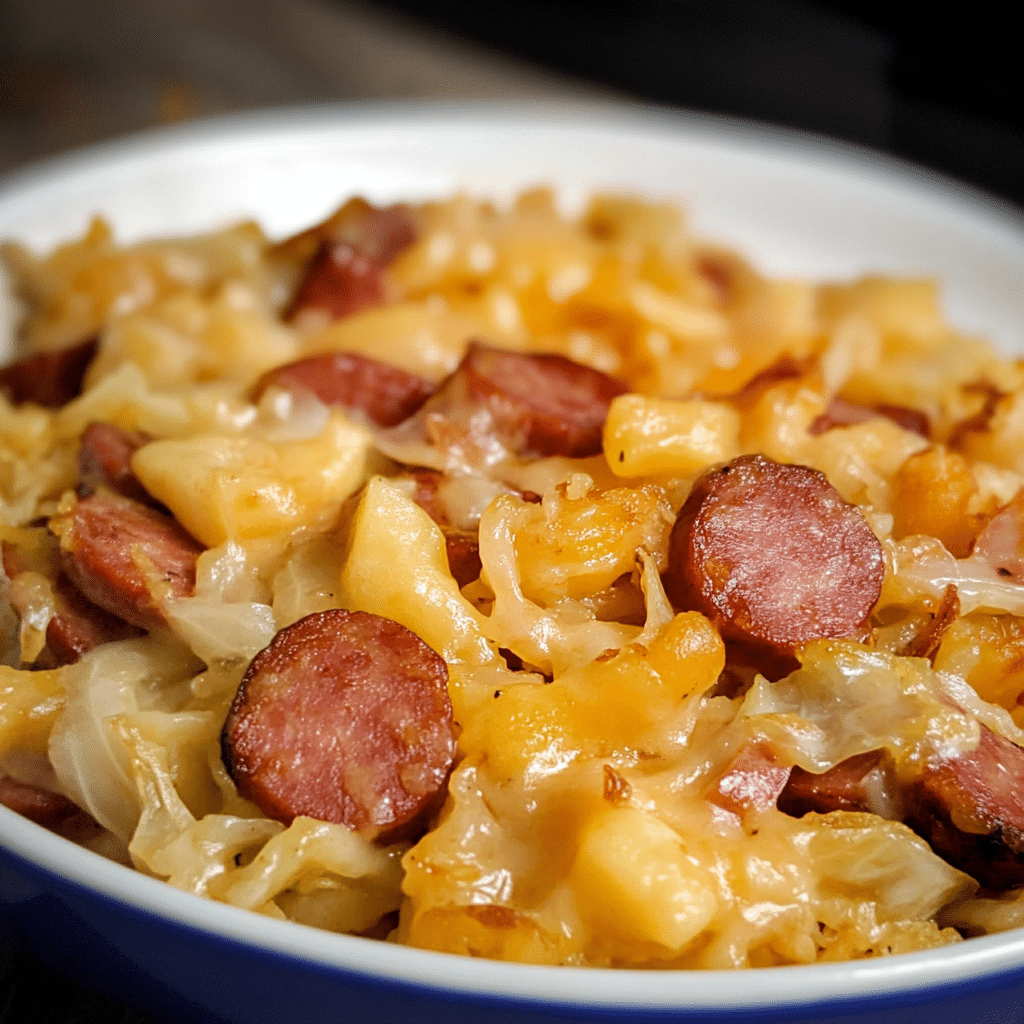
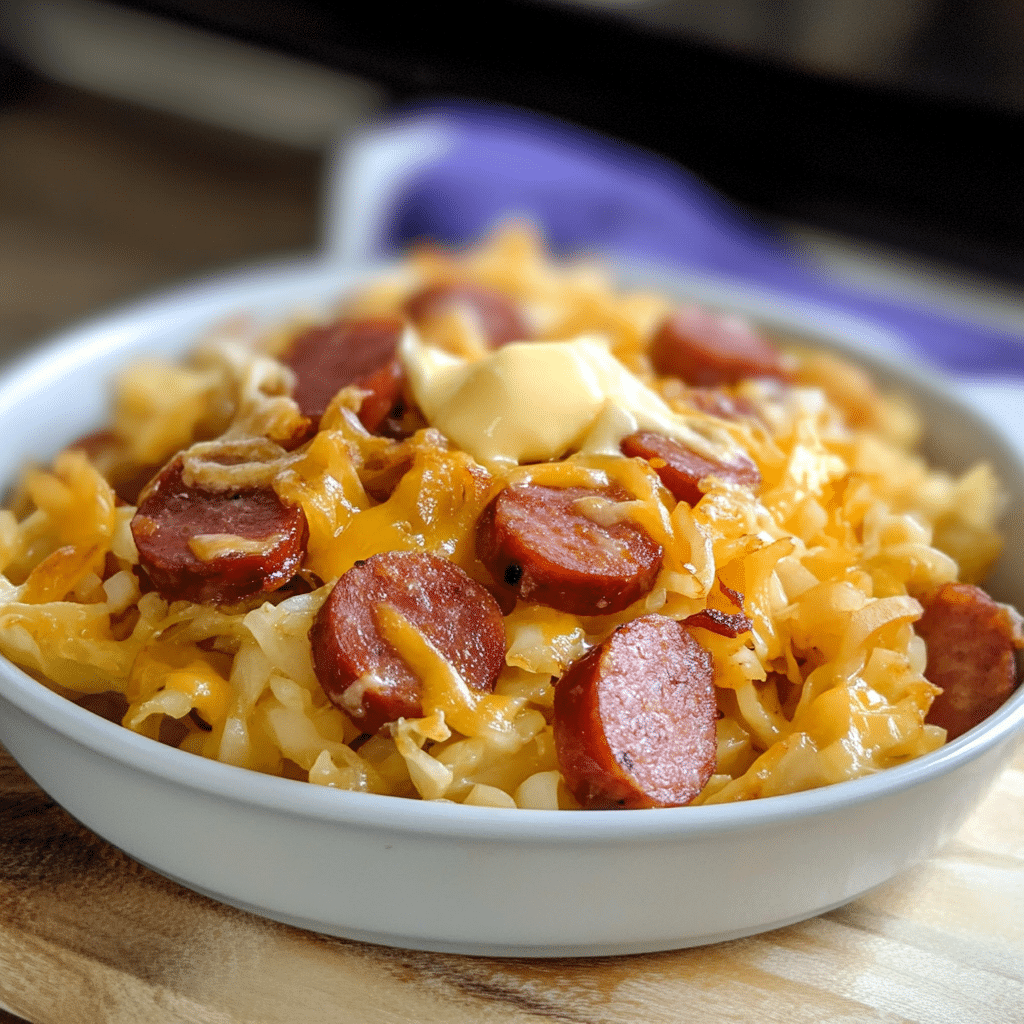
If you’re on the hunt for a meal that combines comfort, flavor, and a bit of fun, Cheesy Kielbasa Hash Browns should be your next go-to dish! Imagine crispy, golden hash browns, tender kielbasa sausage, and gooey melted cheese all coming together in one skillet. The savory kielbasa gives the dish a rich, smoky flavor, while the crispy hash browns add that perfect crunch. With just the right amount of seasonings, every bite is packed with flavor.
Whether you’re hosting a brunch with friends, making a quick and satisfying dinner, or just craving something hearty, this dish delivers it all. Plus, the best part? It’s made in one pan, which means less cleanup and more time enjoying your meal! This is the kind of recipe that’s both easy to prepare and hard to stop eating once you’ve started. It’s simple, comforting, and filling—a meal that will quickly become a staple in your weeknight dinner rotation or brunch spread.
The combination of crispy hash browns, savory kielbasa, and melted cheese is irresistibly delicious, and you can even add your own twist by throwing in some veggies or extra spices. So, grab your skillet, and let’s dive into this recipe that’s bound to become a new favorite in your kitchen!
Why You’ll Love This Recipe
Here’s why Cheesy Kielbasa Hash Browns are a must-try:
- Easy to Make: With simple ingredients and minimal prep time, you can get this dish on the table in no time.
- Full of Flavor: The combination of kielbasa, cheese, and crispy hash browns brings a rich, savory flavor that everyone will love.
- Customizable: You can adjust the cheese, seasoning, and even add extra veggies for a dish that suits your tastes perfectly.
- Perfect for Any Meal: Serve it as a satisfying breakfast, a hearty brunch, or a comforting dinner.
- One-Pan Wonder: Everything cooks in one skillet, meaning less mess and more time to enjoy your meal.
- Crowd-Pleaser: Whether it’s family dinner or a casual get-together, this dish is sure to impress.
- Kid-Friendly: With cheesy goodness and a fun texture, even picky eaters will love it.
Preparation Time and Cook Time
- Total Time: 40 minutes
- Preparation Time: 10 minutes
- Cook Time: 30 minutes
- Servings: 4
- Calories per serving: Approximately 400 calories
- Key Nutrients: Protein: 20g, Carbs: 30g, Fat: 22g, Fiber: 2g
Ingredients
To make your Cheesy Kielbasa Hash Browns, you’ll need the following:
For the Dish:
- 1 lb kielbasa sausage, sliced into ¼-inch pieces
- 4 cups frozen hash browns (or fresh, if you prefer)
- 1 medium onion, diced
- 1 cup shredded sharp cheddar cheese
- 1 tablespoon olive oil
- Salt and pepper, to taste
- ½ teaspoon garlic powder
- ½ teaspoon paprika
- 1 tablespoon fresh parsley, chopped (optional, for garnish)
Ingredient Highlights
- Kielbasa Sausage: Adds a rich, savory flavor to the dish that pairs perfectly with the crispy potatoes.
- Hash Browns: Whether you choose frozen or freshly grated potatoes, they provide the crispy, comforting base for this dish.
- Cheddar Cheese: Melts beautifully, giving the dish a creamy, cheesy richness.
- Onion: Adds a little sweetness and savory depth that balances out the richness of the cheese and sausage.
- Garlic Powder and Paprika: These seasonings bring an extra layer of flavor that enhances the overall taste of the dish.
Step-by-Step Instructions


Here’s how to create your Cheesy Kielbasa Hash Browns:
1: Cook the Kielbasa
- Heat the Skillet: Start by heating a large skillet over medium heat. Add the olive oil and let it warm up.
- Sauté the Kielbasa: Add the sliced kielbasa sausage to the skillet and cook for 5-7 minutes, or until it’s browned and slightly crispy. This helps to release the savory flavor into the oil. Once done, remove the kielbasa from the skillet and set it aside.
2: Sauté the Vegetables
- Cook the Onion: In the same skillet, add the diced onion and sauté for 3-4 minutes until softened and translucent.
- Add Seasoning: Sprinkle in the garlic powder, paprika, salt, and pepper. Stir to combine, allowing the spices to bloom for a minute.
3: Add the Hash Browns
- Cook the Hash Browns: Add the frozen hash browns (or fresh ones, if you prefer) to the skillet. Spread them out in an even layer and let them cook for about 10-12 minutes, flipping halfway through. You want them golden and crispy on both sides.
- Return Kielbasa: Once the hash browns are crisp, return the cooked kielbasa to the skillet and stir everything together. Let it cook for an additional 3-4 minutes to combine the flavors.
4: Add the Cheese
- Melt the Cheese: Sprinkle the shredded cheddar cheese over the top of the hash browns and kielbasa. Cover the skillet with a lid and cook for another 2-3 minutes until the cheese is melted and gooey.
5: Serve
- Garnish and Enjoy: Once the cheese has melted, remove the skillet from the heat. Garnish with freshly chopped parsley if desired. Serve hot and enjoy!
How to Serve
This dish is a versatile and filling meal that can be served in a variety of ways:
- For Brunch: Serve with a side of scrambled eggs and toast for a complete meal.
- As a Main Course: Serve it on its own with a light salad or roasted vegetables for a balanced dinner.
- With Hot Sauce: Add a drizzle of hot sauce for a little extra kick.
- With Avocado: Top with sliced avocado for added creaminess.
- Breakfast-Style: Serve alongside some eggs cooked to your liking for a breakfast-inspired feast.
- Family Style: Serve the skillet right on the table for a communal meal, letting everyone dig in with a fork or spoon.
Additional Tips
Maximize your enjoyment of Cheesy Kielbasa Hash Browns with these helpful tips:
- Use Fresh Potatoes: If you have the time, freshly grated potatoes will give the dish a more homemade feel.
- Cook the Kielbasa First: Browning the sausage first helps develop its flavor and prevents it from becoming too chewy in the dish.
- Customize the Cheese: Try different cheeses like mozzarella or pepper jack for a unique twist.
- Add Veggies: For a more balanced meal, consider adding bell peppers, mushrooms, or spinach to the mix.
- Make It Spicy: Toss in some red pepper flakes or a diced jalapeño to give the dish an extra kick.
- Use a Cast-Iron Skillet: A cast-iron skillet helps achieve even cooking and adds a nice crispy texture to the hash browns.
- Make It Ahead: You can make the hash browns and kielbasa mixture ahead of time and store it in the fridge. Simply reheat and melt the cheese when you’re ready to serve.
- Double the Recipe: This is a great dish for feeding a crowd, so feel free to double the recipe for larger gatherings.
Recipe Variations
Feel free to switch things up and try these variations for your Cheesy Kielbasa Hash Browns:
- Sausage Swap: Use turkey sausage or chicken sausage for a lighter alternative.
- Spicy Kielbasa: Opt for a spicy kielbasa for an extra kick of heat.
- Vegan Version: Use plant-based sausage and dairy-free cheese for a vegan-friendly dish.
- Add Egg: Top with a fried or poached egg for an extra-rich breakfast or brunch option.
- Southwest Style: Add black beans, corn, and a sprinkle of cumin for a southwestern twist.
Freezing and Storage
Store your Cheesy Kielbasa Hash Browns properly to enjoy them later:
- Storage: Store any leftovers in an airtight container in the fridge for up to 3 days.
- Freezing: You can freeze the cooked dish for up to 2 months. Let it cool completely, then transfer it to a freezer-safe container.
- Reheating: To reheat, microwave for 1-2 minutes or heat it up in a skillet over medium heat until warmed through.
Special Equipment
You’ll need the following kitchen tools to make your Cheesy Kielbasa Hash Browns:
- Large Skillet: A heavy-duty skillet for even cooking.
- Spatula: For flipping and stirring.
- Grater: If using fresh potatoes, a grater is essential for shredding.
- Lid: To cover the skillet and melt the cheese.
FAQ Section
Here are some common questions and answers about Cheesy Kielbasa Hash Browns:
- Can I use fresh potatoes instead of frozen hash browns?
Yes! Just grate the potatoes and squeeze out any excess moisture before cooking. - Can I add other meats?
Absolutely! Bacon, ham, or even ground beef would be delicious in this dish. - Is there a way to make this dish vegetarian?
Yes, use a plant-based sausage and dairy-free cheese for a vegetarian version. - Can I freeze leftovers?
Yes, you can freeze leftovers. Just make sure it’s stored properly in a freezer-safe container.

Cheesy Kielbasa Hash Browns
- Total Time: 40 min.
Ingredients
For the Dish:
- 1 lb kielbasa sausage, sliced into ¼-inch pieces
- 4 cups frozen hash browns (or fresh, if you prefer)
- 1 medium onion, diced
- 1 cup shredded sharp cheddar cheese
- 1 tablespoon olive oil
- Salt and pepper, to taste
- ½ teaspoon garlic powder
- ½ teaspoon paprika
- 1 tablespoon fresh parsley, chopped (optional, for garnish)
Instructions
Step 1: Cook the Kielbasa
- Heat the Skillet: Start by heating a large skillet over medium heat. Add the olive oil and let it warm up.
- Sauté the Kielbasa: Add the sliced kielbasa sausage to the skillet and cook for 5-7 minutes, or until it’s browned and slightly crispy. This helps to release the savory flavor into the oil. Once done, remove the kielbasa from the skillet and set it aside.
Step 2: Sauté the Vegetables
- Cook the Onion: In the same skillet, add the diced onion and sauté for 3-4 minutes until softened and translucent.
- Add Seasoning: Sprinkle in the garlic powder, paprika, salt, and pepper. Stir to combine, allowing the spices to bloom for a minute.
Step 3: Add the Hash Browns
- Cook the Hash Browns: Add the frozen hash browns (or fresh ones, if you prefer) to the skillet. Spread them out in an even layer and let them cook for about 10-12 minutes, flipping halfway through. You want them golden and crispy on both sides.
- Return Kielbasa: Once the hash browns are crisp, return the cooked kielbasa to the skillet and stir everything together. Let it cook for an additional 3-4 minutes to combine the flavors.
Step 4: Add the Cheese
- Melt the Cheese: Sprinkle the shredded cheddar cheese over the top of the hash browns and kielbasa. Cover the skillet with a lid and cook for another 2-3 minutes until the cheese is melted and gooey.
Step 5: Serve
- Garnish and Enjoy: Once the cheese has melted, remove the skillet from the heat. Garnish with freshly chopped parsley if desired. Serve hot and enjoy!
- Prep Time: 10 min.
- Cook Time: 30 min.
Nutrition
- Serving Size: 4 servings
- Calories: 400 kcal
- Fat: 22g
- Carbohydrates: 30g
- Fiber: 2g
- Protein: 20g
Conclusion
If you’re craving a satisfying, flavorful meal that brings together comforting ingredients with just the right touch of indulgence, Cheesy Kielbasa Hash Browns is your go-to recipe. The crispy potatoes paired with savory kielbasa and gooey cheese create a hearty dish that’s perfect for any occasion. Plus, it’s easy to make, customizable to your tastes, and best of all, requires just one pan for cleanup—talk about a win!
Whether you’re serving it up for a lazy weekend breakfast, a casual family dinner, or even a fun brunch gathering, this dish is guaranteed to please. Don’t be afraid to experiment and make it your own—add your favorite veggies or switch up the cheese to suit your style.
I’d love to know how this dish turns out for you and if you make any tasty tweaks! Don’t forget to snap a photo and tag me on social media – I love seeing your delicious creations!


