Introduction
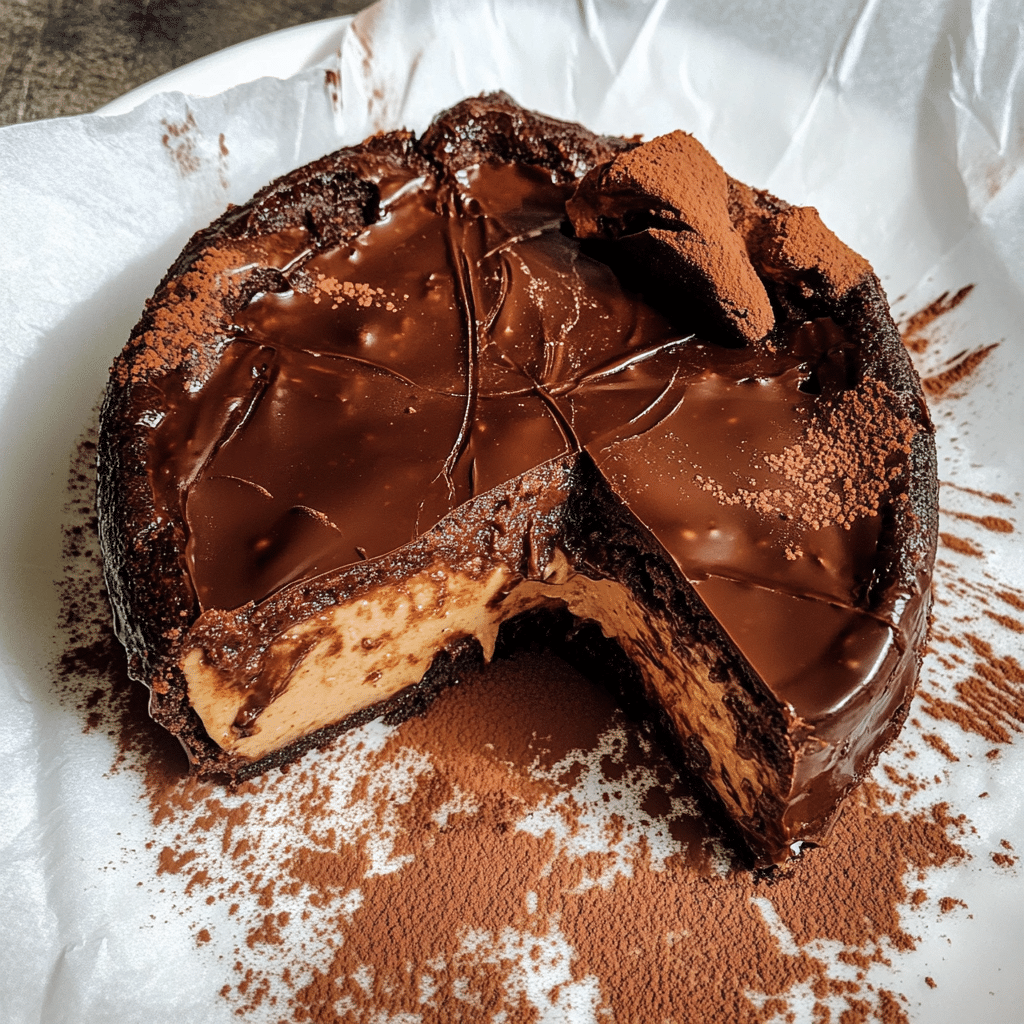
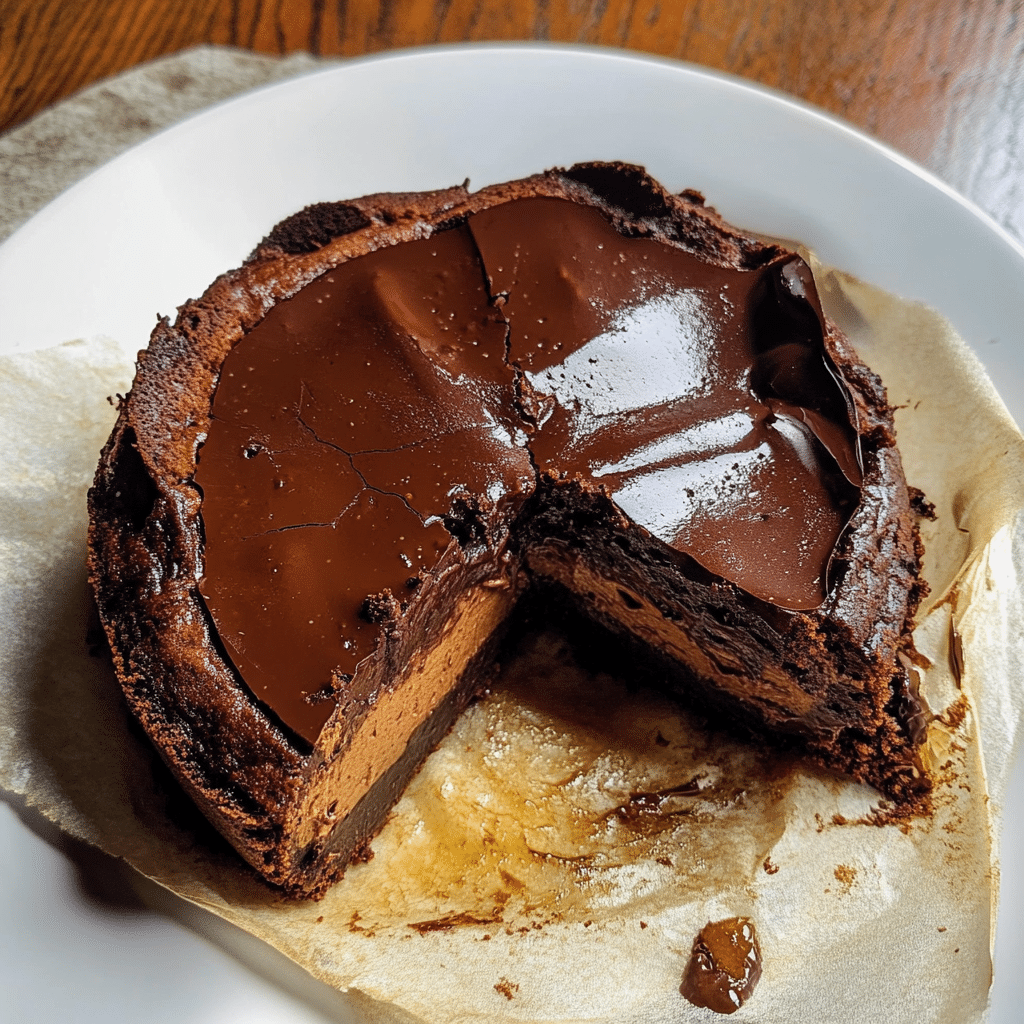
If you’re looking for a dessert that’s as indulgent as it is impressive, then you’ve got to try Chocolate Basque Burnt Cheesecake. This dessert is a modern twist on the classic Basque cheesecake, with a rich, creamy filling and a decadent layer of chocolate that’ll make your taste buds sing. The key to its charm lies in its slightly burnt, caramelized top, which gives it a unique flavor that perfectly balances the richness of the chocolate. Whether you’re hosting a dinner party or just treating yourself to something special, this cheesecake will make a statement.
Made without a crust, the Chocolate Basque Burnt Cheesecake has a smooth, velvety texture that’s truly irresistible. The burnished top adds a little extra drama, but don’t be fooled—the burnt edges are what give this cheesecake its characteristic flavor. So if you’re ready to make your next dessert a showstopper, keep reading for the recipe and tips to nail this gorgeous cake.
Why You’ll Love This Recipe
Let’s break down why Chocolate Basque Burnt Cheesecake is going to become your new go-to dessert:
- Rich and Decadent: The creamy, chocolatey filling is melt-in-your-mouth good and incredibly satisfying.
- No Crust Needed: Forget about fussing with a crust—this cheesecake is all about that rich filling.
- Easy to Make: Don’t let the “burnt” part intimidate you! The recipe is surprisingly simple and perfect for beginner bakers.
- Impressive Presentation: That dramatic burnt top makes this cheesecake look as fancy as it tastes.
- Unique Flavor: The combination of caramelized top and smooth chocolate filling creates a flavor experience like no other.
- Make-Ahead Option: This cheesecake keeps well, making it a great option to prepare in advance for gatherings.
- Perfect for Any Occasion: Whether you’re celebrating a birthday, hosting a holiday gathering, or simply craving something sweet, this cake is sure to impress.
- Customizable: Want to mix things up? You can experiment with different types of chocolate or add some espresso for a twist.
Preparation Time and Cook Time
- Total Time: 1 hour 30 minutes
- Preparation Time: 15 minutes
- Cook Time: 50 minutes
- Cooling Time: 30 minutes (plus 2 hours for refrigeration)
- Servings: 8-10 servings
- Calories per serving: Approximately 350 calories
- Key Nutrients: Fat: 25g, Carbohydrates: 30g, Protein: 6g
Ingredients
You’ll need a few simple ingredients to make this Chocolate Basque Burnt Cheesecake:
For the Cheesecake:
- 16 oz (450g) cream cheese, softened
- 3/4 cup granulated sugar
- 1/4 cup unsweetened cocoa powder
- 4 large eggs
- 1 1/2 cups heavy cream
- 1 tsp vanilla extract
- 1/2 cup bittersweet chocolate (melted)
- Pinch of salt
Ingredient Highlights
- Cream Cheese: The rich, tangy base of the cheesecake gives it that smooth, creamy texture we all crave.
- Bittersweet Chocolate: For a deep, rich chocolate flavor that contrasts beautifully with the creamy filling.
- Heavy Cream: Adds to the luscious texture of the cheesecake and enhances its melt-in-your-mouth quality.
- Vanilla Extract: Elevates the overall flavor and enhances the sweetness of the cheesecake.
- Cocoa Powder: For that perfect chocolatey taste, without being overly sweet.
Step-by-Step Instructions
Here’s how you can make your own Chocolate Basque Burnt Cheesecake from scratch:
Prepare the Oven and Pan
- Preheat the Oven: Preheat your oven to 400°F (200°C). Line a 9-inch springform pan with parchment paper, ensuring it’s high enough to cover the edges of the pan. The parchment should come up about 2 inches above the sides of the pan to allow the cheesecake to rise without spilling over.
- Prepare the Chocolate: Melt your bittersweet chocolate using a microwave in short bursts or by gently heating it on the stove. Set it aside to cool slightly.
Make the Cheesecake Batter
- Cream the Cheese and Sugar: In a large mixing bowl, use a hand mixer or stand mixer to beat the cream cheese and sugar together until smooth and fluffy. Scrape down the sides of the bowl to make sure everything is well incorporated.
- Add Cocoa Powder: Sift in the cocoa powder and continue mixing until fully combined. The batter should be smooth with no lumps.
- Incorporate the Eggs: Add the eggs one at a time, mixing thoroughly after each addition. This ensures the eggs are fully blended into the cheesecake mixture, giving it a rich, even texture.
- Add the Cream and Vanilla: Pour in the heavy cream and vanilla extract, and mix until fully combined. The batter should now be smooth, creamy, and slightly thick.
- Fold in the Chocolate: Slowly add the melted chocolate to the batter, folding it in gently. This step gives the cheesecake its deep chocolate flavor.
Bake the Cheesecake
- Pour into the Pan: Pour the cheesecake batter into the prepared springform pan, smoothing the top with a spatula.
- Bake: Place the pan in the preheated oven and bake for 50-55 minutes. The top should be dark and slightly cracked, while the center should still be a little jiggly. This slight jiggle is what makes the cheesecake incredibly creamy once it cools.
- Cool: Let the cheesecake cool in the pan for about 30 minutes at room temperature. Then, transfer it to the fridge for at least 2 hours to set completely.
Serve the Cheesecake
Once the cheesecake has chilled and set, it’s ready to serve! You can either serve it as is or top it with a dollop of whipped cream or a sprinkle of chocolate shavings for extra flair.
How to Serve
Here are a few creative ideas for serving your Chocolate Basque Burnt Cheesecake:
- Classic Presentation: Slice the cheesecake and serve it with a small spoonful of whipped cream and a few fresh berries for a light contrast to the rich cheesecake.
- Chocolate Sauce Drizzle: Drizzle some extra chocolate sauce or ganache over the top for an even more decadent experience.
- Individual Servings: For a more personal touch, slice the cheesecake into smaller portions and serve them individually with a side of fresh fruit or a scoop of vanilla ice cream.
- Festive Garnishes: Dust the top of the cheesecake with a little powdered sugar or cocoa powder for a finished look.
- Pair with Coffee: Serve your cheesecake with a strong cup of coffee or espresso to balance out the richness of the dessert.
Additional Tips
For the best possible Chocolate Basque Burnt Cheesecake, keep these tips in mind:
- Don’t Overmix: Overmixing the batter can lead to a denser cheesecake. Mix just until everything is combined.
- Check the Temperature: Make sure your cream cheese is softened before starting, as it’ll blend much easier and create a smoother batter.
- Watch the Baking Time: Every oven is different. Check the cheesecake after 45 minutes to ensure the top is dark but not overly burnt.
- Cool Before Serving: Allow the cheesecake to cool and set before serving to get the best texture. It’s even better the next day!
Recipe Variations
Here are some fun ways to customize your Chocolate Basque Burnt Cheesecake:
- Coffee Twist: Add 1-2 tsp of instant coffee or espresso powder to the batter for a coffee-flavored cheesecake that complements the chocolate.
- Nutty Crunch: Fold in some crushed hazelnuts or walnuts to the batter for added texture.
- Orange Zest: Add a teaspoon of orange zest to the batter for a citrusy contrast to the chocolate.
- Different Chocolate: Swap out the bittersweet chocolate for milk chocolate or dark chocolate to adjust the sweetness and depth of the flavor.
Freezing and Storage
To store your Chocolate Basque Burnt Cheesecake:
- Refrigeration: Store the cheesecake in an airtight container in the fridge for up to 4 days.
- Freezing: Wrap the cheesecake tightly in plastic wrap and foil, and freeze for up to 3 months. Thaw in the fridge overnight before serving.
Special Equipment
You’ll need a few basic tools to make this cheesecake:
- 9-inch Springform Pan: Essential for baking and easily removing the cheesecake from the pan.
- Hand or Stand Mixer: For smooth and fluffy cheesecake batter.
- Spatula: To fold in the chocolate and smooth the batter.
- Parchment Paper: For lining the pan to prevent sticking.
FAQ Section
Here are answers to common questions about Chocolate Basque Burnt Cheesecake:
- Can I use a different type of chocolate?
Yes! Feel free to experiment with milk or dark chocolate, depending on your preference. - Why does the top get burnt?
The burnt top is what gives the cheesecake its unique flavor. It adds a caramelized taste that pairs perfectly with the creamy filling. - Can I make this ahead of time?
Absolutely! This cheesecake is even better after sitting in the fridge for a few hours or overnight.
Chocolate Basque Burnt Cheesecake
- Total Time: 1 hour and 30 minutes
Ingredients
For the Cheesecake:
- 16 oz (450g) cream cheese, softened
- 3/4 cup granulated sugar
- 1/4 cup unsweetened cocoa powder
- 4 large eggs
- 1 1/2 cups heavy cream
- 1 tsp vanilla extract
- 1/2 cup bittersweet chocolate (melted)
- Pinch of salt
Instructions
Prepare the Oven and Pan
- Preheat the Oven: Preheat your oven to 400°F (200°C). Line a 9-inch springform pan with parchment paper, ensuring it’s high enough to cover the edges of the pan. The parchment should come up about 2 inches above the sides of the pan to allow the cheesecake to rise without spilling over.
- Prepare the Chocolate: Melt your bittersweet chocolate using a microwave in short bursts or by gently heating it on the stove. Set it aside to cool slightly.
Make the Cheesecake Batter
- Cream the Cheese and Sugar: In a large mixing bowl, use a hand mixer or stand mixer to beat the cream cheese and sugar together until smooth and fluffy. Scrape down the sides of the bowl to make sure everything is well incorporated.
- Add Cocoa Powder: Sift in the cocoa powder and continue mixing until fully combined. The batter should be smooth with no lumps.
- Incorporate the Eggs: Add the eggs one at a time, mixing thoroughly after each addition. This ensures the eggs are fully blended into the cheesecake mixture, giving it a rich, even texture.
- Add the Cream and Vanilla: Pour in the heavy cream and vanilla extract, and mix until fully combined. The batter should now be smooth, creamy, and slightly thick.
- Fold in the Chocolate: Slowly add the melted chocolate to the batter, folding it in gently. This step gives the cheesecake its deep chocolate flavor.
Bake the Cheesecake
- Pour into the Pan: Pour the cheesecake batter into the prepared springform pan, smoothing the top with a spatula.
- Bake: Place the pan in the preheated oven and bake for 50-55 minutes. The top should be dark and slightly cracked, while the center should still be a little jiggly. This slight jiggle is what makes the cheesecake incredibly creamy once it cools.
- Cool: Let the cheesecake cool in the pan for about 30 minutes at room temperature. Then, transfer it to the fridge for at least 2 hours to set completely.
Serve the Cheesecake
Once the cheesecake has chilled and set, it’s ready to serve! You can either serve it as is or top it with a dollop of whipped cream or a sprinkle of chocolate shavings for extra flair.
- Prep Time: 15 min.
- Cooling Time: 30 min.
- Cook Time: 50 min.
Nutrition
- Serving Size: 8-10 servings
- Calories: 350 kcal
- Fat: 25g
- Carbohydrates: 30g
- Protein: 6g
Conclusion
This Chocolate Basque Burnt Cheesecake takes the classic Basque cheesecake to the next level with a rich, indulgent chocolate twist. The result is a decadent dessert with a creamy, velvety filling that’s balanced perfectly by the caramelized, slightly bitter top. The burnt edges only enhance its character, giving it that signature Basque charm.
Don’t be intimidated by the burnt top—it’s what makes this cheesecake so unique! The beautifully crisp exterior gives way to a smooth, melt-in-your-mouth chocolate filling that’s pure bliss in every bite. Whether you’re serving it at a dinner party or enjoying it as a special treat for yourself, this cheesecake is sure to be a hit.
This recipe is as easy as it is delicious, and the best part is that it doesn’t require a ton of prep or fancy techniques. Just bake, let it cool, and enjoy the rich, chocolatey goodness that awaits. It’s the perfect dessert to impress guests or treat yourself to something indulgent.
So, go ahead, whip up this Chocolate Basque Burnt Cheesecake, and make your next celebration even sweeter. Don’t forget to snap a photo and tag me on social media—I love seeing your delicious creations! Enjoy!

