Introduction
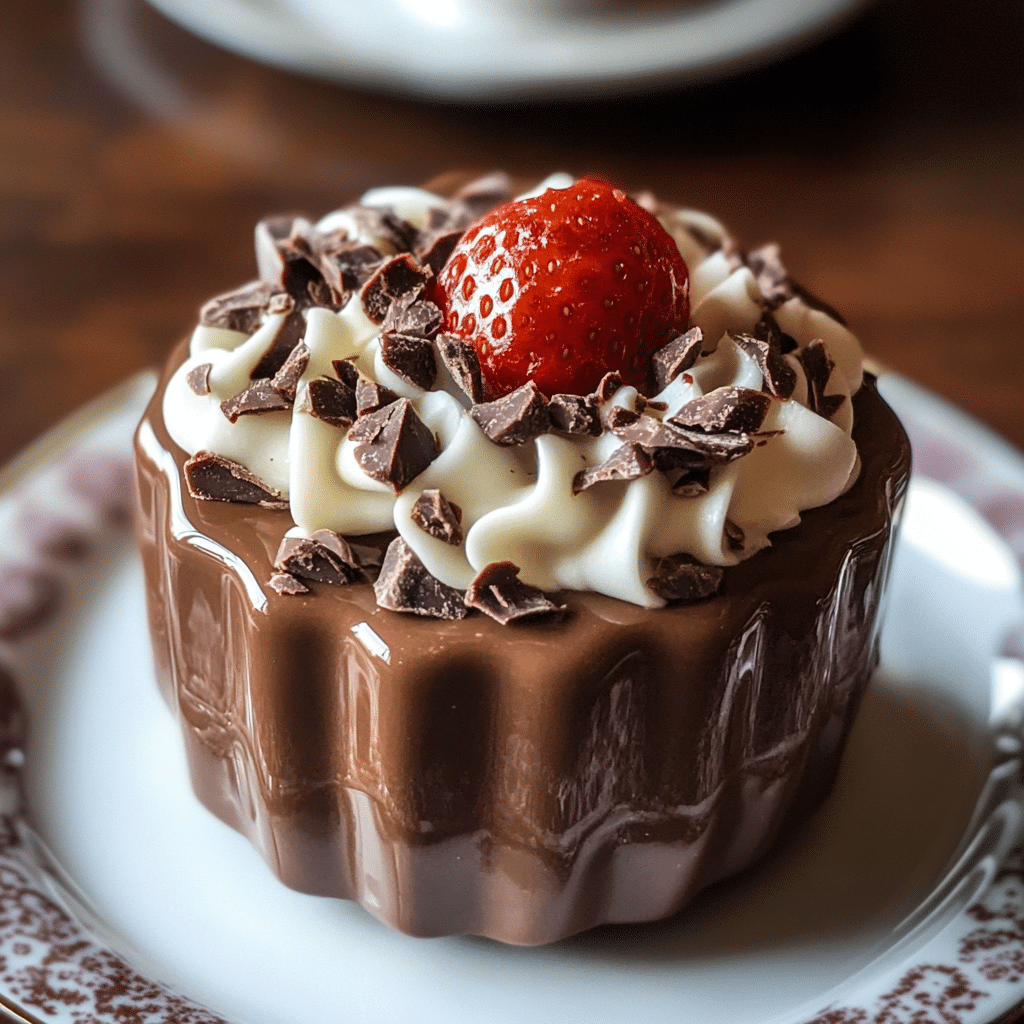
There’s something magical about a rich, silky dessert that feels like a little indulgence after a satisfying meal, and Chocolate Budino is just that. With its smooth, pudding-like consistency and deep chocolate flavor, this Italian-inspired treat is a dessert lover’s dream come true. Whether you’re looking to impress guests at a dinner party or simply craving something sweet for yourself, this luxurious chocolate custard is sure to hit the spot.
The best part? It’s easy to make with just a few simple ingredients, yet it’s elegant enough to stand out at any occasion. In this recipe, I’ll guide you step-by-step to create a Chocolate Budino that’s creamy, indulgent, and totally irresistible. Let’s dive into the wonderful world of chocolate!
Why You’ll Love This Recipe
Here’s why you’ll fall head over heels for this Chocolate Budino:
- Rich and Creamy: The texture is incredibly smooth, almost like a velvety mousse, making every bite melt in your mouth.
- Chocolate Lovers’ Dream: The intense flavor of the chocolate is perfectly balanced with a touch of sweetness, making this a dessert you’ll savor.
- Elegant and Simple: Despite its rich flavor, it’s easy to prepare, and its presentation is enough to impress anyone.
- Versatile: Top it with whipped cream, crushed nuts, or even a drizzle of caramel sauce to make it your own.
- Make-Ahead: Budino is perfect for prepping in advance, allowing the flavors to deepen overnight.
- Gluten-Free: This dessert is naturally gluten-free, making it suitable for those with dietary restrictions.
Preparation Time and Cook Time
- Total Time: 1 hour (plus chilling time)
- Preparation Time: 15 minutes
- Cook Time: 20 minutes
- Chilling Time: 4 hours (or overnight)
- Servings: 6 to 8
- Calories per serving: Approximately 300-350 calories
- Key Nutrients: Fat: 18g, Carbohydrates: 28g, Protein: 4g, Fiber: 3g
Ingredients
You’ll need the following ingredients to create this rich and decadent Chocolate Budino:
For the Budino:
- 2 cups whole milk
- 1 cup heavy cream
- 1/2 cup granulated sugar
- 4 large egg yolks
- 1/4 cup cornstarch
- 8 oz high-quality bittersweet or semisweet chocolate (chopped)
- 1 teaspoon vanilla extract
- Pinch of salt
For the Whipped Cream Topping:
- 1/2 cup heavy cream
- 2 tablespoons powdered sugar
- 1 teaspoon vanilla extract
Ingredient Highlights
- Whole Milk & Heavy Cream: The combination of milk and cream creates the luxuriously creamy texture of the budino.
- Bittersweet Chocolate: The high-quality chocolate is the star of this dessert, bringing that rich, deep flavor you’ll crave with every spoonful.
- Egg Yolks: These help thicken the custard and provide the smooth, velvety texture.
- Cornstarch: It’s used to set the custard, ensuring the perfect consistency.
- Vanilla Extract: A dash of vanilla adds warmth and complexity to the chocolate flavor.
- Whipped Cream: Light and airy, it balances the richness of the budino, adding an extra layer of indulgence.
Step-by-Step Instructions
Creating your Chocolate Budino is simple, and I promise the result will be well worth it!
Prepare the Chocolate Custard
- Heat Milk and Cream: In a medium saucepan, combine the milk and cream. Place it over medium heat and bring to a simmer, stirring occasionally. Be careful not to let it boil.
- Whisk Egg Yolks and Sugar: While the milk and cream are heating up, whisk together the egg yolks, sugar, cornstarch, and a pinch of salt in a separate bowl. You want to make sure the mixture is smooth and well-combined.
- Temper the Eggs: Gradually pour a little of the hot milk and cream mixture into the egg yolk mixture while whisking constantly. This step is called “tempering” and helps prevent the eggs from scrambling when added to the hot liquid. Once the egg mixture is warmed, slowly pour it back into the saucepan with the rest of the milk mixture.
- Cook the Custard: Return the saucepan to the heat and continue to cook the mixture, whisking constantly, until it thickens and coats the back of a spoon. This usually takes about 5 to 7 minutes. You’ll know it’s done when the custard has a smooth, pudding-like consistency.
- Melt the Chocolate: Once the custard has thickened, remove it from the heat and add the chopped chocolate. Stir until the chocolate is completely melted and the mixture is smooth and glossy.
- Add Vanilla: Stir in the vanilla extract for an added layer of flavor. The aroma will be irresistible!
- Cool the Budino: Let the custard cool for a few minutes before transferring it into serving cups or bowls. Cover with plastic wrap, making sure the wrap is touching the surface of the custard to prevent a skin from forming. Refrigerate for at least 4 hours, or preferably overnight, to allow the flavors to fully develop.
Whip the Cream
- Chill the Mixing Bowl: Place your mixing bowl and whisk attachment in the freezer for about 10 minutes before whipping the cream. This will help it whip up quicker and more efficiently.
- Whip the Cream: In the chilled bowl, combine the heavy cream, powdered sugar, and vanilla extract. Beat on medium-high speed until soft peaks form. Be careful not to overwhip—soft peaks are perfect for a light, airy topping.
Assemble and Serve
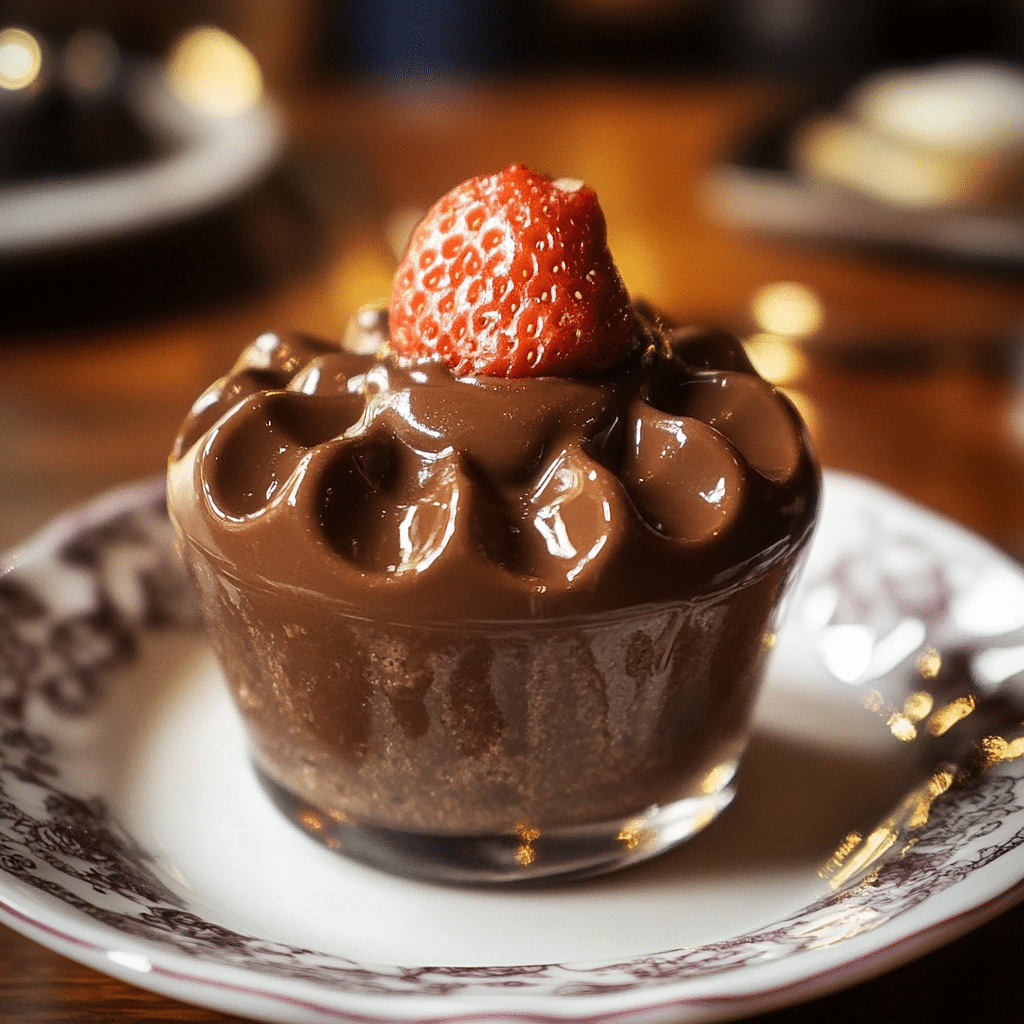
- Top the Budino: Once the budino has chilled and set, top each serving with a generous dollop of whipped cream. You can also add extra toppings, such as shaved chocolate, a sprinkle of cocoa powder, or crushed nuts for some added texture.
- Garnish and Serve: Serve the Chocolate Budino with a sprinkle of chocolate shavings or a few raspberries for a fresh contrast to the richness of the custard.
How to Serve
There are plenty of ways to serve your Chocolate Budino that will make this dessert shine:
- Classic Presentation: Serve the budino in small cups or ramekins for a classic, elegant look. The rich, dark custard will look stunning against the white whipped cream.
- Family-Style: Make a larger batch and serve it in a large, shallow dish for guests to scoop their own servings.
- Personalized: Add fun toppings like candied orange peel, caramel drizzle, or crushed cookies for a personalized touch.
- Party Ready: If you’re serving a crowd, consider making mini versions of the budino in shot glasses for a fun, bite-sized option.
- Chilled or Room Temperature: While this dessert is best served chilled, it can also be enjoyed at room temperature for a slightly different texture. Experiment and find what you love best!
Additional Tips
To make your Chocolate Budino even better, here are a few tips to consider:
- Use High-Quality Chocolate: The chocolate you choose will make a significant difference in the flavor of the budino. Opt for a high-quality bittersweet or semisweet chocolate to get that rich, decadent taste.
- Let It Chill: Be sure to give the budino enough time to set in the fridge. It’s crucial to let it chill for at least 4 hours to get the proper consistency.
- Adjust Sweetness: Feel free to adjust the sweetness to your taste. If you prefer a slightly less sweet dessert, reduce the sugar by a tablespoon or two.
- Make It Ahead: Chocolate Budino is perfect for making ahead. In fact, it tastes even better the next day as the flavors have more time to meld together.
- Avoid Overwhipping: When making the whipped cream, be careful not to overwhip it. Soft peaks are ideal for a smooth, velvety topping.
Recipe Variations
While this Chocolate Budino recipe is delicious on its own, here are a few variations you can try:
- Spicy Chocolate Budino: Add a pinch of cinnamon or a dash of cayenne pepper to the custard for a spicy kick.
- Salted Caramel Budino: Drizzle homemade salted caramel over the budino for an added depth of flavor.
- Fruit Topping: Top the budino with fresh raspberries, strawberries, or even a compote for a burst of freshness.
- Nutty Chocolate Budino: Sprinkle crushed hazelnuts or almonds on top for a delightful crunch that complements the smooth custard.
- Mocha Budino: Add a tablespoon of instant coffee granules to the milk and cream mixture for a mocha-flavored twist.
Freezing and Storage
Proper storage will ensure that your Chocolate Budino stays fresh and delicious:
- Storage: Keep any leftover budino covered with plastic wrap in the refrigerator for up to 3 days.
- Freezing: While it’s best served fresh, you can freeze the budino for up to 2 months. Let it thaw in the refrigerator for a few hours before serving.
faq section
Curious about making Chocolate Budino? I’ve gathered a few common questions to help you navigate the process and ensure you get the best results. Whether you’re a first-time maker or a seasoned pro, here are some helpful tips and answers to common queries!
- Can I use a different type of chocolate?
- Yes! You can substitute the bittersweet or semisweet chocolate with milk chocolate for a sweeter, milder flavor, or with dark chocolate for an even richer taste. Just keep in mind that different chocolates will affect the overall sweetness and depth of flavor.
- How do I prevent a skin from forming on top of the budino?
- To avoid a skin, make sure the plastic wrap touches the surface of the budino while it chills. This helps keep moisture in and prevents a film from forming on top.
- Can I make this dessert ahead of time?
- Absolutely! In fact, Chocolate Budino tastes even better the next day as the flavors meld. It can be made up to 2 days in advance and stored in the fridge, so it’s perfect for prepping ahead of time for a party or special meal.
- Can I make the whipped cream ahead of time?
- Yes, you can! Whip the cream a few hours ahead and store it in the fridge, covered. Just give it a quick whisk before serving to get it fluffy again.
- How do I adjust the sweetness of the budino?
- You can easily adjust the sweetness by reducing the amount of sugar in the recipe. If you prefer a less sweet dessert, try cutting the sugar by a tablespoon or two and taste as you go.
- Can I freeze the Chocolate Budino?
- While it’s best served fresh, you can freeze the budino for up to 2 months. Allow it to thaw in the refrigerator for several hours before serving. However, keep in mind that the texture may change slightly after freezing.

Chocolate Budino
- Total Time: 1 hour
Ingredients
For the Budino:
- 2 cups whole milk
- 1 cup heavy cream
- 1/2 cup granulated sugar
- 4 large egg yolks
- 1/4 cup cornstarch
- 8 oz high-quality bittersweet or semisweet chocolate (chopped)
- 1 teaspoon vanilla extract
- Pinch of salt
For the Whipped Cream Topping:
- 1/2 cup heavy cream
- 2 tablespoons powdered sugar
- 1 teaspoon vanilla extract
Instructions
Prepare the Chocolate Custard
- Heat Milk and Cream: In a medium saucepan, combine the milk and cream. Place it over medium heat and bring to a simmer, stirring occasionally. Be careful not to let it boil.
- Whisk Egg Yolks and Sugar: While the milk and cream are heating up, whisk together the egg yolks, sugar, cornstarch, and a pinch of salt in a separate bowl. You want to make sure the mixture is smooth and well-combined.
- Temper the Eggs: Gradually pour a little of the hot milk and cream mixture into the egg yolk mixture while whisking constantly. This step is called “tempering” and helps prevent the eggs from scrambling when added to the hot liquid. Once the egg mixture is warmed, slowly pour it back into the saucepan with the rest of the milk mixture.
- Cook the Custard: Return the saucepan to the heat and continue to cook the mixture, whisking constantly, until it thickens and coats the back of a spoon. This usually takes about 5 to 7 minutes. You’ll know it’s done when the custard has a smooth, pudding-like consistency.
- Melt the Chocolate: Once the custard has thickened, remove it from the heat and add the chopped chocolate. Stir until the chocolate is completely melted and the mixture is smooth and glossy.
- Add Vanilla: Stir in the vanilla extract for an added layer of flavor. The aroma will be irresistible!
- Cool the Budino: Let the custard cool for a few minutes before transferring it into serving cups or bowls. Cover with plastic wrap, making sure the wrap is touching the surface of the custard to prevent a skin from forming. Refrigerate for at least 4 hours, or preferably overnight, to allow the flavors to fully develop.
Whip the Cream
- Chill the Mixing Bowl: Place your mixing bowl and whisk attachment in the freezer for about 10 minutes before whipping the cream. This will help it whip up quicker and more efficiently.
- Whip the Cream: In the chilled bowl, combine the heavy cream, powdered sugar, and vanilla extract. Beat on medium-high speed until soft peaks form. Be careful not to overwhip—soft peaks are perfect for a light, airy topping.
Assemble and Serve
- Top the Budino: Once the budino has chilled and set, top each serving with a generous dollop of whipped cream. You can also add extra toppings, such as shaved chocolate, a sprinkle of cocoa powder, or crushed nuts for some added texture.
- Garnish and Serve: Serve the Chocolate Budino with a sprinkle of chocolate shavings or a few raspberries for a fresh contrast to the richness of the custard.
- Prep Time: 15 min.
- Chill Time: 4 hours
- Cook Time: 20 min.
Nutrition
- Serving Size: 6-8 servings
- Calories: 300-350 kcal
- Fat: 18g
- Carbohydrates: 28g
- Fiber: 3g
- Protein: 4g
Conclusion
I hope you’ll enjoy making and indulging in this luxurious Chocolate Budino as much as I do. It’s one of those desserts that combines elegance with comfort, making it perfect for any occasion, whether it’s a casual weeknight treat or a special dessert to serve at a gathering. Don’t forget to snap a photo and tag me on social media—I love seeing your delicious creations!

