Introduction
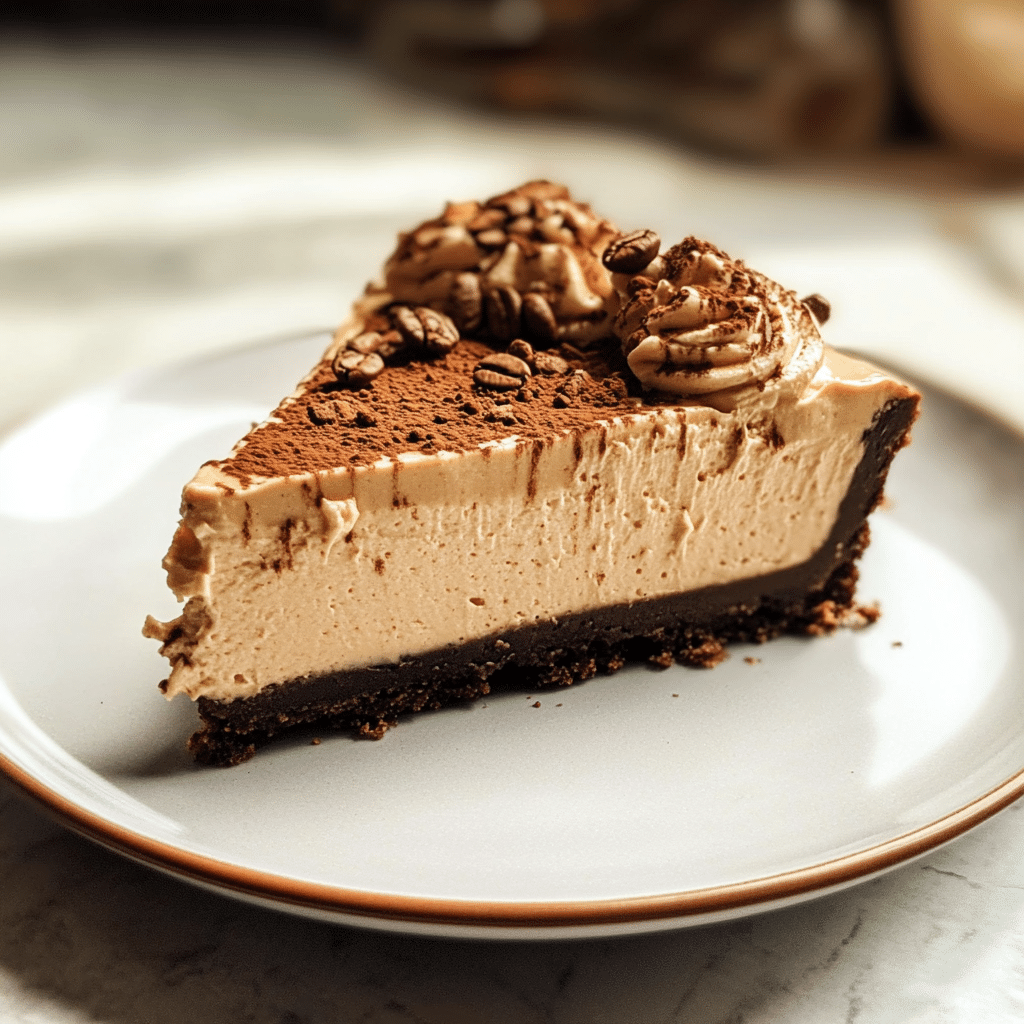
If you’re a coffee lover and cheesecake enthusiast, then you’re in for an absolute treat with this Creamy Coffee Cheesecake. This decadent dessert combines the smooth, rich flavor of coffee with the silky texture of cheesecake, creating an indulgent experience that’s perfect for any occasion. Whether you’re serving it up for a special gathering, holiday dinner, or simply craving something sweet, this cheesecake is sure to impress.
Imagine the combination of coffee’s bold flavor mingling with the creamy, velvety cheesecake filling. It’s the perfect balance of bitterness and sweetness, creating a harmonious dessert that’s rich, yet light on the palate. From the buttery, crunchy graham cracker crust to the creamy filling and the bold coffee flavor, every bite is a comforting, luxurious treat. Plus, it’s easier to make than you might think—no need to be intimidated by the idea of baking a cheesecake. With just a few simple steps, you’ll have a showstopper dessert that looks and tastes like it took hours to prepare.
Why You’ll Love This Recipe
There are so many reasons to adore this Creamy Coffee Cheesecake:
- Perfect for Coffee Lovers: The rich coffee flavor gives this cheesecake a sophisticated twist that coffee lovers will absolutely adore.
- Smooth and Creamy: The velvety cheesecake filling provides the perfect contrast to the crunchy, buttery crust.
- Simple Ingredients: With only a handful of ingredients, you can whip this up without a trip to the specialty store.
- Impressive Yet Easy: While this cheesecake looks fancy, it’s surprisingly easy to make, even for beginners.
- Customizable: You can adjust the coffee flavor to your liking, making it stronger or milder based on your preferences.
- A Showstopper Dessert: This cheesecake will impress at any gathering, with its elegant look and delicious flavor.
- Make Ahead Option: Cheesecake needs time to set, making it the perfect dessert to prepare a day or two ahead.
- Great for Special Occasions: Whether it’s a birthday, dinner party, or holiday celebration, this cheesecake is sure to steal the show.
Preparation Time and Cook Time
- Total Time: 6 hours (includes chilling time)
- Preparation Time: 20 minutes
- Cook Time: 1 hour
- Chilling Time: 4 hours
- Servings: 12 servings
- Calories per serving: Approximately 350 calories
- Key Nutrients: Protein: 8g, Carbohydrates: 40g, Fat: 22g, Fiber: 1g
Ingredients
To make this indulgent Creamy Coffee Cheesecake, you’ll need the following ingredients:
For the Crust:
- 1 1/2 cups graham cracker crumbs
- 1/4 cup granulated sugar
- 1/2 cup unsalted butter, melted
the Filling:
- 3 (8 oz) packages cream cheese, softened
- 1 cup granulated sugar
- 1/4 cup sour cream
- 3 large eggs
- 2 teaspoons vanilla extract
- 1/4 cup strong brewed coffee, cooled
- 2 tablespoons instant coffee granules
For the Topping (Optional):
- Whipped cream
- Shaved chocolate or cocoa powder
Ingredient Highlights
- Graham Cracker Crumbs: They create the perfect base with a slight sweetness and a satisfying crunch.
- Cream Cheese: The base for the cheesecake filling, providing its rich, creamy texture.
- Coffee: Brewed coffee and instant coffee granules infuse the filling with a bold coffee flavor.
- Sour Cream: Adds a slight tang to the filling, balancing out the sweetness of the cheesecake.
- Whipped Cream & Shaved Chocolate: These optional toppings add a luxurious finish and a little extra flair to the cheesecake.
Step-by-Step Instructions
Follow these steps to create your Creamy Coffee Cheesecake:
Prepare the Crust
- Preheat the Oven: Preheat your oven to 325°F (160°C).
- Make the Crust: In a medium bowl, combine the graham cracker crumbs, granulated sugar, and melted butter. Stir until the crumbs are well coated and the mixture resembles wet sand.
- Form the Crust: Press the graham cracker mixture into the bottom of a 9-inch springform pan, making sure it’s evenly spread and slightly packed. Use the back of a spoon to press down firmly.
- Bake the Crust: Bake the crust in the preheated oven for 10 minutes, then remove and let it cool while you prepare the filling.
Prepare the Filling
- Beat the Cream Cheese: In a large bowl, use an electric mixer to beat the softened cream cheese until smooth and creamy, about 2-3 minutes.
- Add Sugar and Sour Cream: Add the granulated sugar and sour cream to the cream cheese, and beat until well combined.
- Add Eggs: Add the eggs one at a time, beating well after each addition. Be sure to scrape down the sides of the bowl to ensure everything is well mixed.
- Add Coffee Flavor: Dissolve the instant coffee granules in the brewed coffee, then add the coffee and vanilla extract to the mixture. Beat until smooth.
- Pour the Filling: Pour the cheesecake filling over the cooled crust, spreading it out evenly with a spatula.
Bake the Cheesecake
- Bake the Cheesecake: Place the cheesecake in the oven and bake for 50-60 minutes, or until the center is almost set but still slightly wobbly. It’s important not to overbake the cheesecake, as it can crack.
- Cool: Turn off the oven and let the cheesecake cool in the oven with the door slightly ajar for about an hour. This helps prevent cracking. After an hour, remove the cheesecake from the oven and allow it to cool to room temperature.
- Chill: Once the cheesecake reaches room temperature, cover it with plastic wrap and refrigerate for at least 4 hours, or overnight, to allow it to fully set.
Serve and Garnish
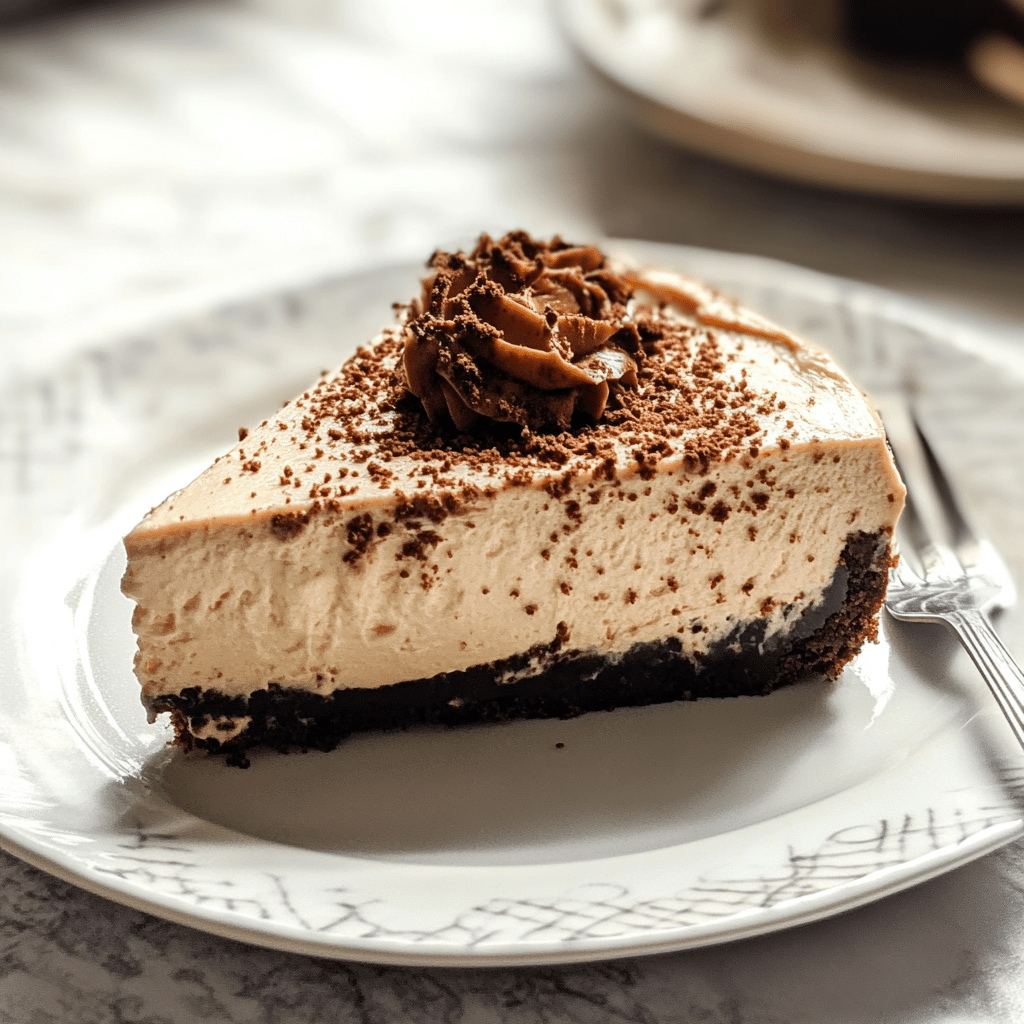
- Top with Whipped Cream: Before serving, top the cheesecake with a dollop of whipped cream and garnish with shaved chocolate or a dusting of cocoa powder for a beautiful, indulgent touch.
- Slice and Serve: Carefully remove the cheesecake from the springform pan, slice it into wedges, and serve.
How to Serve
Here are a few ideas for serving your Creamy Coffee Cheesecake:
- As a Centerpiece: Serve the cheesecake as the highlight of your dessert table.
- Pair with Coffee: Since the cheesecake is coffee-flavored, serve it alongside a cup of freshly brewed coffee or a cappuccino for an extra indulgence.
- On Special Occasions: This cheesecake is perfect for birthdays, anniversaries, or holiday celebrations.
- With Seasonal Fruit: Add a side of fresh berries for a touch of tartness that contrasts beautifully with the rich cheesecake.
- Mini Cheesecakes: Make individual portions by dividing the crust and filling into muffin tins for a fun, personalized twist.
Additional Tips
Maximize the enjoyment of your Creamy Coffee Cheesecake with these helpful tips:
- Use Room Temperature Ingredients: Make sure the cream cheese, eggs, and sour cream are all at room temperature to ensure a smooth filling.
- Prevent Cracks: Don’t overbake the cheesecake and let it cool gradually to prevent cracks in the surface.
- Chill Longer for Best Results: The cheesecake sets better when chilled overnight, allowing the flavors to fully develop.
- Custom Coffee Flavor: Adjust the strength of the coffee based on your taste preference—use a stronger brew for a more intense coffee flavor.
- Topping Variations: Try using caramel sauce, chocolate ganache, or even a sprinkle of cinnamon for different topping ideas.
Recipe Variations
Want to try something different? Consider these variations:
- Chocolate Coffee Cheesecake: Add melted chocolate to the filling for a mocha twist.
- Nutty Crust: Add crushed walnuts or almonds to the graham cracker crust for a crunchy texture.
- Decaf Option: Use decaffeinated coffee if you want the flavor without the caffeine.
- No-Bake Cheesecake: Make a no-bake version by using a store-bought graham cracker crust and letting the filling set in the refrigerator for a few hours.
Freezing and Storage
Ensure proper storage to maintain the quality of your Creamy Coffee Cheesecake:
- Storage: Keep any leftover cheesecake covered tightly in plastic wrap or in an airtight container in the refrigerator for up to 5 days.
- Freezing: You can freeze the cheesecake, too! Wrap it tightly in plastic wrap and then foil, and freeze for up to 3 months. Thaw in the refrigerator overnight before serving.
- Portioning: For easy serving later, slice the cheesecake before freezing, so you can grab a piece whenever you want.
Special Equipment
You’ll need a few kitchen tools to make your Creamy Coffee Cheesecake:
- Springform Pan: Essential for making cheesecakes with a removable bottom.
- Electric Mixer: For beating the cream cheese and other ingredients until smooth.
- Spatula: To spread the filling evenly over the crust and smooth out the top.
Creamy Coffee Cheesecake
- Total Time: 6 hrs.
Ingredients
For the Filling:
- 3 (8 oz) packages cream cheese, softened
- 1 cup granulated sugar
- 1/4 cup sour cream
- 3 large eggs
- 2 teaspoons vanilla extract
- 1/4 cup strong brewed coffee, cooled
- 2 tablespoons instant coffee granules
For the Topping (Optional):
- Whipped cream
- Shaved chocolate or cocoa powder
Instructions
Prepare the Crust
- Preheat the Oven: Preheat your oven to 325°F (160°C).
- Make the Crust: In a medium bowl, combine the graham cracker crumbs, granulated sugar, and melted butter. Stir until the crumbs are well coated and the mixture resembles wet sand.
- Form the Crust: Press the graham cracker mixture into the bottom of a 9-inch springform pan, making sure it’s evenly spread and slightly packed. Use the back of a spoon to press down firmly.
- Bake the Crust: Bake the crust in the preheated oven for 10 minutes, then remove and let it cool while you prepare the filling.
Prepare the Filling
- Beat the Cream Cheese: In a large bowl, use an electric mixer to beat the softened cream cheese until smooth and creamy, about 2-3 minutes.
- Add Sugar and Sour Cream: Add the granulated sugar and sour cream to the cream cheese, and beat until well combined.
- Add Eggs: Add the eggs one at a time, beating well after each addition. Be sure to scrape down the sides of the bowl to ensure everything is well mixed.
- Add Coffee Flavor: Dissolve the instant coffee granules in the brewed coffee, then add the coffee and vanilla extract to the mixture. Beat until smooth.
- Pour the Filling: Pour the cheesecake filling over the cooled crust, spreading it out evenly with a spatula.
Bake the Cheesecake
- Bake the Cheesecake: Place the cheesecake in the oven and bake for 50-60 minutes, or until the center is almost set but still slightly wobbly. It’s important not to overbake the cheesecake, as it can crack.
- Cool: Turn off the oven and let the cheesecake cool in the oven with the door slightly ajar for about an hour. This helps prevent cracking. After an hour, remove the cheesecake from the oven and allow it to cool to room temperature.
- Chill: Once the cheesecake reaches room temperature, cover it with plastic wrap and refrigerate for at least 4 hours, or overnight, to allow it to fully set.
Serve and Garnish
- Top with Whipped Cream: Before serving, top the cheesecake with a dollop of whipped cream and garnish with shaved chocolate or a dusting of cocoa powder for a beautiful, indulgent touch.
- Slice and Serve: Carefully remove the cheesecake from the springform pan, slice it into wedges, and serve.
- Prep Time: 20 min.
- Chill Time: 4 hours
- Cook Time: 1 hr
Nutrition
- Serving Size: 12 servings
- Calories: 350 kcal
- Fat: 22g
- Carbohydrates: 40g
- Fiber: 1g
- Protein: 8g
Conclusion
This Creamy Coffee Cheesecake brings together the best of both worlds—smooth, creamy cheesecake and rich, aromatic coffee flavor. It’s sure to be a crowd-pleaser at any gathering, and with its simple ingredients and easy preparation, you can make it whenever you’re craving a delicious, sophisticated dessert. So, what are you waiting for? Give this recipe a try and let me know how it turns out! Don’t forget to snap a photo and tag me on social media—I love seeing your delicious creations!

