Introduction
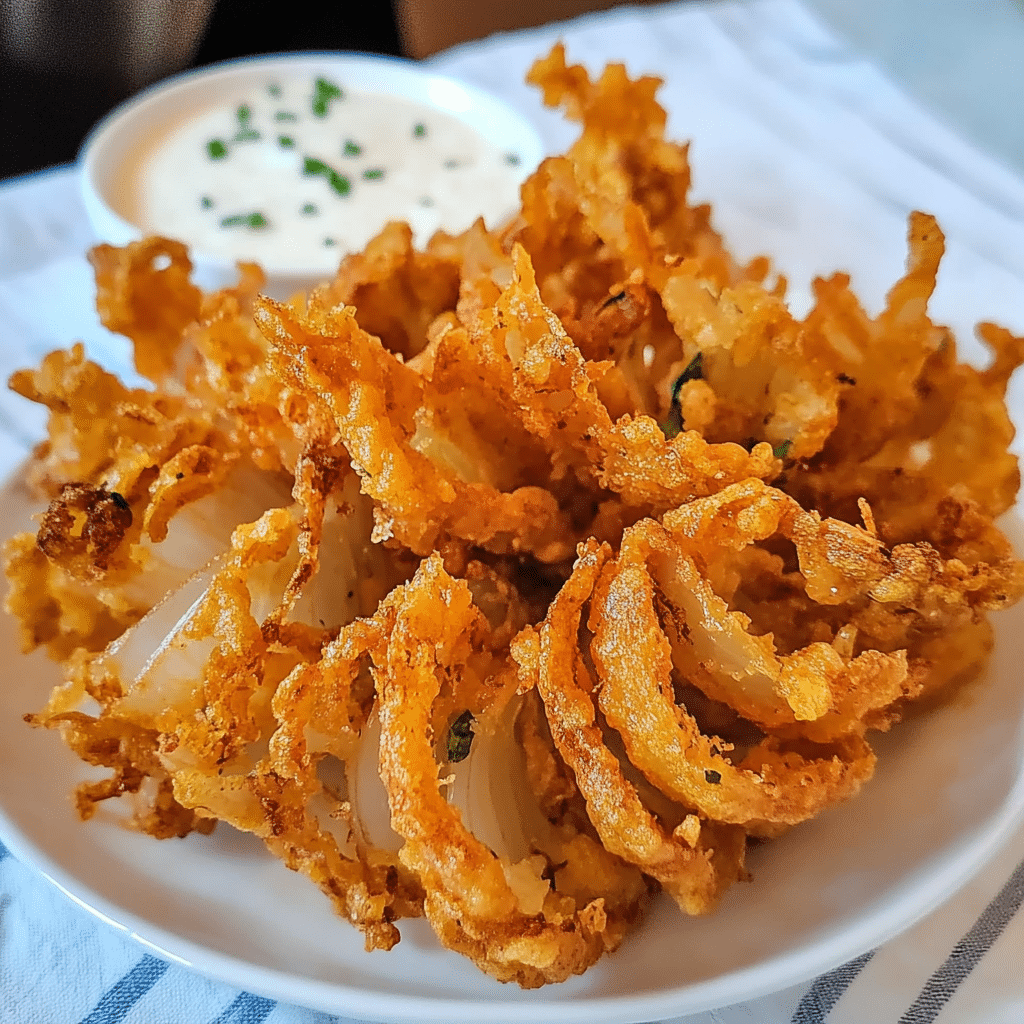
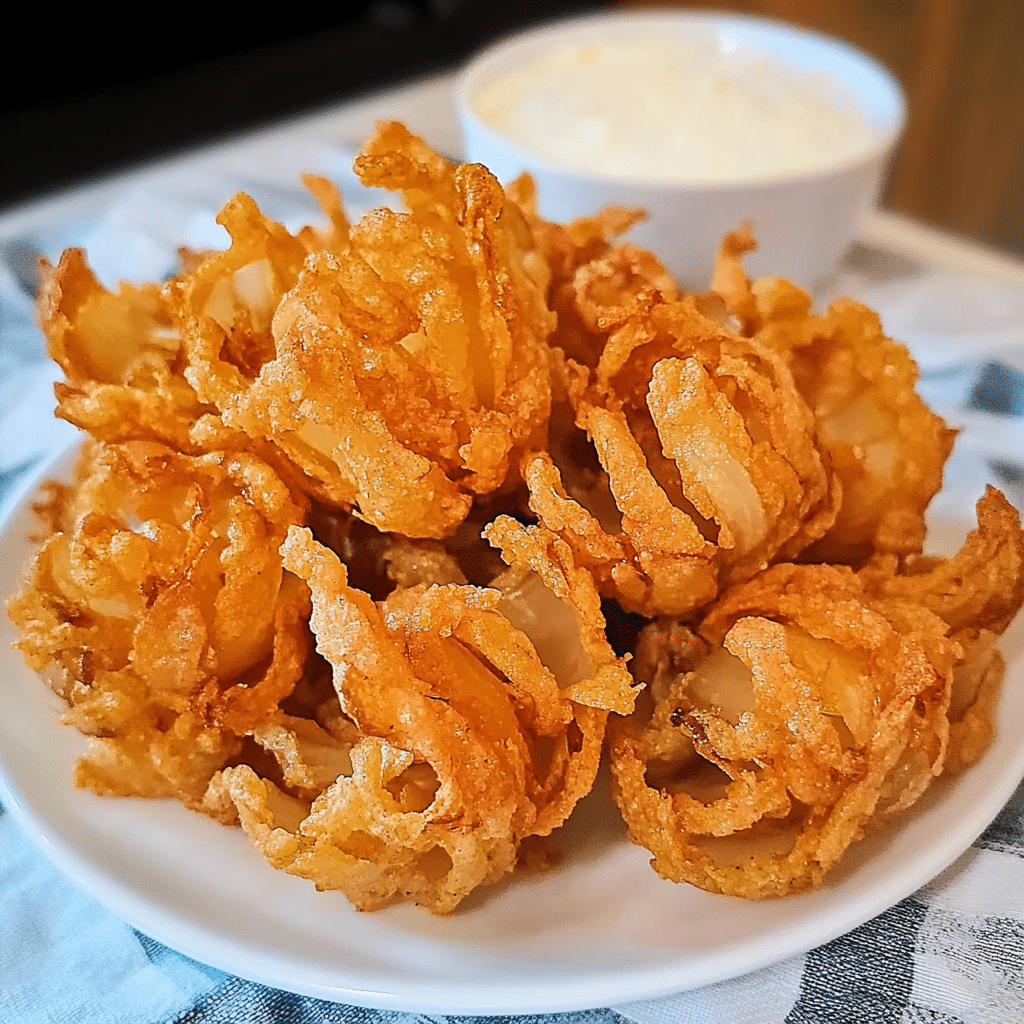
Who doesn’t crave the crispy, golden, and oh-so-satisfying crunch of a Easy Blooming Onion? It’s that show-stopping appetizer that’s both fun to make and even more fun to eat. The irresistible aroma, combined with the perfect blend of spices and that satisfying crunch, makes it a favorite for any occasion. And the best part? You don’t need a deep fryer to get that restaurant-quality bloom right at home!
This easy blooming onion recipe is all about simplicity and flavor. With just a handful of ingredients, including a large onion, flour, and your choice of seasonings, you can create a dish that’s crispy on the outside, tender on the inside, and bursting with flavor. It’s the perfect snack for game days, parties, or just a fun treat to share with family. Plus, making your own blooming onion means you can control the seasoning and heat, adjusting it just the way you like!
The process of Easy Blooming Onion is surprisingly straightforward: slice the onion into petals, coat it in a seasoned flour mixture, and bake it until golden and crispy. Serve it with a dipping sauce like classic ranch or zesty comeback sauce, and you’ve got a treat that will disappear fast!
If you’re looking for a fun, crowd-pleasing appetizer, this blooming onion is the way to go. It’s easy, delicious, and sure to impress everyone around the table of Easy Blooming Onion. Let’s dive into how to make this mouthwatering dish and get ready for a flavor explosion!
Why You’ll Love This Recipe
- Crispy and Tender: The outer petals get beautifully crisp while the onion stays soft and sweet inside.
- Simple Ingredients: You probably have most of the ingredients at home already—nothing too fancy required.
- No Deep Fryer Needed: This version is baked, making it a healthier (but still super delicious) option compared to the fried version.
- Perfect for Sharing: This is the ultimate shareable appetizer—everyone can dig in and enjoy together!
Preparation Time and Cook Time
- Total Time: 40 minutes
- Preparation Time: 15 minutes
- Cook Time: 25 minutes
- Servings: 4-6 people
- Calories per serving: Approximately 250 calories (varies depending on serving size)
Ingredients
Here’s what you’ll need to make this Easy Blooming Onion:
For the Onion:
- 1 large yellow onion (preferably sweet onion like Vidalia)
- 1 cup all-purpose flour
- 1 teaspoon paprika
- 1 teaspoon garlic powder
- 1/2 teaspoon salt
- 1/2 teaspoon black pepper
- 1/2 teaspoon cayenne pepper (optional, for some heat)
- 1/2 cup buttermilk (or regular milk)
- 1 large egg
- Olive oil or cooking spray (for baking)
For the Dipping Sauce:
- 1/2 cup mayonnaise
- 2 tablespoons ketchup
- 1 teaspoon Worcestershire sauce
- 1 teaspoon horseradish (optional, for a spicy kick)
- 1/2 teaspoon paprika
- A squeeze of fresh lemon juice (optional)
Step-by-Step Instructions
Prepare the Onion
- Peel the Onion: Start by cutting off the top of the onion, then peel off the skin. Leave the root end intact to keep the onion “bloomed” as it bakes.
- Cut the Onion: Place the onion cut side down. Using a sharp knife, make four vertical cuts, about 1 inch apart, stopping just before the root. Then, turn the onion and make four more cuts in the opposite direction, creating a “bloom” effect. Gently separate the layers so the onion starts to open up.
- Soak the Onion: To help the flour mixture stick, soak the cut onion in cold water for about 10-15 minutes. This step is optional but can help the layers open up more easily while baking.
Make the Coating
- Prepare the Dry Ingredients: In a shallow bowl, whisk together the flour, paprika, garlic powder, salt, black pepper, and cayenne pepper (if using). This will be your dry coating.
- Make the Wet Mix: In another bowl, whisk together the buttermilk (or regular milk) and egg. This will help the flour mixture stick to the onion.
Coat the Onion
- Coat the Onion: Carefully dip the onion into the wet mixture, making sure to coat the inside layers well. Then, gently dip it into the dry flour mixture, ensuring that all the layers are well coated. You can repeat the process if needed for extra crunch.
Bake the Onion
- Prepare the Baking Sheet: Place a rack on a baking sheet, and lightly grease it with olive oil or cooking spray. This will allow the air to circulate around the onion, helping it crisp up as it bakes.
- Place the Onion on the Rack: Place the coated onion on the rack, root side down. Lightly spray the top with olive oil or cooking spray.
- Bake: Bake the onion at 400°F (200°C) for 20-25 minutes, or until it’s golden and crispy. Check occasionally to make sure the layers aren’t burning. If the onion isn’t crispy enough, you can broil it for an additional 2-3 minutes at the end.
Make the Dipping Sauce
- Prepare the Sauce: While the onion is baking, mix together all of the dipping sauce ingredients in a small bowl. Taste and adjust the seasoning, adding more horseradish or Worcestershire sauce if desired. Chill the sauce in the fridge while the onion bakes.
Serve and Enjoy
- Serve: Once the onion is golden and crispy, remove it from the oven and allow it to cool for a minute or two. Serve it on a platter with the dipping sauce on the side.
How to Serve
This Easy Blooming Onion is a perfect appetizer for any gathering. Here are some ideas for serving it:
- As an Appetizer: Serve it as a showstopper starter at your next party or family gathering.
- With Drinks: Pair it with your favorite cocktails or beers for a fun, shareable snack.
- For Game Day: This blooming onion is a perfect addition to your game day spread—crispy and crowd-pleasing!
- As a Side Dish: It can also work as a side dish for a casual dinner, served alongside burgers, grilled chicken, or steak.
Additional Tips
Here are a few extra tips to ensure your Easy Blooming Onion turns out perfect every time:
- Choose the Right Onion: Sweet onions like Vidalia or Walla Walla work best for this recipe. They have a milder flavor and are easy to cut and bloom.
- Don’t Overcrowd: Be sure to give the onion enough space on the baking sheet so that it can crisp up properly. If needed, bake in batches.
- For Extra Flavor: Sprinkle some grated Parmesan or Italian seasoning into the flour mixture for added depth of flavor.
- Serve Immediately: For the best texture, serve the blooming onion right after baking. The longer it sits, the less crispy it will be.
Recipe Variations
Get creative with this recipe by making a few simple tweaks:
- Spicy Blooming Onion: Add extra cayenne pepper or even some finely chopped jalapeños to the coating mix for a spicy kick.
- Cheesy Blooming Onion: After baking, sprinkle some grated cheese (like cheddar or mozzarella) on top of the onion and return it to the oven for a few minutes to melt.
- Herb Blooming Onion: Add fresh herbs like thyme or rosemary to the coating mix for a fragrant, herby flavor.
Freezing and Storage
If you have leftovers of Easy Blooming Onion (which is rare, but hey, it happens!), you can store them for later:
- Storage: Store any leftover blooming onion in an airtight container in the fridge for up to 2 days.
- Reheating: Reheat the blooming onion in a 350°F (175°C) oven for about 5-10 minutes to crisp it back up. Avoid microwaving, as it can make the onion soggy.
Special Equipment
To make this Easy Blooming Onion, you’ll need:
- Sharp Knife: For cutting and blooming the onion.
- Baking Sheet with Rack: To help the onion crisp evenly.
- Bowls: For mixing the coating and wet ingredients.
- Cooking Spray: To lightly coat the onion and baking sheet.
FAQ Section
Here are answers to some frequently asked questions for Easy Blooming Onion:
- Can I fry the onion instead of baking it?
Yes, if you prefer a traditional deep-fried version, you can fry the coated onion in hot oil (375°F/190°C) for about 4-5 minutes until golden and crispy. - Can I use a different type of onion?
While sweet onions are the best for this recipe, yellow onions will also work. Just keep in mind that yellow onions can be more pungent. - Can I make this ahead of time?
It’s best to serve the blooming onion fresh for the crispiest texture. However, you can prepare the onion and store it in the fridge, then bake it right before serving.

Easy Blooming Onion
- Total Time: 45 min.
Ingredients
For the Onion:
- 1 large yellow onion (preferably sweet onion like Vidalia)
- 1 cup all-purpose flour
- 1 teaspoon paprika
- 1 teaspoon garlic powder
- 1/2 teaspoon salt
- 1/2 teaspoon black pepper
- 1/2 teaspoon cayenne pepper (optional, for some heat)
- 1/2 cup buttermilk (or regular milk)
- 1 large egg
- Olive oil or cooking spray (for baking)
For the Dipping Sauce:
- 1/2 cup mayonnaise
- 2 tablespoons ketchup
- 1 teaspoon Worcestershire sauce
- 1 teaspoon horseradish (optional, for a spicy kick)
- 1/2 teaspoon paprika
- A squeeze of fresh lemon juice (optional)
Instructions
Prepare the Onion
- Peel the Onion: Start by cutting off the top of the onion, then peel off the skin. Leave the root end intact to keep the onion “bloomed” as it bakes.
- Cut the Onion: Place the onion cut side down. Using a sharp knife, make four vertical cuts, about 1 inch apart, stopping just before the root. Then, turn the onion and make four more cuts in the opposite direction, creating a “bloom” effect. Gently separate the layers so the onion starts to open up.
- Soak the Onion: To help the flour mixture stick, soak the cut onion in cold water for about 10-15 minutes. This step is optional but can help the layers open up more easily while baking.
Make the Coating
- Prepare the Dry Ingredients: In a shallow bowl, whisk together the flour, paprika, garlic powder, salt, black pepper, and cayenne pepper (if using). This will be your dry coating.
- Make the Wet Mix: In another bowl, whisk together the buttermilk (or regular milk) and egg. This will help the flour mixture stick to the onion.
Coat the Onion
- Coat the Onion: Carefully dip the onion into the wet mixture, making sure to coat the inside layers well. Then, gently dip it into the dry flour mixture, ensuring that all the layers are well coated. You can repeat the process if needed for extra crunch.
Bake the Onion
- Prepare the Baking Sheet: Place a rack on a baking sheet, and lightly grease it with olive oil or cooking spray. This will allow the air to circulate around the onion, helping it crisp up as it bakes.
- Place the Onion on the Rack: Place the coated onion on the rack, root side down. Lightly spray the top with olive oil or cooking spray.
- Bake: Bake the onion at 400°F (200°C) for 20-25 minutes, or until it’s golden and crispy. Check occasionally to make sure the layers aren’t burning. If the onion isn’t crispy enough, you can broil it for an additional 2-3 minutes at the end.
Make the Dipping Sauce
- Prepare the Sauce: While the onion is baking, mix together all of the dipping sauce ingredients in a small bowl. Taste and adjust the seasoning, adding more horseradish or Worcestershire sauce if desired. Chill the sauce in the fridge while the onion bakes.
Serve and Enjoy
- Serve: Once the onion is golden and crispy, remove it from the oven and allow it to cool for a minute or two. Serve it on a platter with the dipping sauce on the side.
- Prep Time: 15 min.
- Cook Time: 25 min.
Nutrition
- Serving Size: 4-6 servings
- Calories: 250 kcal
Conclusion
This Easy Blooming Onion recipe is a game-changer, offering all the crispy, flavorful goodness of a blooming onion without the hassle of deep frying. With a crispy golden crust and tender onion layers inside, it’s the perfect appetizer to serve at any gathering. The best part? You can make it at home with minimal effort, so you get the restaurant-style experience in the comfort of your own kitchen.
Whether you’re hosting a party, looking for a fun snack, or just craving something savory, this Easy Blooming Onion is guaranteed to be a hit. The seasoning gives it the perfect balance of flavor, and the dipping sauce adds that extra punch. It’s a crowd-pleaser for sure!
So, what are you waiting for? Grab an Easy Blooming Onion, get your ingredients ready, and whip up this crispy delight. I promise it will disappear fast! And remember, don’t forget to snap a photo and tag me on social media—I love seeing your delicious creations! Enjoy!

