Introduction
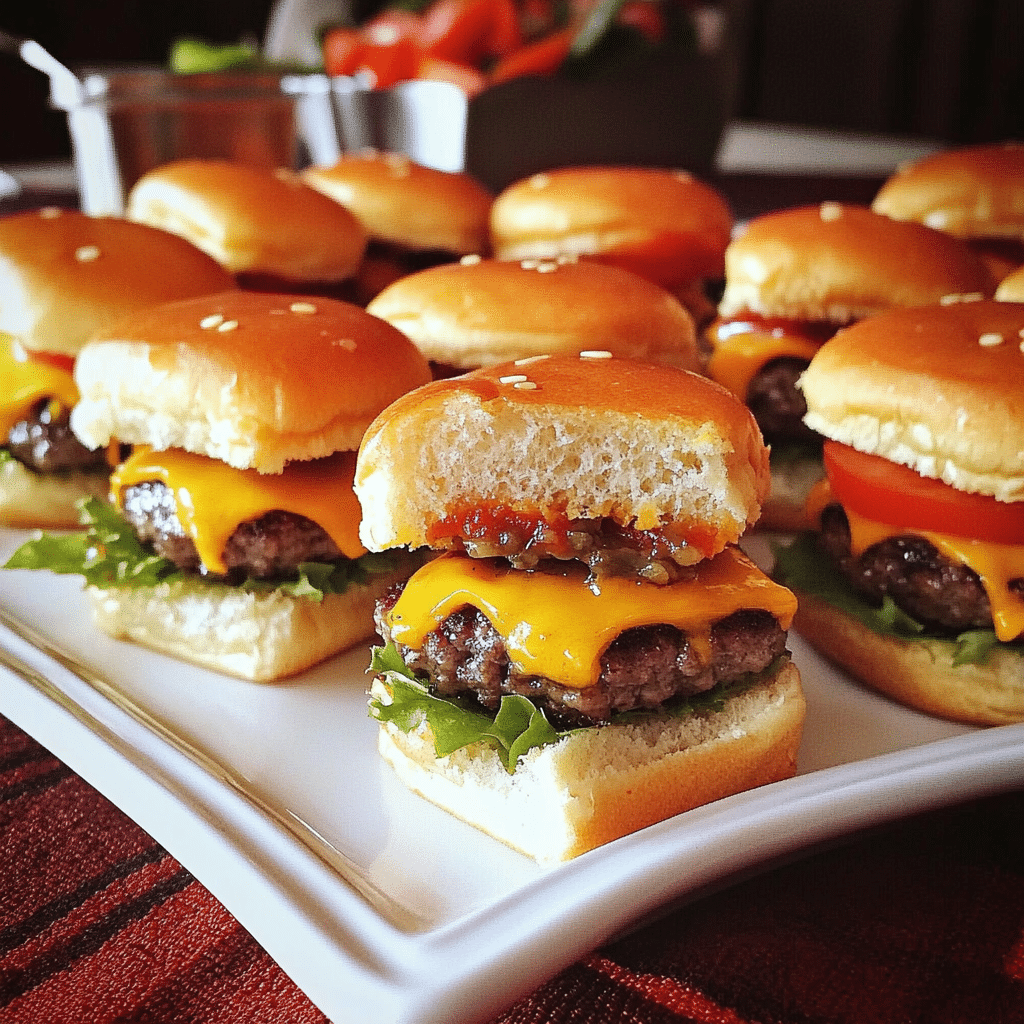
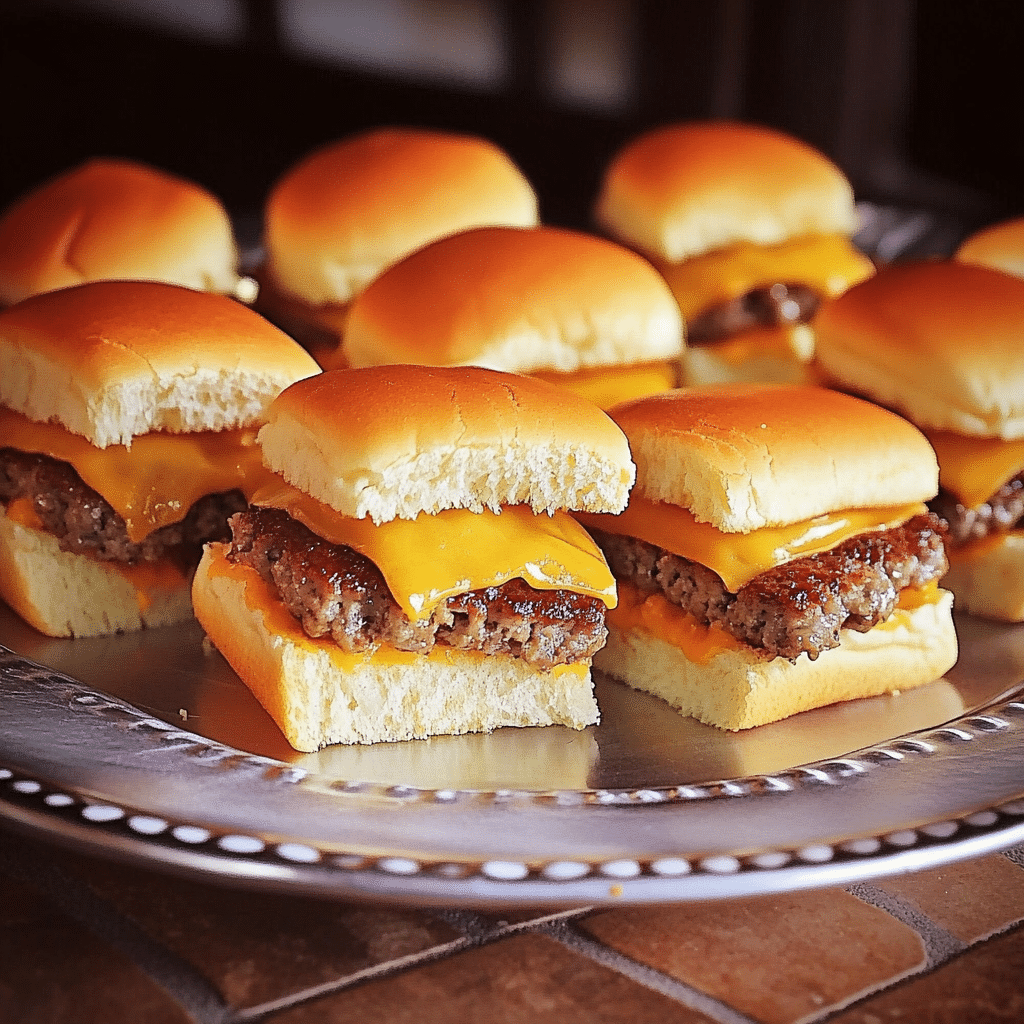
Craving something quick, fun, and absolutely delicious? Easy Cheeseburger Sliders are the perfect solution! These bite-sized burgers pack all the flavor of a classic cheeseburger but in a compact, slider-sized package. Whether you’re planning a weeknight dinner, hosting a family gathering, or preparing for game day, these sliders are sure to satisfy everyone’s taste buds. With their savory beef patties, melted cheese, and soft, pillowy buns, these sliders are a hit for any occasion. Plus, they’re simple to make, and you can easily customize them with your favorite toppings and sauces. If you’ve ever wanted a mini version of a classic cheeseburger, look no further – these sliders are sure to become your go-to recipe.
Why You’ll Love This Recipe
Here are just a few reasons why you’ll absolutely love making and eating Easy Cheeseburger Sliders:
- Bite-Sized Goodness: Perfect for serving as appetizers, snacks, or a main dish.
- Family-Friendly: Even the pickiest eaters will devour these mini burgers.
- Quick and Easy: Ready in under 30 minutes, these sliders are ideal for busy nights.
- Customizable: Swap out the ingredients to fit your family’s preferences, from different cheeses to toppings.
- Perfect for Parties: These sliders are easy to serve and perfect for sharing with guests.
- Kid-Friendly: With their small size, they’re great for kids, and they’ll love getting to add their own toppings.
- Affordable: An inexpensive meal option that doesn’t skimp on flavor.
- Great for Meal Prep: These sliders are easy to store and reheat, making them perfect for meal prep.
- Mess-Free: The slider buns are easy to hold, making them a cleaner option compared to traditional burgers.
Preparation Time and Cook Time
- Total Time: 30 minutes
- Preparation Time: 10 minutes
- Cook Time: 20 minutes
- Servings: 12 sliders
- Calories per slider: Approximately 250-300 calories
- Key Nutrients: Protein: 12g, Carbohydrates: 15g, Fat: 18g
Ingredients
To make Easy Cheeseburger Sliders, gather these ingredients:
For the Sliders:
- 1 lb ground beef (80% lean)
- 12 slider buns (or dinner rolls)
- 6 slices of American cheese (or your favorite cheese)
- Salt and pepper to taste
- 1 tablespoon Worcestershire sauce (optional)
For the Toppings:
- 1 small onion, sliced thinly
- 1 tomato, sliced
- Pickles (sliced)
- Lettuce leaves (optional)
- Ketchup and mustard (optional)
Ingredient Highlights
- Ground Beef: The base for these sliders, bringing juicy flavor to each bite.
- Cheese: American cheese melts beautifully, but feel free to swap for cheddar, Swiss, or any of your favorites.
- Slider Buns: Choose soft, slightly sweet slider buns for the best contrast to the savory beef.
- Toppings: Customize with whatever you love on a classic burger—whether it’s onions, lettuce, pickles, or your favorite condiments.
Step-by-Step Instructions
Creating your Easy Cheeseburger Sliders is a breeze. Just follow these steps:
Prepare the Patties
- Preheat Your Oven: Preheat your oven to 350°F (175°C). Line a baking sheet with parchment paper or lightly grease a baking dish.
- Form the Patties: In a bowl, mix the ground beef with a pinch of salt, pepper, and Worcestershire sauce. Form the mixture into 12 small, even patties. You want them to be slightly smaller than the slider buns since they’ll shrink a bit during cooking.
- Cook the Patties: Heat a skillet over medium heat and cook the patties for about 3-4 minutes per side, until they’re browned and cooked through. If you prefer your beef a bit more well-done, cook for an additional minute or two.
- Melt the Cheese: Place a slice of cheese on each patty during the last minute of cooking, covering the pan with a lid to help the cheese melt.
Assemble the Sliders
- Prepare the Buns: While the patties are cooking, slice your slider buns in half. Optionally, you can toast the buns lightly in the same skillet to add a bit of crunch and flavor.
- Assemble the Sliders: Place each cooked patty onto the bottom half of the buns. Top with your favorite toppings—sliced onions, tomatoes, lettuce, pickles, and condiments like ketchup or mustard.
- Finish and Serve: Add the top bun to each slider and serve immediately while they’re warm and cheesy.
How to Serve
These Easy Cheeseburger Sliders are incredibly versatile and can be served in a variety of ways:
- Party Platter: Serve them on a large platter at your next gathering or BBQ, where guests can grab a slider as a snack or appetizer.
- Mini Burgers for Kids: Let the kids have their own mini burgers, customizing each slider with their preferred toppings.
- Game Day Treat: Perfect for serving during game day, these sliders are easy to hold and even easier to eat.
- With Fries or Chips: Serve alongside classic fries or crunchy potato chips for the ultimate comfort meal.
- Slider Bar: Set up a DIY slider bar with a variety of toppings, so guests can build their own customized sliders.
- Meal Prep: Make a batch of sliders, store them in an airtight container, and reheat them throughout the week for a quick lunch or dinner.
Additional Tips
Here are some additional tips to elevate your Easy Cheeseburger Sliders:
- Use Lean Beef: For a slightly healthier option, choose lean ground beef or ground turkey for your patties.
- Add Spice: If you like a little heat, throw in a pinch of red pepper flakes, jalapeños, or a spicy sauce to your patties.
- Cheese Variations: Experiment with different cheeses, like sharp cheddar, pepper jack, or even blue cheese for a unique twist.
- Make It a Slider Bar: Offer a variety of toppings, like sautéed mushrooms, bacon, or even fried eggs, to give everyone a chance to build their perfect burger.
- Fresh Buns: Opt for freshly baked buns for a soft, pillowy texture that complements the juicy beef patty.
- Skip the Grill: If you don’t have access to a grill, cooking the patties in a skillet on the stove or in the oven works just as well.
- Batch Cooking: If you’re cooking for a crowd, double or triple the recipe to make enough sliders for everyone.
- Reheat for Later: These sliders are easy to reheat in the microwave or oven, making them perfect for leftovers or meal prep.
- Caramelized Onions: If you have time, sauté onions in a bit of butter for a sweet, savory topping that takes these sliders to the next level.
Recipe Variations
Add some creativity to your sliders with these fun variations:
- Bacon Cheeseburger Sliders: Top each patty with crispy bacon for an added crunch and flavor.
- Veggie Sliders: Make a vegetarian version using veggie patties or even portobello mushrooms as the “patty.”
- Sliders with a Kick: Add jalapeños or a spicy sauce to the patties or topping for a little extra heat.
- BBQ Sliders: Swap the ketchup for BBQ sauce and add a slice of pickled red onion or coleslaw for a smoky twist.
- Cheeseburger Sliders with Fried Egg: Add a fried egg on top of each patty for a breakfast-inspired slider.
- Mini Turkey Sliders: Swap the ground beef for ground turkey for a lighter version of the slider.
Freezing and Storage
To keep your Easy Cheeseburger Sliders fresh, follow these storage tips:
- Storing Leftovers: Place any leftover sliders in an airtight container and refrigerate for up to 3 days.
- Freezing Sliders: These sliders can be frozen before or after cooking. For uncooked sliders, freeze them individually on a baking sheet, then transfer to a freezer-safe bag. For cooked sliders, wrap them tightly in foil or plastic wrap and freeze for up to 3 months.
- Reheating: To reheat, thaw frozen sliders overnight in the fridge and warm in the oven or microwave until heated through.
Special Equipment
You may need the following tools to make your sliders:
- Skillet or Griddle: For cooking the patties.
- Baking Sheet: If you prefer baking the patties in the oven.
- Knife: For slicing the buns and toppings.
- Spatula: To flip the patties without breaking them.
- Serving Platter: For presenting your sliders to guests.
FAQ Section
Here are answers to some common questions about Easy Cheeseburger Sliders:
- Can I use ground turkey instead of beef?
Yes, ground turkey can be used for a leaner option, though it may require some additional seasoning to maintain flavor. - How do I keep sliders from getting soggy?
Toast the buns lightly, and consider adding condiments on top of the patty rather than under it to prevent the buns from getting soggy. - Can I make these sliders in advance?
You can make the patties and store them in the fridge for up to 24 hours before cooking. Once cooked, the sliders can be stored in the fridge for 2-3 days. - How do I make these sliders spicy?
Add chopped jalapeños to the beef mixture or use spicy condiments like sriracha or spicy mustard.

Easy Cheeseburger Sliders
- Total Time: 30 min.
Ingredients
For the Sliders:
- 1 lb ground beef (80% lean)
- 12 slider buns (or dinner rolls)
- 6 slices of American cheese (or your favorite cheese)
- Salt and pepper to taste
- 1 tablespoon Worcestershire sauce (optional)
For the Toppings:
- 1 small onion, sliced thinly
- 1 tomato, sliced
- Pickles (sliced)
- Lettuce leaves (optional)
- Ketchup and mustard (optional)
Instructions
Prepare the Patties
- Preheat Your Oven: Preheat your oven to 350°F (175°C). Line a baking sheet with parchment paper or lightly grease a baking dish.
- Form the Patties: In a bowl, mix the ground beef with a pinch of salt, pepper, and Worcestershire sauce. Form the mixture into 12 small, even patties. You want them to be slightly smaller than the slider buns since they’ll shrink a bit during cooking.
- Cook the Patties: Heat a skillet over medium heat and cook the patties for about 3-4 minutes per side, until they’re browned and cooked through. If you prefer your beef a bit more well-done, cook for an additional minute or two.
- Melt the Cheese: Place a slice of cheese on each patty during the last minute of cooking, covering the pan with a lid to help the cheese melt.
Assemble the Sliders
- Prepare the Buns: While the patties are cooking, slice your slider buns in half. Optionally, you can toast the buns lightly in the same skillet to add a bit of crunch and flavor.
- Assemble the Sliders: Place each cooked patty onto the bottom half of the buns. Top with your favorite toppings—sliced onions, tomatoes, lettuce, pickles, and condiments like ketchup or mustard.
- Finish and Serve: Add the top bun to each slider and serve immediately while they’re warm and cheesy.
- Prep Time: 10 min.
- Cook Time: 20 min.
Nutrition
- Serving Size: 12 sliders
- Calories: 250 kcal – 300 kcal
- Fat: 18g
- Carbohydrates: 15g
- Protein: 12g
Conclusion
These Easy Cheeseburger Sliders are more than just a meal—they’re a fun, versatile, and quick way to enjoy all the flavors of a classic cheeseburger in bite-sized portions. Perfect for gatherings, busy nights, or simply satisfying your burger cravings, this recipe is sure to become a favorite in your rotation. Don’t forget to snap a photo and tag me on social media—I love seeing your delicious creations! Enjoy!

