Introduction
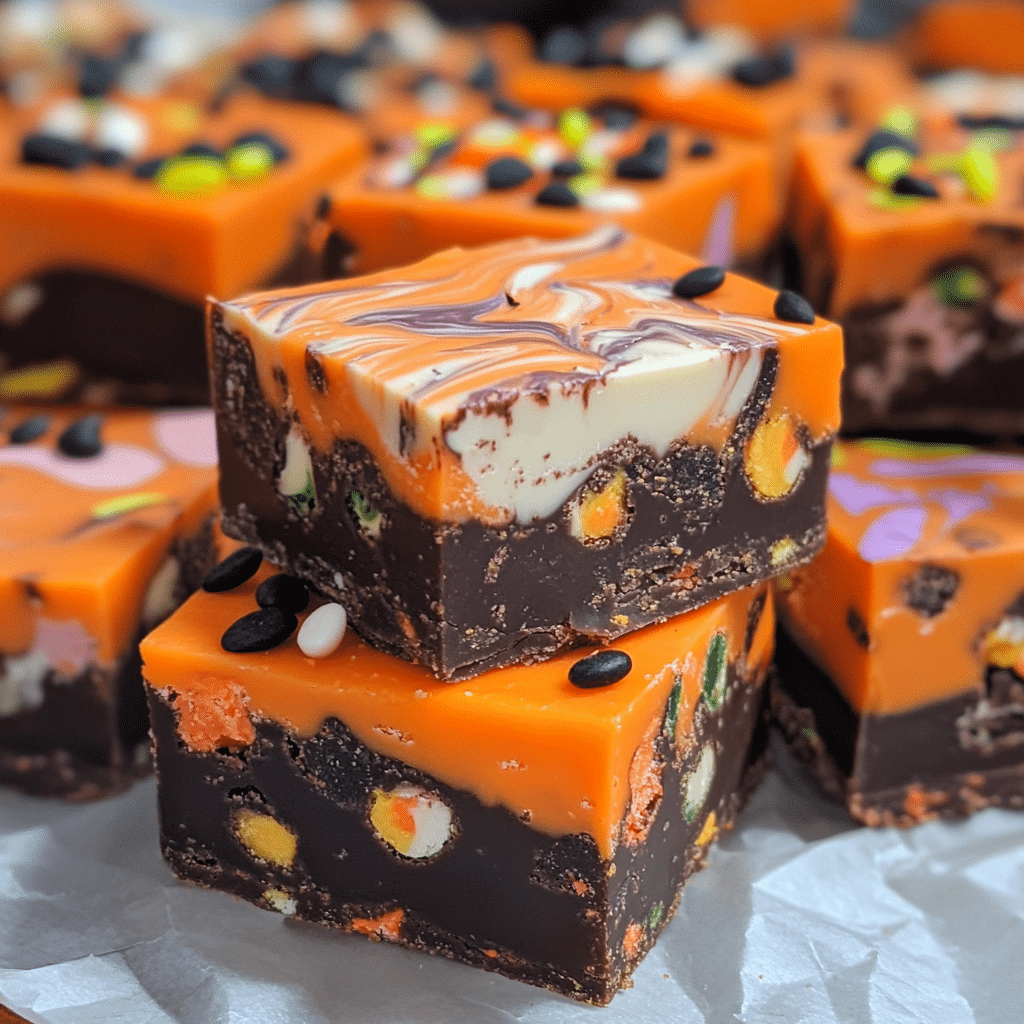
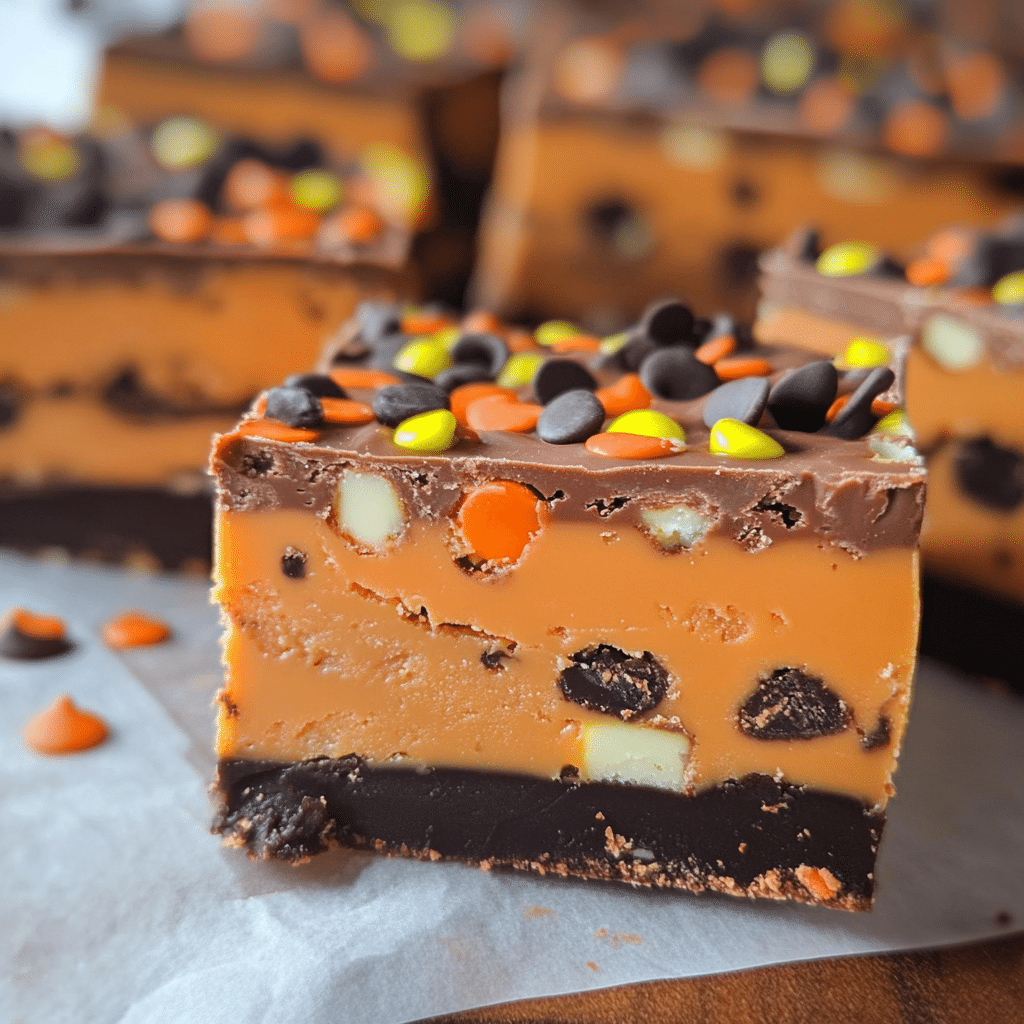
Hey there, friend! If you’re looking for a fun and festive treat to celebrate Halloween, you’ve got to try making this Halloween Fudge. Trust me, it’s a total crowd-pleaser and super simple, even if you’re just getting your feet wet in the kitchen. I mean, who doesn’t love a rich and creamy fudge that’s as colorful as a Halloween costume?
With just a handful of ingredients and some quick steps, I ended up with a batch of fudge that vanished faster than you could say “Boo!” The best part? You can customize this fudge however you like! Whether you want to add festive sprinkles, mix in some candy corn, or even swirl in some spooky colors, the options are endless.
Why You’ll Love This Recipe
Here are several reasons to fall in love with Halloween Fudge:
- Fun and Colorful: The vibrant colors make it a festive addition to any Halloween spread.
- Easy to Make: With minimal prep and no baking required, it’s perfect for busy schedules.
- Customizable Flavors: Feel free to experiment with different flavors and toppings.
- Perfect for Sharing: Cut into bite-sized pieces, it’s great for parties or as homemade gifts.
- Kid-Friendly Activity: Get the kids involved in mixing and decorating for some family fun.
- Rich and Creamy: The combination of sweetened condensed milk and chocolate creates a luscious texture.
- Quick to Assemble: Prepare it in under an hour, making it a last-minute treat option.
- No Special Equipment Needed: You only need a few basic kitchen tools to get started.
- A Showstopper Dessert: Impress your guests with this eye-catching treat.
- Great for Any Skill Level: Simple enough for beginners and fun for experienced bakers.
Preparation Time and Cook Time
- Total Time: 1 hour
- Preparation Time: 20 minutes
- Cook Time: 15 minutes
- Cooling Time: 25 minutes
- Servings: 24 pieces
- Calories per piece: Approximately 150 calories
- Key Nutrients: Fiber: 1g, Fat: 8g, Carbohydrates: 18g, Protein: 1g
Ingredients
Gather the following ingredients to create your Halloween Fudge:
For the Fudge:
- 2 cups semi-sweet chocolate chips
- 1 cup white chocolate chips
- 1 can (14 oz) sweetened condensed milk
- 1 teaspoon vanilla extract
- Food coloring (orange, purple, or green)
For Toppings:
- Halloween sprinkles
- Crushed candy corn
- Mini chocolate chips
- Chopped nuts (optional)
Ingredient Highlights
- Semi-Sweet Chocolate Chips: The base of the fudge, providing rich chocolate flavor.
- White Chocolate Chips: Adds creaminess and can be tinted for festive colors.
- Sweetened Condensed Milk: Makes the fudge smooth and sweet.
- Food Coloring: Brightens up the fudge and adds a spooky touch.
Step-by-Step Instructions
Follow these steps to create your Halloween Fudge:
Prepare the Fudge Base
- Melt Chocolate: In a medium saucepan over low heat, combine semi-sweet chocolate chips and 1/2 cup of sweetened condensed milk. Stir until melted and smooth.
- Add Vanilla: Remove from heat and stir in the vanilla extract. Pour the mixture into a greased 9×9-inch baking dish, spreading it evenly.
Make the Second Layer
- Melt White Chocolate: In the same saucepan, combine white chocolate chips and the remaining sweetened condensed milk. Stir over low heat until melted and smooth.
- Add Food Coloring: Divide the mixture into bowls if using multiple colors. Add food coloring to achieve your desired colors and stir until evenly colored.
- Layer the Fudge: Pour the colored white chocolate over the chocolate layer in the baking dish. Use a spatula to spread it evenly.
Add Toppings
- Sprinkle Toppings: Before the fudge sets, add your favorite Halloween toppings, such as sprinkles, candy corn, or mini chocolate chips.
Cool and Cut
- Set the Fudge: Allow the fudge to cool at room temperature for about 25 minutes. For quicker cooling, place it in the refrigerator until firm.
- Slice and Serve: Once set, cut into squares and serve or package for gifts.
How to Serve
Here are some fun serving ideas for your Halloween Fudge:
- On a Festive Platter: Arrange pieces on a Halloween-themed serving platter for a colorful display.
- With Halloween Treats: Serve alongside other Halloween goodies for a dessert table.
- Individual Treat Bags: Package fudge pieces in clear bags tied with Halloween ribbons for party favors.
- Fun Presentation: Use Halloween-themed cupcake liners for individual servings.
- Create a Fudge Bar: Set up a station with different fudge flavors and toppings for guests to customize their own.
- As Dessert Shooters: Layer fudge pieces in small cups with whipped cream for an elegant treat.
- Top with Whipped Cream: Serve pieces topped with whipped cream and extra sprinkles for a festive touch.
- Pair with Drinks: Enjoy with warm apple cider or Halloween-themed beverages for a cozy dessert experience.
- Halloween Movie Night: Set out a tray of fudge for a sweet treat while watching spooky films.
- Engage Guests: Let guests decorate their own fudge pieces with toppings for a fun activity.
Additional Tips
Maximize your enjoyment of Halloween Fudge with these helpful tips:
- Use Quality Chocolate: Opt for good-quality chocolate chips for the best flavor and texture.
- Experiment with Flavors: Try adding extracts like peppermint or almond for a unique twist.
- Chill for Clean Cuts: For clean slices, chill the fudge before cutting it into squares.
- Store Properly: Keep fudge in an airtight container at room temperature for up to a week.
- Freeze for Later: Wrap fudge in plastic wrap and store in the freezer for up to 3 months.
- Custom Molds: Use Halloween-themed silicone molds for fun shapes instead of cutting into squares.
- Decorate with Drizzle: Drizzle melted chocolate over the top for an extra special touch.
- Use Leftovers Wisely: Crumble leftover fudge over ice cream for a delicious topping.
- Adjust Sweetness: Feel free to reduce the amount of sweetened condensed milk for a less sweet fudge.
- Create a Fudge Gift Box: Package fudge in a decorative box for a thoughtful homemade gift.
Recipe Variations
Consider these creative variations for your Halloween Fudge:
- Pumpkin Spice Fudge: Add pumpkin spice seasoning to the white chocolate layer for a fall twist.
- Nutty Fudge: Stir in chopped nuts or nut butter for added texture.
- Swirled Fudge: Swirl the melted chocolate and white chocolate together for a marbled effect.
- Caramel Drizzle: Drizzle caramel sauce over the fudge before it sets for a sweet addition.
- Vegan Option: Use dairy-free chocolate chips and coconut milk for a vegan version.
- Halloween Colors: Use colored candy melts instead of white chocolate for vibrant fudge.
- Layered Fudge: Create additional layers with different flavors or colors for a multi-layered effect.
- Fruity Fudge: Add dried fruits or fruit-flavored candies for a chewy texture.
- Mint Chocolate: Incorporate mint extract into the chocolate for a refreshing flavor.
- No-Bake Cookies: Use the fudge as a filling for no-bake cookie sandwiches.
Freezing and Storage
Ensure proper storage to maintain the quality of your Halloween Fudge:
- Storage: Keep fudge in an airtight container at room temperature for up to 1 week.
- Refrigerate for Freshness: In warmer climates, store in the refrigerator for added freshness.
- Freezing: Wrap individual pieces in plastic wrap and store in a freezer-safe bag for up to 3 months.
- Thawing: Allow frozen fudge to sit at room temperature for a few minutes before serving.
Special Equipment
You may need these kitchen tools to create your Halloween Fudge:
- Medium Saucepan: For melting the chocolate.
- Spatula: To spread the fudge mixture evenly.
- 9×9-inch Baking Dish: To set the fudge in.
- Parchment Paper: For easy removal of the fudge from the dish.
- Knife: For cutting the fudge into squares.
- Measuring Cups: For accurate ingredient measurements.
- Candy Thermometer (optional): For checking the temperature of the melted chocolate.
FAQ Section
Here are answers to common questions about Halloween Fudge:
- Can I use milk chocolate instead of semi-sweet?
Yes, feel free to use milk chocolate for a sweeter fudge. - How long can I store the fudge?
It can be stored at room temperature for up to a week or in the refrigerator for a longer shelf life. - Can I freeze this fudge?
Yes, it freezes well when wrapped properly. - What if I can’t find sweetened condensed milk?
You can make your own by simmering milk and sugar together until thickened. - Can I add nuts?
Absolutely! Chopped nuts can be stirred into the fudge for added texture. - How can I make it gluten-free?
This recipe is naturally gluten-free, but always check your ingredient labels. - Can I use different flavorings?
Yes, try using flavored extracts to create unique varieties of fudge. - What should I do if the fudge doesn’t set?
If the fudge doesn’t set, you can reheat it gently and add more chocolate or condensed milk. - Can I use flavored chocolate?
Yes, flavored chocolate can add an extra twist to your fudge. - What are some good toppings?
Try sprinkles, crushed cookies, or chocolate drizzle for decoration.
Halloween Fudge
- Total Time: 1 hour
Ingredients
For the Fudge:
- 2 cups semi-sweet chocolate chips
- 1 cup white chocolate chips
- 1 can (14 oz) sweetened condensed milk
- 1 teaspoon vanilla extract
- Food coloring (orange, purple, or green)
For Toppings:
- Halloween sprinkles
- Crushed candy corn
- Mini chocolate chips
- Chopped nuts (optional)
Instructions
Prepare the Fudge Base
- Melt Chocolate: In a medium saucepan over low heat, combine semi-sweet chocolate chips and 1/2 cup of sweetened condensed milk. Stir until melted and smooth.
- Add Vanilla: Remove from heat and stir in the vanilla extract. Pour the mixture into a greased 9×9-inch baking dish, spreading it evenly.
Make the Second Layer
- Melt White Chocolate: In the same saucepan, combine white chocolate chips and the remaining sweetened condensed milk. Stir over low heat until melted and smooth.
- Add Food Coloring: Divide the mixture into bowls if using multiple colors. Add food coloring to achieve your desired colors and stir until evenly colored.
- Layer the Fudge: Pour the colored white chocolate over the chocolate layer in the baking dish. Use a spatula to spread it evenly.
Add Toppings
- Sprinkle Toppings: Before the fudge sets, add your favorite Halloween toppings, such as sprinkles, candy corn, or mini chocolate chips.
Cool and Cut
- Set the Fudge: Allow the fudge to cool at room temperature for about 25 minutes. For quicker cooling, place it in the refrigerator until firm.
- Slice and Serve: Once set, cut into squares and serve or package for gifts.
- Prep Time: 15 min.
- Cook Time: 20 min.
Nutrition
- Serving Size: 24 pieces
- Calories: 150 kcal
- Fat: 8g
- Carbohydrates: 18g
- Fiber: 1g
- Protein: 1g
Conclusion
I can’t wait for you to dive into making this Halloween Fudge! It’s such a fun and festive way to celebrate the season, and I promise it’ll be a hit with everyone. Whether you’re sharing it with family during a spooky movie night or gifting it to friends, this fudge brings a delightful touch to any gathering.
As you mix, melt, and decorate, take a moment to enjoy the creative process. Cooking together is one of those simple joys that can turn a regular day into something special. I’d love to hear how your fudge turns out, so please leave a comment and share your thoughts!
And don’t forget, I want to see your beautiful fudge creations! Snap a photo and tag me on Instagram—I love seeing your delicious results and how you put your own spin on this recipe. So go ahead, get into the Halloween spirit, and let your imagination run wild! Happy Halloween, and enjoy all the treats!

