Introduction
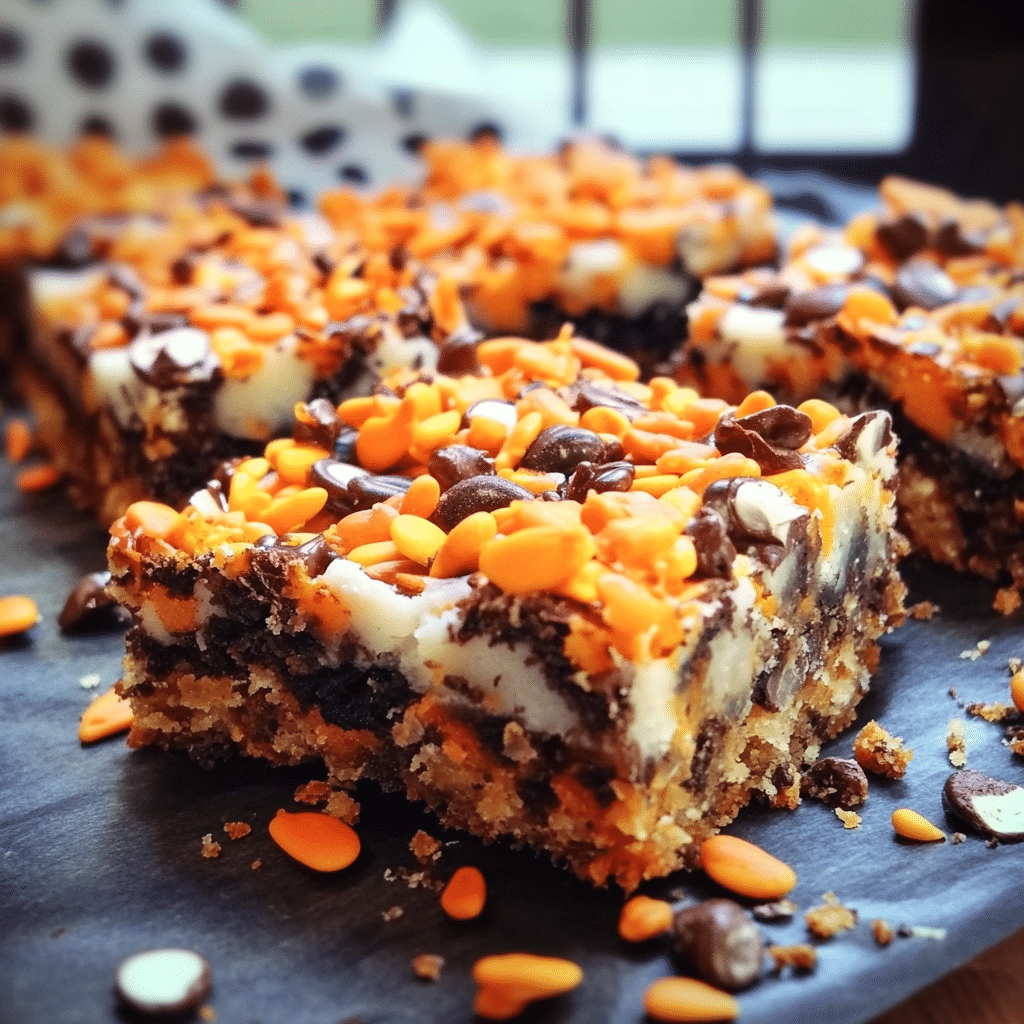
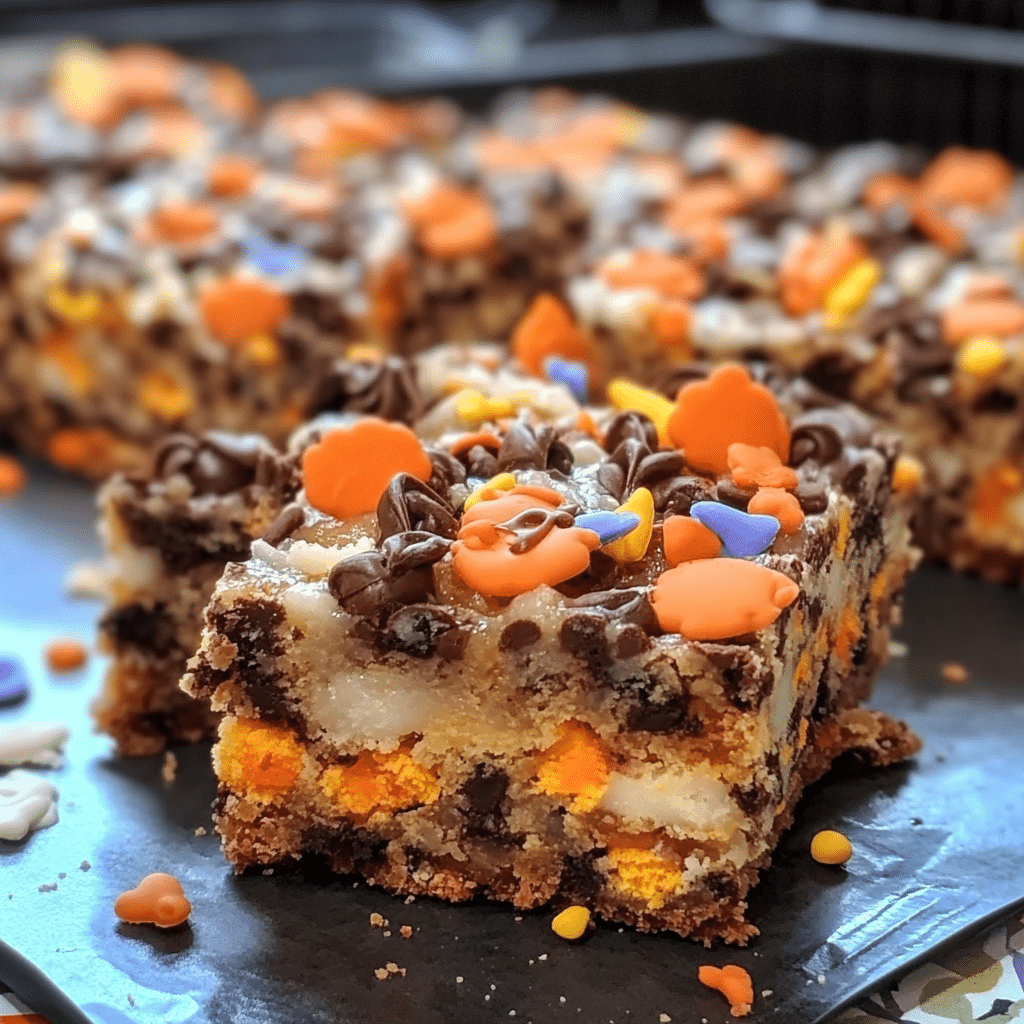
Halloween Magic Cookie Bars are one of those treats that just scream “party time!” Every year, when Halloween rolls around, my kitchen transforms into a candy-strewn wonderland as I whip up a batch of these sweet, gooey bars. They’re a perfect mix of nostalgia and indulgence, reminding me of childhood trick-or-treat hauls but with a grown-up twist of buttery graham crust and decadent layers of chocolate, butterscotch, and coconut.
What I love most about these bars is how easy they are to make. You don’t need any fancy techniques or special equipment—just layer everything in a pan, pop it in the oven, and let the magic happen. And if you’re new to baking, don’t worry! These bars are practically foolproof. They’re all about layering and baking, so as long as you can sprinkle and pour, you’re all set. Plus, there’s something so satisfying about watching those layers bake up into a chewy, delicious treat that’s always a hit with family and friends.
The real fun comes with the toppings. You can go wild with any Halloween candies you love—M&Ms, peanut butter cups, candy corn, or even pretzel pieces for a salty twist. It’s a great way to use up any leftover candy (if there’s any!) after Halloween night. These bars are not only perfect for a spooky gathering but also ideal for cozy nights at home when you’re craving something sweet and festive. So, gather up your candy stash and let’s make some Halloween magic!
Why You’ll Love This Recipe
Here’s why Halloween Magic Cookie Bars are a must-try:
- Festive and Fun: A colorful and playful dessert ideal for Halloween gatherings.
- Kid-Friendly: Perfect for kids to help decorate with their favorite candies.
- Simple to Make: Just layer, bake, and enjoy—no need for fancy techniques.
- Perfectly Chewy and Crunchy: A mix of chewy coconut and crunchy candies gives these bars a delightful texture.
- Customizable: Use any combination of candy and toppings you prefer.
- Great for Parties: Easy to transport and serve at Halloween events or potlucks.
- Sweet and Indulgent: Each bite is loaded with rich, gooey goodness!
- Make-Ahead Friendly: These bars stay fresh for days, so you can bake them in advance.
- Crowd-Pleaser: Loved by kids and adults alike, they’re a hit for any Halloween event.
- No Special Equipment Needed: Easy to make with basic kitchen tools.
Preparation Time and Cook Time
- Total Time: 45 minutes
- Preparation Time: 10 minutes
- Cook Time: 35 minutes
- Servings: 16 bars
- Calories per bar: Approximately 220 calories
- Key Nutrients: Fiber: 2g, Fat: 12g, Carbohydrates: 28g, Protein: 3g
Ingredients
Gather the following ingredients to create your Halloween Magic Cookie Bars:
For the Bars:
- 1 1/2 cups graham cracker crumbs
- 1/2 cup unsalted butter, melted
- 1 cup sweetened shredded coconut
- 1 cup semi-sweet chocolate chips
- 1 cup butterscotch chips
- 1 can (14 oz) sweetened condensed milk
- 1 cup assorted Halloween candies (M&M’s, Reese’s Pieces, candy corn, etc.)
Ingredient Highlights
- Graham Cracker Crust: Provides a buttery, crunchy base for the bars.
- Sweetened Condensed Milk: Adds sweetness and helps create the gooey texture.
- Halloween Candy: Use your favorites for a fun and festive topping.
Step-by-Step Instructions
Follow these steps to create your Halloween Magic Cookie Bars:
Prepare the Base
- Preheat Oven: Preheat your oven to 350°F (175°C). Grease or line a 9×13-inch baking dish with parchment paper.
- Make the Crust: In a bowl, combine the graham cracker crumbs and melted butter. Mix until well combined, then press evenly into the bottom of the prepared dish.
Layer the Toppings
- Add Toppings: Sprinkle the coconut, chocolate chips, and butterscotch chips evenly over the crust.
- Pour Sweetened Condensed Milk: Drizzle the sweetened condensed milk evenly over the top, covering the layers below.
- Add Candy: Sprinkle your choice of Halloween candies on top.
Bake and Cool
- Bake: Bake in the preheated oven for 25-30 minutes, or until the edges are golden brown.
- Cool and Cut: Allow the bars to cool completely in the dish before cutting into squares.
How to Serve
Here are some fun serving ideas for your Halloween Magic Cookie Bars:
- Serve on a Festive Platter: Arrange the bars on a Halloween-themed tray.
- Wrap as Treats: Place individual bars in clear bags tied with Halloween ribbon for a fun gift.
- Pair with Drinks: Serve alongside hot chocolate or apple cider for a cozy treat.
- Use as Party Favors: Wrap bars in decorative bags for guests to take home.
- Serve with Ice Cream: Add a scoop of vanilla ice cream for an extra indulgent dessert.
- Make a Dessert Table: Place bars with other Halloween-themed treats for a spooky dessert spread.
- Get Creative: Use themed cupcake liners to serve individual bars.
- Halloween Buffet: Add them to a Halloween buffet for an easy-to-grab treat.
- Potluck Perfect: Transport in a container for potlucks or gatherings.
- Movie Night Snack: Enjoy with a Halloween movie for a themed snack.
Additional Tips
Maximize your enjoyment of Halloween Magic Cookie Bars with these helpful tips:
- Experiment with Flavors: Feel free to mix and match your favorite candies and toppings for variety.
- Use Quality Ingredients: Higher quality chocolate chips and butter will enhance the flavor of the bars.
- Check for Doneness: The bars are ready when the edges are golden; they’ll firm up as they cool.
- Store Properly: Keep leftovers in an airtight container at room temperature for up to 5 days.
- Freeze for Later: You can freeze uncut bars for up to 2 months; just wrap them tightly.
- Add a Drizzle: For extra flair, drizzle melted chocolate over the top before serving.
- Customize for Allergies: Substitute ingredients as needed to accommodate dietary restrictions.
- Chill Before Cutting: For cleaner slices, refrigerate the bars for about an hour before cutting.
- Serve with Ice Cream: Pair warm bars with a scoop of vanilla ice cream for a decadent dessert.
- Engage Guests: Invite friends or family to help create their own unique bars with different toppings.
Recipe Variations
Consider these creative variations for your Halloween Magic Cookie Bars:
- Peanut Butter Twist: Add peanut butter chips or drizzle peanut butter on top.
- Caramel Swirl: Add caramel bits or drizzle caramel sauce over the top.
- S’mores Magic Bars: Add mini marshmallows and chocolate chunks for a s’mores-inspired version.
- Dark Chocolate Lovers: Use dark chocolate chips for a richer flavor.
- Gluten-Free: Use gluten-free graham crackers for a gluten-free version.
- Festive Sprinkles: Add Halloween-themed sprinkles on top for extra color.
- Spooky Additions: Use candy eyeballs or gummy worms for a fun twist.
- Salted Caramel: Add a sprinkle of sea salt on top after baking for a sweet-salty combo.
- Minty Twist: Add a handful of mint chocolate chips for a refreshing layer.
- Pumpkin Spice: Sprinkle a dash of pumpkin spice in the crust for a seasonal flavor.
Freezing and Storage
Ensure proper storage to maintain the quality of your Halloween Magic Cookie Bars:
- Storage: Keep bars in an airtight container at room temperature for up to 5 days.
- Refrigeration: Store in the fridge to keep them fresh longer, if desired.
- Freezing: Wrap each bar in plastic wrap, place in a freezer-safe bag, and freeze for up to 1 month.
- Thawing: Let bars thaw at room temperature before serving.
Special Equipment
You may need these kitchen tools to create your Halloween Magic Cookie Bars:
- 9×13-inch Baking Dish: For baking the bars.
- Mixing Bowl: For combining the graham cracker crust ingredients.
- Spatula: To spread the crust and toppings.
- Knife: For cutting the cooled bars.
- Measuring Cups: For accurate ingredient measurements.
FAQ Section
Here are answers to common questions about Halloween Magic Cookie Bars:
- Can I make these without coconut?
Yes, simply omit the coconut or replace it with chopped nuts for a crunchy texture. - Can I use homemade graham cracker crumbs?
Absolutely! Crush graham crackers in a food processor or with a rolling pin. - How do I keep the bars from sticking?
Lining the dish with parchment paper makes it easy to remove and cut the bars. - What other candies can I use?
Try adding mini chocolate bars, chopped Snickers, or other Halloween-themed candies. - Can I freeze the bars?
Yes, wrap individually and freeze for up to a month.
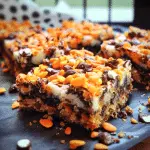
Halloween Magic Cookie Bars
- Total Time: 45 min.
Ingredients
For the Bars:
- 1 1/2 cups graham cracker crumbs
- 1/2 cup unsalted butter, melted
- 1 cup sweetened shredded coconut
- 1 cup semi-sweet chocolate chips
- 1 cup butterscotch chips
- 1 can (14 oz) sweetened condensed milk
- 1 cup assorted Halloween candies (M&M’s, Reese’s Pieces, candy corn, etc.)
Instructions
Prepare the Base
- Preheat Oven: Preheat your oven to 350°F (175°C). Grease or line a 9×13-inch baking dish with parchment paper.
- Make the Crust: In a bowl, combine the graham cracker crumbs and melted butter. Mix until well combined, then press evenly into the bottom of the prepared dish.
Layer the Toppings
- Add Toppings: Sprinkle the coconut, chocolate chips, and butterscotch chips evenly over the crust.
- Pour Sweetened Condensed Milk: Drizzle the sweetened condensed milk evenly over the top, covering the layers below.
- Add Candy: Sprinkle your choice of Halloween candies on top.
Bake and Cool
- Bake: Bake in the preheated oven for 25-30 minutes, or until the edges are golden brown.
- Cool and Cut: Allow the bars to cool completely in the dish before cutting into squares.
- Prep Time: 10 min.
- Cook Time: 35 min.
Nutrition
- Serving Size: 16 bars
- Calories: 220 kcal
- Fat: 12g
- Carbohydrates: 28g
- Fiber: 2g
- Protein: 3g
Conclusion
I can’t wait for you to dive into making these Halloween Magic Cookie Bars! They’re not just a treat; they’re an experience that brings the spirit of the season to life with their vibrant layers and ooey-gooey goodness. Perfect for any Halloween gathering, these bars are sure to delight kids and adults alike, making them a sweet centerpiece for your celebrations.
As you get ready to whip up your batch, I encourage you to have fun with the toppings! Choose your favorite candies and get creative with the colors and textures. Once you’ve made them, I’d love to hear how they turned out! Leave a comment below sharing your thoughts or any twists you added.
And don’t forget to snap some photos of your finished creation! I’d be thrilled to see your spooky masterpieces. Tag me on social media so we can celebrate your baking success together. Your delicious treats deserve to be shared, and I can’t wait to see what magic you create in your kitchen! Happy baking, and enjoy every bite of your Halloween treats!

