Introduction
Are you looking for a dessert that is both delicious and visually stunning? Look no further than the Japanese Cake Roll—a light, airy, and perfectly rolled cake that combines delicate sponge cake with creamy fillings. This dessert has been a staple in Japanese kitchens and is now beloved worldwide for its subtle sweetness and smooth texture. Whether you’re celebrating a special occasion or simply want to indulge in a sweet treat, the Japanese Cake Roll is guaranteed to impress.
This cake is not just about the flavor; it’s about the experience. From the soft, melt-in-your-mouth sponge to the rich and creamy filling, each bite of this dessert offers a symphony of textures and flavors. The best part? It’s surprisingly easy to make! With just a few ingredients and a bit of patience, you’ll be able to create this delightful roll in the comfort of your own kitchen. So, let’s dive into how you can make this beautiful, fluffy cake roll at home!
Why You’ll Love This Recipe
There’s so much to love about this Japanese Cake Roll. Here are some reasons why it should be your next dessert project:
- Light and Fluffy: The sponge cake is incredibly soft and light, making it a perfect base for any filling.
- Versatile Flavors: You can fill the cake with anything from whipped cream to fruit or even matcha for a Japanese twist.
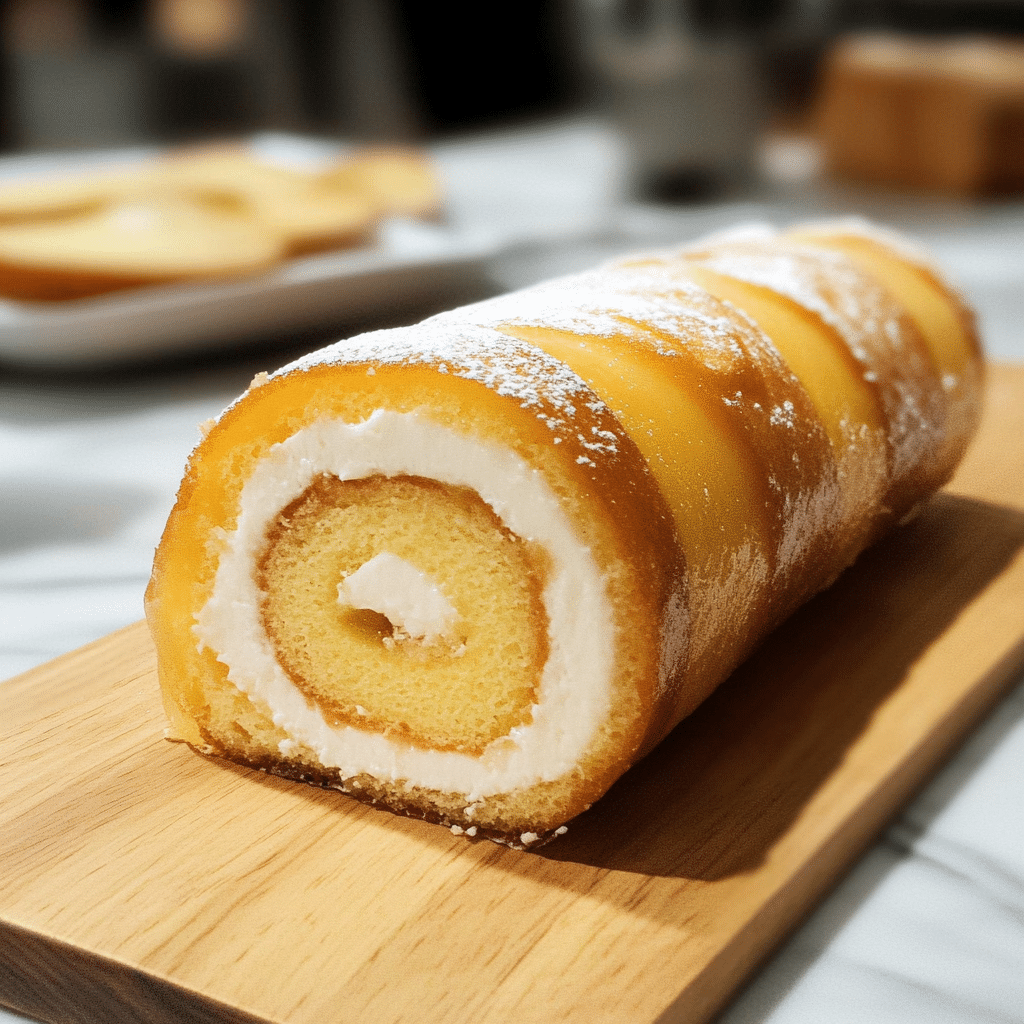
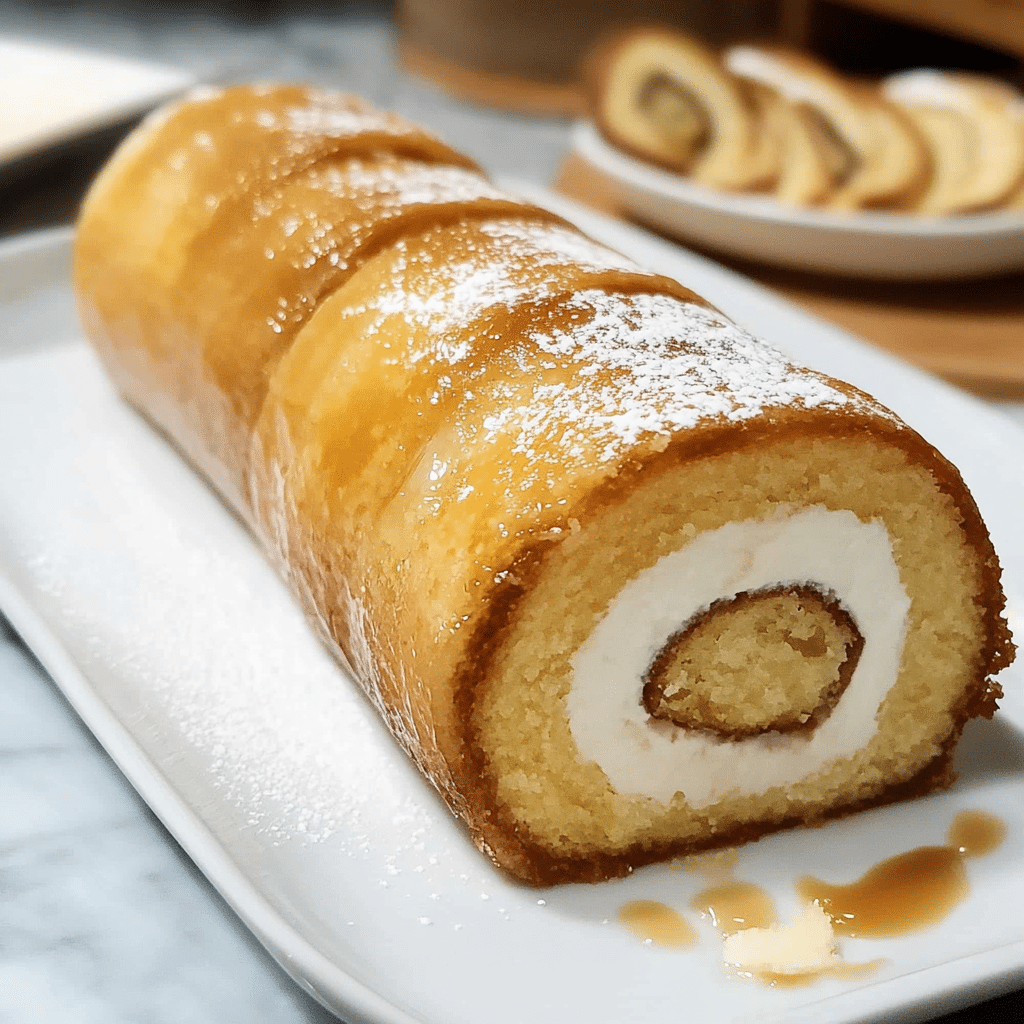
- Impressive Presentation: When you slice into the roll, the spiral of cream looks stunning, making it an impressive centerpiece for any dessert table.
- Easy to Customize: Feel free to play around with fillings like chocolate ganache, fresh berries, or even flavored whipped creams to make it your own.
- A Fun Baking Project: This recipe offers a fun opportunity to practice cake rolling, and the end result will make you feel like a pro.
- Perfect for Sharing: Slice it into neat rounds and serve at parties, gatherings, or family meals. Everyone will love this melt-in-your-mouth treat.
- Great for All Occasions: Whether it’s a casual family dinner, a special birthday, or a holiday gathering, this cake roll fits every occasion.
- Satisfying Yet Not Overwhelming: The cake’s light texture and moderate sweetness ensure it’s the perfect balance between indulgence and delicacy.
Preparation Time and Cook Time
- Total Time: 1 hour 15 minutes
- Preparation Time: 30 minutes
- Cook Time: 12 minutes
- Cooling Time: 30 minutes
- Servings: 8–10 slices
- Calories per slice: Approximately 180 calories
- Key Nutrients: Protein: 3g, Fat: 7g, Carbohydrates: 27g
Ingredients
To make your own Japanese Cake Roll, gather the following ingredients:
For the Sponge Cake:
- 4 large eggs, room temperature
- 1/2 cup (100g) granulated sugar
- 1/2 teaspoon vanilla extract
- 1/2 cup (60g) cake flour, sifted
- 1 tablespoon (15g) cornstarch
- 1/4 teaspoon baking powder
- 1/4 teaspoon salt
- 2 tablespoons (30g) unsalted butter, melted
- 1/4 cup (60ml) whole milk, warmed
For the Filling:
- 1 cup (240ml) heavy whipping cream
- 1/4 cup (30g) powdered sugar
- 1 teaspoon vanilla extract
- Optional: Fresh fruit (strawberries, kiwi, or mango), chocolate ganache, or matcha powder for flavor variations
Ingredient Highlights
- Cake Flour: This flour creates a tender, airy texture in the sponge, giving the cake its characteristic lightness.
- Cornstarch: Helps stabilize the batter and gives the cake a soft, melt-in-your-mouth feel.
- Heavy Whipping Cream: The creamy, luxurious filling pairs beautifully with the sponge cake, providing a rich contrast in texture.
- Optional Fresh Fruits: Add a refreshing and colorful touch to your cake with fresh fruits like berries or tropical fruit slices.
Step-by-Step Instructions
Making a Japanese Cake Roll is easier than you might think, and with a few simple steps, you’ll create a dessert worthy of any celebration!
1: Prepare the Sponge Cake Batter
- Preheat the Oven: Preheat your oven to 350°F (175°C). Line a 10×15-inch jelly roll pan with parchment paper. Lightly grease the paper to ensure the cake comes out smoothly.
- Whisk the Eggs: In a large mixing bowl, beat the eggs and sugar together using an electric mixer. Start on a low speed and gradually increase to medium-high. Beat for about 5–7 minutes, or until the mixture becomes thick and pale. This is the key to getting that airy texture in the sponge.
- Add Vanilla: Once the eggs and sugar have reached the desired consistency, add the vanilla extract and mix until combined.
- Sift the Dry Ingredients: In a separate bowl, sift the cake flour, cornstarch, baking powder, and salt together. Sifting ensures that the dry ingredients are evenly distributed and helps prevent lumps in the batter.
- Incorporate Dry Ingredients: Gently fold the dry ingredients into the egg mixture using a spatula. Be careful not to deflate the air bubbles you’ve created by overmixing.
- Add Butter and Milk: Warm the milk and melt the butter. Gently fold both into the batter, ensuring everything is well combined.
2: Bake the Cake
- Pour the Batter: Pour the cake batter into the prepared jelly roll pan. Use a spatula to spread the batter evenly.
- Bake: Place the pan in the preheated oven and bake for 10–12 minutes, or until the cake springs back when touched and a toothpick inserted into the center comes out clean.
- Cool the Cake: Once the cake is done, remove it from the oven and immediately run a knife around the edges to loosen it. Place a clean kitchen towel over the cake and flip it onto a flat surface. Carefully peel off the parchment paper. Let the cake cool for 10 minutes.
3: Prepare the Filling
- Whip the Cream: While the cake is cooling, use an electric mixer to whip the heavy cream until soft peaks form. Gradually add powdered sugar and vanilla extract, continuing to beat until stiff peaks form.
- Flavor Variations: At this stage, you can add additional flavorings. For instance, mix in a bit of matcha powder for a Japanese twist or fresh fruit like strawberries for a refreshing taste.
4: Roll the Cake
- Fill the Cake: Once the cake has cooled, place a piece of parchment paper or a kitchen towel under the cake. Spread a thin layer of the whipped cream filling evenly across the cake, leaving a small border around the edges. Add fruit or other fillings if desired.
- Roll Carefully: Starting from one end, gently roll the cake up tightly, making sure to roll evenly to avoid cracks. If the cake cracks a little, don’t worry—it’ll still taste delicious!
- Chill: Once rolled, wrap the cake in the parchment paper or plastic wrap and refrigerate for at least 30 minutes to allow the filling to set and the roll to firm up.
5: Slice and Serve
- Slice the Cake: After the cake has chilled, slice it into neat rounds. You should see a beautiful spiral of cream inside.
- Serve: Arrange the slices on a plate and serve with a dusting of powdered sugar or a drizzle of chocolate sauce for added flair.
How to Serve
Here are a few creative ways to serve your Japanese Cake Roll:
- Elegant Dessert Platter: Arrange slices on a decorative platter for a beautiful presentation.
- Individual Servings: Place slices of the cake roll on individual plates and garnish with a sprig of mint or a few berries.
- Pair with Tea: This cake pairs wonderfully with a cup of green tea or jasmine tea for a serene, Japanese-inspired experience.
- Holiday Treat: Add some seasonal fruit or edible flowers on top for a festive touch.
- For Special Occasions: This cake roll makes an excellent birthday or celebration dessert. Customize it with colorful frosting or edible decorations to suit the event.
Additional Tips
- Practice Makes Perfect: If you’re new to rolling cakes, don’t worry if it takes a few tries to get the perfect roll. Just be gentle with the cake as it’s delicate.
- Chill the Cake: Let the cake set in the fridge before slicing to make sure it holds its shape.
- Use Fresh Ingredients: The fresher your ingredients, the more flavorful your cake will be. Opt for high-quality cream and eggs for the best results.
- Add Extra Flavor: For a unique twist, try filling the cake with chocolate ganache, custard, or even whipped mascarpone cheese.
Recipe Variations
Here are some variations you can try to mix things up:
- Chocolate Cake Roll: Use cocoa powder or a chocolate cake mix for the sponge cake to create a richer, chocolatey version.
- Matcha Roll: Add matcha powder to both the cake and filling for a traditional Japanese flavor.
- Tropical Roll: Use coconut cream and fresh tropical fruits like mango or pineapple for a refreshing variation.
- Nutty Roll: Incorporate finely chopped nuts like almonds or hazelnuts into the filling for added texture and flavor.
faq section
If you’re new to making Japanese Cake Rolls, you might have some questions. Don’t worry—we’ve got you covered! Below are some common questions and helpful answers to make your baking experience even smoother.
Can I use a regular cake pan instead of a jelly roll pan?
Yes, you can. If you don’t have a jelly roll pan, use a standard baking sheet with sides. Just make sure the cake is spread evenly and doesn’t come out too thick.
Can I make this cake in advance?
Absolutely! The cake roll keeps well in the fridge for 1-2 days. Just make sure to wrap it tightly in plastic wrap or store it in an airtight container to keep it fresh.
What if my cake cracks when I roll it?
Don’t panic! A few cracks are normal, especially when you’re first learning. If it happens, just roll the cake more gently next time, and remember, it’s all about practice. Plus, the filling will help cover up the cracks!

Japanese Cake Roll
- Total Time: 1 hour 15 minutes
Ingredients
For the Sponge Cake:
- 4 large eggs, room temperature
- 1/2 cup (100g) granulated sugar
- 1/2 teaspoon vanilla extract
- 1/2 cup (60g) cake flour, sifted
- 1 tablespoon (15g) cornstarch
- 1/4 teaspoon baking powder
- 1/4 teaspoon salt
- 2 tablespoons (30g) unsalted butter, melted
- 1/4 cup (60ml) whole milk, warmed
For the Filling:
- 1 cup (240ml) heavy whipping cream
- 1/4 cup (30g) powdered sugar
- 1 teaspoon vanilla extract
- Optional: Fresh fruit (strawberries, kiwi, or mango), chocolate ganache, or matcha powder for flavor variations
Instructions
Step 1: Prepare the Sponge Cake Batter
- Preheat the Oven: Preheat your oven to 350°F (175°C). Line a 10×15-inch jelly roll pan with parchment paper. Lightly grease the paper to ensure the cake comes out smoothly.
- Whisk the Eggs: In a large mixing bowl, beat the eggs and sugar together using an electric mixer. Start on a low speed and gradually increase to medium-high. Beat for about 5–7 minutes, or until the mixture becomes thick and pale. This is the key to getting that airy texture in the sponge.
- Add Vanilla: Once the eggs and sugar have reached the desired consistency, add the vanilla extract and mix until combined.
- Sift the Dry Ingredients: In a separate bowl, sift the cake flour, cornstarch, baking powder, and salt together. Sifting ensures that the dry ingredients are evenly distributed and helps prevent lumps in the batter.
- Incorporate Dry Ingredients: Gently fold the dry ingredients into the egg mixture using a spatula. Be careful not to deflate the air bubbles you’ve created by overmixing.
- Add Butter and Milk: Warm the milk and melt the butter. Gently fold both into the batter, ensuring everything is well combined.
Step 2: Bake the Cake
- Pour the Batter: Pour the cake batter into the prepared jelly roll pan. Use a spatula to spread the batter evenly.
- Bake: Place the pan in the preheated oven and bake for 10–12 minutes, or until the cake springs back when touched and a toothpick inserted into the center comes out clean.
- Cool the Cake: Once the cake is done, remove it from the oven and immediately run a knife around the edges to loosen it. Place a clean kitchen towel over the cake and flip it onto a flat surface. Carefully peel off the parchment paper. Let the cake cool for 10 minutes.
Step 3: Prepare the Filling
- Whip the Cream: While the cake is cooling, use an electric mixer to whip the heavy cream until soft peaks form. Gradually add powdered sugar and vanilla extract, continuing to beat until stiff peaks form.
- Flavor Variations: At this stage, you can add additional flavorings. For instance, mix in a bit of matcha powder for a Japanese twist or fresh fruit like strawberries for a refreshing taste.
Step 4: Roll the Cake
- Fill the Cake: Once the cake has cooled, place a piece of parchment paper or a kitchen towel under the cake. Spread a thin layer of the whipped cream filling evenly across the cake, leaving a small border around the edges. Add fruit or other fillings if desired.
- Roll Carefully: Starting from one end, gently roll the cake up tightly, making sure to roll evenly to avoid cracks. If the cake cracks a little, don’t worry—it’ll still taste delicious!
- Chill: Once rolled, wrap the cake in the parchment paper or plastic wrap and refrigerate for at least 30 minutes to allow the filling to set and the roll to firm up.
Step 5: Slice and Serve
- Slice the Cake: After the cake has chilled, slice it into neat rounds. You should see a beautiful spiral of cream inside.
- Serve: Arrange the slices on a plate and serve with a dusting of powdered sugar or a drizzle of chocolate sauce for added flair.
- Prep Time: 30 min.
- Cooling Time: 30 min.
- Cook Time: 12 min.
Nutrition
- Serving Size: 8-10 slices
- Calories: 180 kcal
- Fat: 7g
- Carbohydrates: 27g
- Protein: 3g
Conclusion
The Japanese Cake Roll is a dessert that can be made with love and enjoyed by all. Its light and fluffy texture, paired with a smooth and creamy filling, creates a dessert that’s as delightful to make as it is to eat. Whether you’re making it for a family gathering, a special occasion, or just to treat yourself, this cake is sure to be a hit. Don’t forget to snap a photo and tag me on social media – I love seeing your delicious creations! Enjoy your baking adventure, and let this cake roll bring a little extra sweetness to your day!

