Introduction
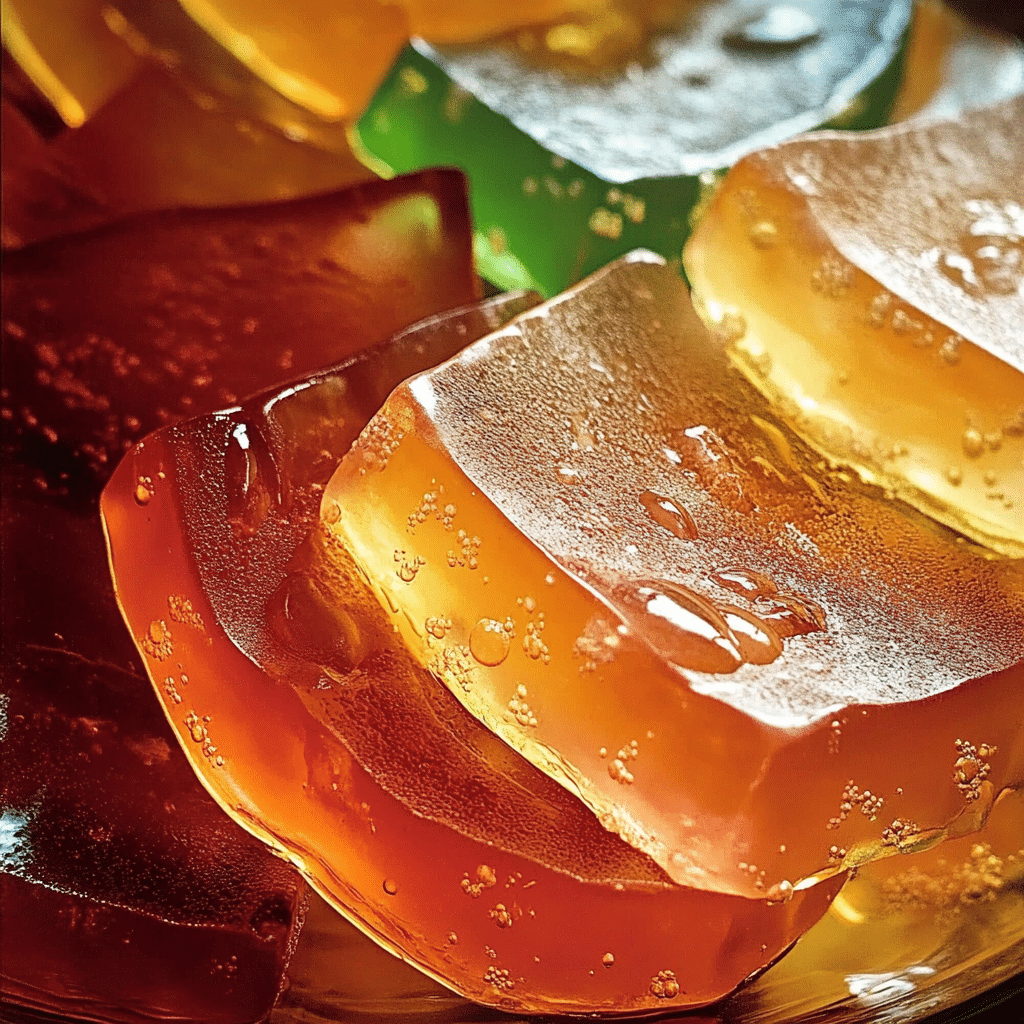
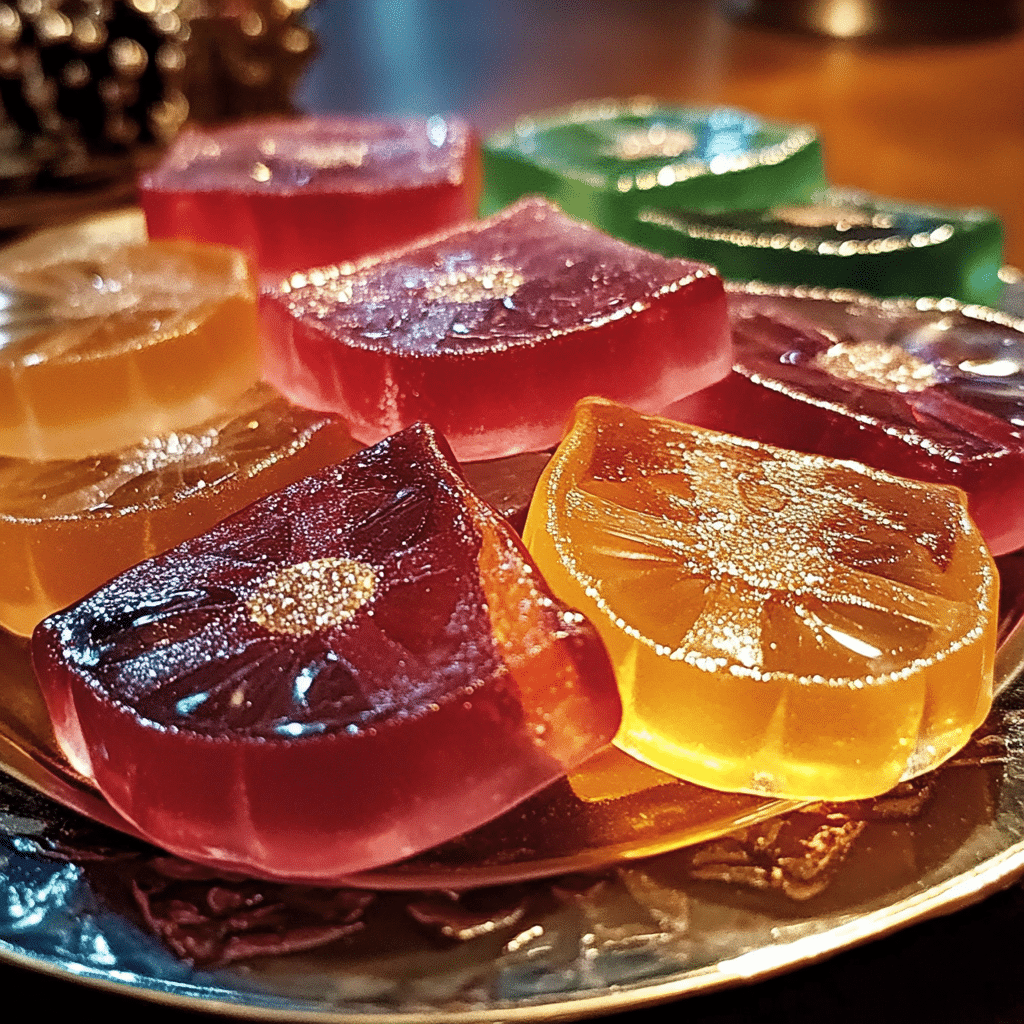
Jelly Slices are the ultimate treat when you want something both fun and delicious! These colorful, tangy slices are as playful as they are tasty, making them a perfect snack or dessert for just about any occasion. Whether you’re preparing for a summer picnic, bringing something vibrant to a party, or simply looking for a sweet bite to enjoy on your own, Jelly Slices are a great choice.
The beauty of Jelly Slices lies in their simplicity. With just a few basic ingredients like gelatin, fruit juice, and a touch of sweetness, you can create a dessert that’s bursting with flavor and texture. The smooth, jiggly consistency is a treat for the senses, and the vibrant colors make these slices as visually appealing as they are satisfying.
What’s even better? You can get creative with the flavors and colors. Try using different fruit juices or even adding in layers of complementary flavors for extra fun. You can also play with shapes—cut the jelly into fun, bite-sized pieces, or go for larger wedges for a more dramatic presentation.
Not only are Jelly Slices a big hit with kids, but they also make for an eye-catching addition to any spread, whether you’re serving them at a party or as a sweet treat after a meal. Easy to make and irresistibly refreshing, these little slices are bound to be a crowd-pleaser!
Why You’ll Love Jelly Slices
Here are several reasons you’re going to fall for these Jelly Slices:
- Bright and Colorful: Their vibrant colors make them a visual treat that’s perfect for parties or family gatherings.
- Sweet and Tangy: The combination of sweet fruit flavors with the tartness of jelly creates a refreshing snack.
- No Baking Required: With no baking involved, these are a great go-to treat when you’re short on time.
- Customizable: Use your favorite flavors and colors of jelly to personalize these slices.
- Fun for Kids: The fun, wobbly texture is perfect for kids (and adults!) to enjoy.
- Minimal Ingredients: With just a handful of ingredients, you can make these slices with ease.
- Make-Ahead Dessert: These jelly slices can be made ahead of time and stored, so they’re perfect for planning ahead.
- Perfect for Any Occasion: From birthday parties to casual get-togethers, Jelly Slices can fit any occasion.
Preparation Time and Chill Time
- Total Time: 3 hours 10 minutes
- Preparation Time: 10 minutes
- Chill Time: 3 hours
- Servings: 12-16 slices
- Calories per slice: Approximately 100 calories
- Key Nutrients: Carbohydrates: 24g, Sugars: 20g, Protein: 2g, Fat: 0g
Ingredients
Gather these ingredients to create your Jelly Slices:
For the Jelly Layers:
- 2 boxes of flavored gelatin (such as strawberry, lime, or orange)
- 1 cup boiling water
- 1 cup cold water
- 2 teaspoons unflavored gelatin (to help the jelly set firmly)
For the Creamy Layer:
- 1 can (14 oz) sweetened condensed milk
- 1/2 cup hot water
Ingredient Highlights
- Flavored Gelatin: This forms the main base of your jelly and comes in a variety of fun, fruity flavors.
- Unflavored Gelatin: This helps the jelly layers set up firmly, so they’re easy to slice and enjoy.
- Sweetened Condensed Milk: This adds a creamy texture to the jelly, making each slice smooth and delicious.
Step-by-Step Instructions
Follow these simple steps to make your Jelly Slices:
Prepare the Jelly Layers
- Dissolve the Gelatin: In a mixing bowl, combine one box of flavored gelatin with 1 cup of boiling water. Stir until the gelatin has completely dissolved.
- Add Cold Water: Stir in 1 cup of cold water and mix well. For a firmer texture, add 1 teaspoon of unflavored gelatin to this mixture. Let it cool slightly.
- Set the First Layer: Pour the jelly mixture into a rectangular dish (about 9×6 inches). Make sure it’s spread evenly. Refrigerate for about 1 hour, or until set.
the Creamy Layer
- Mix the Creamy Base: In a separate bowl, combine the sweetened condensed milk with 1/2 cup of hot water. Stir until smooth.
- Add Unflavored Gelatin: Dissolve 1 teaspoon of unflavored gelatin into the creamy mixture to help it set. Stir well.
- Add Creamy Layer: Once the first jelly layer is fully set, pour the creamy mixture gently over it, spreading it evenly. Refrigerate for another 1 hour.
the Second Jelly Layer
- Dissolve the Second Gelatin: While the creamy layer is setting, prepare the second flavored jelly layer. Dissolve the second box of flavored gelatin in 1 cup of boiling water and mix in 1 cup of cold water. Let it cool slightly.
- Add the Second Layer: Once the creamy layer is firm, pour the second jelly mixture on top. Spread it out evenly, then refrigerate for at least 1 hour, or until the jelly is fully set.
How to Serve Jelly Slices
Once your Jelly Slices are set and ready to go, here are some fun ways to serve them:
- Serve Chilled: Slice the jelly into squares or rectangles and serve chilled on a platter.
- Use Cookie Cutters: For a fun twist, use cookie cutters to shape the jelly slices into fun shapes like hearts, stars, or animals.
- Pair with Fresh Fruit: Add some fresh fruit like berries, kiwi, or melon on top for an extra refreshing touch.
- Serve at a Party: Display these jelly slices on a colorful tray at your next gathering. They’re sure to catch everyone’s eye!
- Use as a Layered Dessert: These jelly slices can be stacked into layers of fruit and cream for a more decadent dessert.
Additional Tips
Maximize your enjoyment of Jelly Slices with these handy tips:
- Make Ahead: Prepare your jelly slices a day before you plan to serve them. They’ll keep well in the refrigerator and save you time.
- Check Consistency: Make sure the jelly layers are completely set before adding the next layer. This ensures the slices stay neat when cut.
- Custom Flavors: Experiment with different flavor combinations to suit your taste. How about a tangy lemon-lime combo or a tropical pineapple-coconut flavor?
- Serve in Small Portions: Jelly slices are fun and wobbly, so consider serving them in individual portions for easy handling at parties.
- Use Gelatin to Your Advantage: If you prefer a firmer jelly texture, simply add a bit more unflavored gelatin to each layer for a sturdier consistency.
Recipe Variations
Here are some fun ways to customize your Jelly Slices:
- Fruit Flavored Jelly: Use a mix of fruity jellies, such as mango, strawberry, and blueberry, for an even more colorful effect.
- Coconut Layer: Add a coconut milk layer for a tropical twist.
- Add Berries: Add small pieces of fresh berries to the jelly mixture for added texture and flavor.
- Make it Vegan: Use agar-agar powder instead of gelatin to make these jelly slices vegan-friendly.
- Use Other Dairy: If you don’t have sweetened condensed milk, you can substitute it with regular cream or coconut cream for a different flavor.
Freezing and Storage
Here’s how to store your Jelly Slices so they stay fresh:
- Storage: Keep the jelly slices in an airtight container in the refrigerator for up to 3-4 days.
- Freezing: While the jelly texture may change slightly after freezing, you can freeze the slices for up to 1 month. Just make sure they’re wrapped well to avoid freezer burn.
- Thawing: Thaw frozen jelly slices in the refrigerator overnight for best results.
Special Equipment
For these Jelly Slices, you’ll need a few basic kitchen tools:
- Rectangular Dish: For setting the jelly and creating perfect slices.
- Mixing Bowls: To combine the jelly and creamy layers.
- Whisk: To ensure the gelatin dissolves completely.
- Sharp Knife: For cutting the jelly into perfect slices or shapes.
- Refrigerator: For chilling the layers and ensuring they set properly.
FAQ Section
Here are answers to some common questions about making Jelly Slices:
- Can I make Jelly Slices without sweetened condensed milk?
Yes, you can substitute the sweetened condensed milk with regular cream or coconut cream for a different flavor. - How long do Jelly Slices last?
They’ll keep for about 3-4 days in the refrigerator. - Can I use other flavors of gelatin?
Absolutely! Feel free to experiment with any flavor of gelatin you love. - Can I add fruit to the jelly layers?
Yes, you can add small pieces of fruit like berries or kiwi into the jelly for added texture. - Can I make Jelly Slices vegan?
Yes, substitute gelatin with agar-agar powder for a vegan-friendly version.
Jelly Slices
- Total Time: 0 hours
Ingredients
For the Jelly Layers:
- 2 boxes of flavored gelatin (such as strawberry, lime, or orange)
- 1 cup boiling water
- 1 cup cold water
- 2 teaspoons unflavored gelatin (to help the jelly set firmly)
For the Creamy Layer:
- 1 can (14 oz) sweetened condensed milk
- 1/2 cup hot water
Instructions
Prepare the Jelly Layers
- Dissolve the Gelatin: In a mixing bowl, combine one box of flavored gelatin with 1 cup of boiling water. Stir until the gelatin has completely dissolved.
- Add Cold Water: Stir in 1 cup of cold water and mix well. For a firmer texture, add 1 teaspoon of unflavored gelatin to this mixture. Let it cool slightly.
- Set the First Layer: Pour the jelly mixture into a rectangular dish (about 9×6 inches). Make sure it’s spread evenly. Refrigerate for about 1 hour, or until set.
Prepare the Creamy Layer
- Mix the Creamy Base: In a separate bowl, combine the sweetened condensed milk with 1/2 cup of hot water. Stir until smooth.
- Add Unflavored Gelatin: Dissolve 1 teaspoon of unflavored gelatin into the creamy mixture to help it set. Stir well.
- Add Creamy Layer: Once the first jelly layer is fully set, pour the creamy mixture gently over it, spreading it evenly. Refrigerate for another 1 hour.
Prepare the Second Jelly Layer
- Dissolve the Second Gelatin: While the creamy layer is setting, prepare the second flavored jelly layer. Dissolve the second box of flavored gelatin in 1 cup of boiling water and mix in 1 cup of cold water. Let it cool slightly.
- Add the Second Layer: Once the creamy layer is firm, pour the second jelly mixture on top. Spread it out evenly, then refrigerate for at least 1 hour, or until the jelly is fully set.
- Prep Time: 10 min.
- Chill Time: 3 hours
- Cook Time: 3 hours and 10 minutes
Nutrition
- Serving Size: 12-16 slices
- Calories: 100 kcal
- Sugar: 20g
- Carbohydrates: 24g
- Protein: 2g
Conclusion
Jelly Slices are the ultimate combination of fun, color, and flavor! They’re perfect for any celebration or casual treat, and their vibrant layers are sure to brighten up the table. The best part? They’re easy to make with just a few ingredients and some patience while the layers set, making them an ideal dessert for all ages.
Whether you’re planning a kids’ party, a summer picnic, or simply looking to enjoy a fun and refreshing snack at home, these jelly slices are a crowd-pleaser. With their chewy texture and sweet, fruity flavor, each bite is a burst of happiness. You can get creative with the colors and flavors, mixing up the gelatin to match your theme or personal taste.
The process of layering the jelly might take a bit of time as each layer needs to set, but the end result is totally worth it. Not only will they look gorgeous on your serving tray, but they’re also a treat that’s easy to share and enjoy with friends and family.
So why not give it a try? Grab your gelatin, get layering, and enjoy the process of making these colorful, sweet bites. And when you do, don’t forget to snap a photo and tag me on social media—I love seeing your delicious creations! Happy jelly-making!

