Introduction
Martha Washington Candy: A Sweet Treat to Cherish
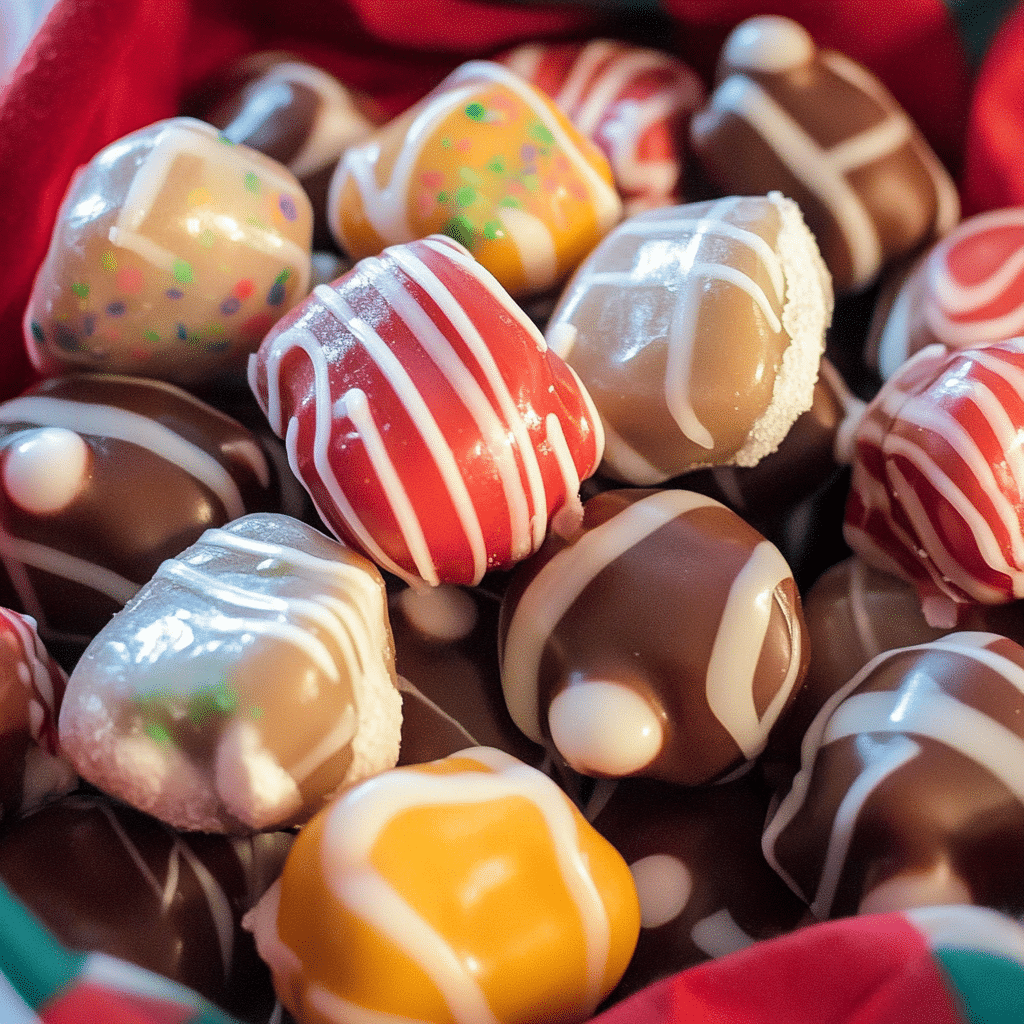
Hey there! If you’re looking for a way to indulge your sweet tooth, let me introduce you to Martha Washington Candy. Named after our first lady, this treat is an absolute gem! Imagine smooth, rich chocolate enveloping a creamy coconut and pecan filling—it’s just divine. I remember the first time I made these candies; it was during the holidays, and I was determined to impress my family with something homemade. When I pulled these beauties out of the fridge, the look on their faces was priceless.
This recipe is not just about satisfying a sweet craving; it’s about sharing love and warmth with those around you. Whether you’re whipping them up for a holiday gathering, a special occasion, or just because, I promise these little bites of heaven will be a hit. And don’t worry if you’re new to cooking—this recipe is super simple! Most of the ingredients are likely already in your pantry, so you can jump right in without any fuss.
What I love most about Martha Washington Candy is how it brings everyone together. It’s become a staple in my home, and I often find myself making a double batch because they disappear so quickly! Plus, they’re perfect for sharing; I always encourage my friends to take some home, and I love seeing their smiles when they try them. So grab your apron and let’s get started on making these delightful candies—you’ve got this!

Why You’ll Love This Recipe
Here are several reasons to fall in love with Martha Washington Candy:
- Decadent Flavor: The combination of chocolate, coconut, and pecans creates a rich, mouthwatering taste.
- Easy to Make: With a few simple steps, you can whip up these candies in no time.
- Perfect for Gifting: These candies make thoughtful homemade gifts for friends and family during the holidays.
- No Baking Required: A great option for those who prefer not to turn on the oven.
- Customizable: Feel free to switch up the nuts or add different flavors to the filling.
- Fun to Assemble: Get the kids involved in dipping and decorating these delicious candies!
- Versatile Treat: Perfect for any occasion, from holiday celebrations to casual get-togethers.
- Make-Ahead Option: Prepare these candies in advance and store them for later enjoyment.
- Rich Texture: The creamy filling pairs perfectly with the chocolate coating, making each bite a delight.
- Crowd-Pleaser: These candies are sure to impress anyone with a sweet tooth!
Preparation Time and Cook Time
- Total Time: 1 hour
- Preparation Time: 20 minutes
- Chill Time: 30 minutes
- Servings: Approximately 24 pieces
- Calories per piece: Approximately 120 calories
- Key Nutrients: Fiber: 1g, Fat: 8g, Carbohydrates: 11g, Protein: 1g
Ingredients
Gather the following ingredients to create your Martha Washington Candy:
For the Filling:
- 1 cup sweetened shredded coconut
- 1 cup finely chopped pecans
- 1 cup powdered sugar
- 4 ounces cream cheese, softened
- 1 teaspoon vanilla extract
For the Chocolate Coating:
- 12 ounces semisweet chocolate chips (or dark chocolate)
- 1 tablespoon vegetable shortening (optional, for a smoother coating)
Ingredient Highlights
- Sweetened Shredded Coconut: Adds a tropical flavor and chewy texture to the filling.
- Pecans: Provide a crunchy contrast and nutty taste that complements the chocolate.
- Cream Cheese: Creates a rich and creamy texture for the filling, balancing the sweetness.
- Chocolate Chips: Use high-quality chocolate for the best flavor and a smooth coating.
Step-by-Step Instructions
Follow these steps to create your Martha Washington Candy:
Make the Filling
- Combine Ingredients: In a medium bowl, mix together the shredded coconut, chopped pecans, powdered sugar, softened cream cheese, and vanilla extract until well combined.
- Chill the Mixture: Cover the bowl and refrigerate the mixture for about 30 minutes, or until it’s firm enough to handle.
Shape the Candies
- Form the Filling: Once chilled, scoop out small portions of the mixture and roll them into balls or shape them into small rectangles. Place them on a baking sheet lined with parchment paper.
- Chill Again: Return the shaped candies to the refrigerator for another 30 minutes to firm up.
Coat with Chocolate
- Melt the Chocolate: In a microwave-safe bowl, melt the chocolate chips with the vegetable shortening (if using) in 30-second intervals, stirring in between, until smooth.
- Dip the Candies: Remove the chilled candies from the refrigerator. Using a fork or toothpick, dip each piece into the melted chocolate, coating it completely. Let any excess chocolate drip off.
- Set on Parchment: Place the coated candies back on the parchment-lined baking sheet. Repeat until all candies are coated.
Let the Chocolate Set
- Chill Again: Refrigerate the candies for about 15-20 minutes, or until the chocolate coating is firm.
How to Serve
Here are some fun serving ideas for your Martha Washington Candy:
- Gift Packaging: Place candies in a decorative box or tin for a thoughtful gift.
- Dessert Platter: Arrange candies on a serving platter for a sweet treat display.
- Holiday Treat Bags: Fill small bags with candies and tie them with festive ribbons for party favors.
- Coffee Pairing: Serve alongside coffee or tea for a delightful afternoon treat.
- Mix with Other Candies: Include these candies in a homemade candy mix for a fun variety.
- Decorate for Presentation: Add sprinkles or decorative drizzles of chocolate for a festive touch.
- Layered Dessert: Incorporate pieces into a layered dessert or parfait for added texture.
- Freeze for Later: Keep some in the freezer for a sweet treat whenever the craving strikes.
- Serve at Parties: Offer them at gatherings for a delightful addition to dessert tables.
- Engage Guests: Let guests help themselves to the candies from a beautiful bowl or tray.
Additional Tips
Maximize your enjoyment of Martha Washington Candy with these helpful tips:
- Experiment with Flavors: Try adding different extracts, like almond or coconut, to the filling for unique flavors.
- Use Quality Chocolate: For the best taste, choose high-quality chocolate chips or chocolate bars.
- Chill Thoroughly: Make sure the filling is cold before dipping to ensure a better coating.
- Shape Consistently: Use a small cookie scoop for even-sized candies.
- Store Properly: Keep candies in an airtight container at room temperature for up to a week.
- Don’t Skip the Chilling: Chilling the filling helps it hold its shape and makes it easier to dip in chocolate.
- Keep a Close Eye on Melting: When melting chocolate, be cautious not to overheat it; stir frequently.
- Try Different Nuts: Substitute pecans with walnuts or almonds for a different flavor profile.
- Add Sea Salt: Sprinkle a pinch of sea salt on top of the chocolate for a delicious sweet-salty contrast.
- Make a Double Batch: These candies are so popular; consider making extra to share!
Recipe Variations
Consider these creative variations for your Martha Washington Candy:
- Coconut Cream Filling: Substitute some of the cream cheese with coconut cream for an extra coconut flavor.
- Dark Chocolate Coating: Use dark chocolate for a richer flavor and a more sophisticated treat.
- Nut-Free Version: Omit the pecans for a delicious coconut candy without nuts.
- Flavored Chocolate: Mix in flavored extracts like peppermint or orange into the chocolate coating for a twist.
- Add Dried Fruits: Incorporate finely chopped dried fruits like cranberries or cherries into the filling for added flavor and texture.
- Mini Versions: Make smaller bite-sized versions for a more poppable treat.
- Decorate with Drizzles: After coating, drizzle with white chocolate for an elegant finish.
- Caramel Addition: Add a layer of caramel in the center of each piece for a gooey surprise.
- Almond Joy Twist: Mix in some shredded almonds into the coconut filling for an almond joy-inspired treat.
- Peanut Butter Version: Substitute peanut butter for cream cheese for a different flavor profile.
Freezing and Storage
Ensure proper storage to maintain the quality of your Martha Washington Candy:
- Storage: Keep any leftover candies in an airtight container at room temperature for up to a week.
- Refrigerate: If your kitchen is warm, refrigerate the candies to keep them fresh.
- Freezing: Candies can be frozen for up to 3 months. Just make sure to store them in a freezer-safe container.
- Thawing: Thaw frozen candies at room temperature before serving.
Special Equipment
You may need these kitchen tools to create your Martha Washington Candy:
- Mixing Bowl: For combining the filling ingredients.
- Baking Sheet: To chill and set the candies.
- Parchment Paper: To line the baking sheet and prevent sticking.
- Microwave-Safe Bowl: For melting the chocolate.
- Fork or Toothpick: For dipping the candies in chocolate.
- Airtight Container: For storing the finished candies.
FAQ Section
Here are answers to common questions about Martha Washington Candy:
- Can I use a different type of nut?
Yes, feel free to use any nuts you prefer, such as walnuts or almonds. - How long do these candies last?
They can be stored at room temperature for up to a week, or refrigerated for longer freshness. - Can I make these ahead of time?
Absolutely! You can make them a few days in advance or freeze them for later. - What if I can’t find sweetened coconut?
Unsweetened coconut can be used, but you may need to adjust the sugar content. - Can I use milk chocolate instead of semisweet?
Yes, using milk chocolate will give a sweeter taste to the candies. - Is it possible to make them vegan?
You could try substituting cream cheese with a vegan cream cheese alternative and using dairy-free chocolate.

Martha Washington Candy
- Total Time: 1 hour
Ingredients
For the Filling:
- 1 cup sweetened shredded coconut
- 1 cup finely chopped pecans
- 1 cup powdered sugar
- 4 ounces cream cheese, softened
- 1 teaspoon vanilla extract
For the Chocolate Coating:
- 12 ounces semisweet chocolate chips (or dark chocolate)
- 1 tablespoon vegetable shortening (optional, for a smoother coating)
Instructions
Make the Filling
- Combine Ingredients: In a medium bowl, mix together the shredded coconut, chopped pecans, powdered sugar, softened cream cheese, and vanilla extract until well combined.
- Chill the Mixture: Cover the bowl and refrigerate the mixture for about 30 minutes, or until it’s firm enough to handle.
Shape the Candies
- Form the Filling: Once chilled, scoop out small portions of the mixture and roll them into balls or shape them into small rectangles. Place them on a baking sheet lined with parchment paper.
- Chill Again: Return the shaped candies to the refrigerator for another 30 minutes to firm up.
Coat with Chocolate
- Melt the Chocolate: In a microwave-safe bowl, melt the chocolate chips with the vegetable shortening (if using) in 30-second intervals, stirring in between, until smooth.
- Dip the Candies: Remove the chilled candies from the refrigerator. Using a fork or toothpick, dip each piece into the melted chocolate, coating it completely. Let any excess chocolate drip off.
- Set on Parchment: Place the coated candies back on the parchment-lined baking sheet. Repeat until all candies are coated.
Let the Chocolate Set
- Chill Again: Refrigerate the candies for about 15-20 minutes, or until the chocolate coating is firm.
- Prep Time: 20 min.
- Cook Time: 30 min.
Nutrition
- Serving Size: 24 pieces
- Calories: 120 kcal
- Fat: 8g
- Carbohydrates: 11g
- Fiber: 1g
- Protein: 1g
Conclusion
I can’t wait for you to experience the joy of making Martha Washington Candy! This timeless treat is not just about satisfying your sweet tooth; it’s an opportunity to create something truly special, whether you’re sharing with friends or indulging yourself. The combination of rich chocolate, sweet coconut, and crunchy nuts is sure to bring smiles all around.
As you prepare your own batch, remember to savor the process and maybe even involve a loved one. Cooking can be such a wonderful bonding experience! Once you’ve rolled and dipped your candies to perfection, I’d love to see how they turned out.
So, don’t be shy! Leave a comment to share your thoughts or any tips you might have. And when you post your beautiful creations on social media, be sure to tag me. I absolutely love seeing the delicious treats you all make!
Enjoy every sweet moment, and happy candy making! Don’t forget to snap a photo and tag me on Instagram—I love seeing your delicious creations!

