
Introduction
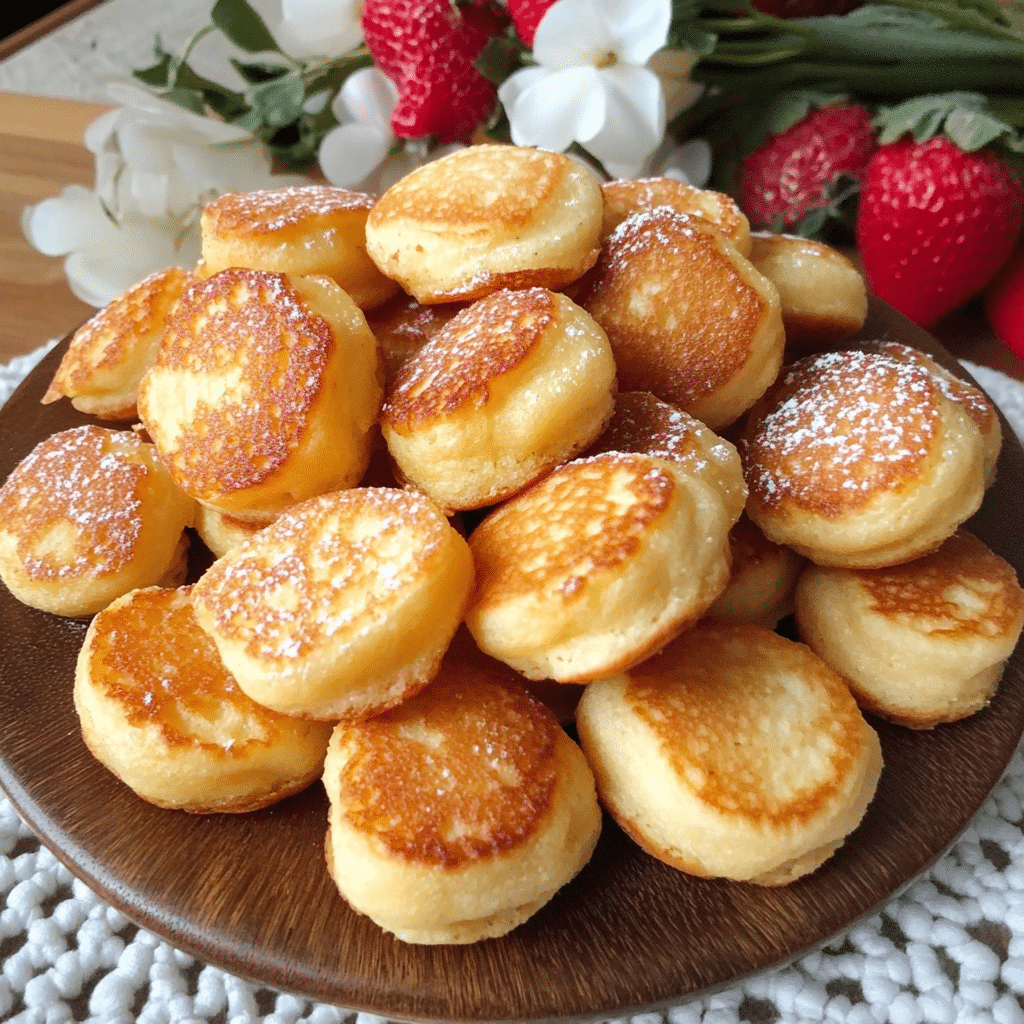
Mini Quiches are the kind of appetizer that never goes out of style. They’re elegant, delicious, and incredibly versatile, making them perfect for any occasion—whether it’s a brunch with friends, a holiday party, or a simple weekday breakfast you can grab on the go. These bite-sized delights feature a buttery, flaky crust and a rich, creamy custard filling that can be customized to suit any taste.
One of the best things about mini quiches is their adaptability. You can keep it classic with bacon and cheddar, go veggie-packed with spinach and mushrooms, or even spice things up with a little chorizo and pepper jack cheese. The possibilities are endless! Plus, they can be made ahead of time and reheated, making them an excellent option for meal prep or stress-free entertaining.
And let’s talk about how easy they are to make! Whether you use store-bought pie crust or make your own, these little quiches come together quickly and bake up beautifully golden and crisp. Serve them warm or at room temperature, and watch them disappear from the platter in no time.
If you’re looking for a sophisticated yet effortless dish that will impress your guests (or just make your mornings a little more special), mini quiches are the way to go. Give them a try, and don’t forget to snap a photo and tag me on social media—I love seeing your delicious creations!
Why You’ll Love This Recipe
There are so many reasons to love Mini Quiches, but here are just a few:
- Perfect for Any Occasion – Great for brunches, parties, or even as a quick breakfast option.
- Bite-Sized and Convenient – No need for utensils—just grab and enjoy!
- Make-Ahead Friendly – Prepare them in advance and store them for later.
- Endlessly Customizable – Choose your favorite meats, cheeses, and veggies.
- Crispy, Flaky Crust – Buttery pastry pairs beautifully with the rich, creamy filling.
- Great for Meal Prep – Make a batch and enjoy throughout the week.
- Kid-Friendly – A fun, delicious way to sneak in veggies for picky eaters.
- Elegant and Impressive – A gourmet-looking dish with minimal effort.
- Gluten-Free Option – Easily made with a gluten-free crust or without any crust at all.
- Tastes Amazing Hot or Cold – Enjoy them fresh out of the oven or chilled for a picnic!
Preparation Time and Cook Time
- Total Time: 45 minutes
- Preparation Time: 15 minutes
- Cook Time: 25-30 minutes
- Cooling Time: 5 minutes
- Servings: 24 mini quiches
- Calories per mini quiche: Approximately 80 calories
- Key Nutrients: Protein: 3g, Carbohydrates: 5g, Fat: 6g, Fiber: 1g
Ingredients
Here’s what you’ll need to make your delicious Mini Quiches:
For the Crust:
- 1 package store-bought pie crust (or homemade)
- 1 tablespoon flour (for rolling out the dough)
For the Filling:
- 4 large eggs
- ½ cup whole milk or heavy cream
- ½ teaspoon salt
- ¼ teaspoon black pepper
- ¼ teaspoon ground nutmeg (optional)
Mix-In Options:
Choose your favorite ingredients to customize your mini quiches:
- Meats: ½ cup cooked bacon, diced ham, or crumbled sausage
- Vegetables: ½ cup chopped spinach, bell peppers, mushrooms, or onions
- Cheese: ½ cup shredded cheddar, Swiss, or feta
- Herbs: 1 tablespoon fresh chives, parsley, or thyme
Step-by-Step Instructions


Prepare the Crust
- Preheat Oven – Set your oven to 375°F (190°C) and grease a mini muffin tin.
- Roll Out the Dough – Lightly flour a clean surface and roll out the pie crust until it’s about ⅛-inch thick.
- Cut Out Circles – Using a round cookie cutter or a glass, cut circles slightly larger than the muffin tin cups.
- Press into the Tin – Gently press each dough circle into the greased muffin tin, making sure it fits snugly.
Prepare the Filling
- Whisk the Eggs and Milk – In a bowl, whisk together the eggs, milk (or cream), salt, pepper, and nutmeg.
- Add the Mix-Ins – Stir in your chosen meats, veggies, cheese, and herbs.
Assemble the Mini Quiches
- Fill the Crusts – Spoon about 1 tablespoon of the filling mixture into each crust-lined muffin cup.
- Bake – Place in the oven and bake for 25-30 minutes, or until the tops are golden and the filling is set.
- Cool and Serve – Let the quiches cool for about 5 minutes before removing from the pan. Serve warm or at room temperature.

How to Serve
These mini quiches are perfect on their own, but here are a few fun ways to serve them:
- On a Brunch Board – Pair them with fresh fruit, croissants, and jam.
- As an Appetizer – Serve on a platter with a side of dipping sauces.
- With a Side Salad – A light green salad makes a perfect pairing.
- Pack for Lunch – Great for school or work lunchboxes.
- As a Party Snack – Arrange them on a tiered stand for an elegant touch.
- With Soup – Pair with a warm bowl of tomato soup for a cozy meal.
- Breakfast on the Go – Grab a couple for a quick and nutritious start to your day.
Additional Tips
To get the best results, keep these tips in mind:
- Keep the Dough Cold – Chilled dough is easier to handle and creates a crispier crust.
- Use a Non-Stick Muffin Tin – This prevents sticking and makes for easy removal.
- Avoid Overfilling – Fill only ¾ of the way to prevent spillage.
- Experiment with Fillings – Try smoked salmon, caramelized onions, or even sun-dried tomatoes.
- Reheat Properly – Warm them in the oven at 300°F for 10 minutes for the best texture.
Recipe Variations
There are so many ways to customize Mini Quiches! Here are a few ideas:
- Crustless Mini Quiches – Skip the crust for a low-carb option.
- Dairy-Free Version – Use almond milk and skip the cheese.
- Southwest Style – Add diced jalapeños, black beans, and pepper jack cheese.
- Italian-Inspired – Use mozzarella, basil, and sun-dried tomatoes.
- Seafood Quiches – Try crab meat or smoked salmon for a gourmet twist.
Freezing and Storage
- One of the best things about Mini Quiches is how well they store and reheat! Whether you’re prepping for a busy week or making a big batch for a future brunch, here’s how to keep them fresh and delicious.
- How to Store Mini Quiches
- Refrigeration (Short-Term Storage)
- How long do mini quiches last in the fridge?
- They stay fresh for up to 4 days when stored properly.
- How to store:
- Let the mini quiches cool completely before storing.
- Place them in an airtight container or wrap them individually in plastic wrap to keep them from drying out.
- Keep them in the coldest part of your fridge for maximum freshness.
- Freezing (Long-Term Storage)
- Can you freeze mini quiches?
- Yes! Mini quiches freeze beautifully for up to 3 months.
- How to freeze mini quiches:
- Let them cool completely to avoid excess moisture.
- Place them in a single layer on a baking sheet and freeze for about 1-2 hours (this prevents them from sticking together).
- Transfer the frozen quiches to a freezer-safe bag or airtight container.
- Label with the date so you know when to use them.
- Should I freeze mini quiches before or after baking?
- You can freeze either way, but baking first makes reheating quicker and easier.
- How to Reheat Mini Quiches
- From the Refrigerator:
- Oven Method: Preheat to 325°F (160°C) and bake for 5-7 minutes until warm.
- Microwave Method: Heat on medium power for 30-45 seconds (cover with a damp paper towel to retain moisture).
- From Frozen:
- Oven Method (Best for Texture):
- No need to thaw! Bake at 350°F (175°C) for 10-15 minutes until heated through.
- Microwave Method (Quickest):
Special Equipment
To make these mini quiches, you’ll need:
- Mini Muffin Tin – To create the perfect bite-sized portions.
- Rolling Pin – For rolling out the pie crust.
- Whisk – To mix the eggs and milk smoothly.
- Cookie Cutter – For cutting the dough into circles.
FAQ Section
- 1. Can I make mini quiches ahead of time?
- Absolutely! You can bake them in advance and store them in the fridge or freezer until needed.
- 2. How do I keep my mini quiches from getting soggy?
- Make sure any vegetables are pre-cooked to release excess moisture before adding them to the quiche.
- 3. Can I make crustless mini quiches?
- Yes! Simply grease the muffin tin well and pour the egg mixture directly into the cups.
- 4. What’s the best way to reheat mini quiches?
- For the best texture, reheat in the oven at 325°F for 5-7 minutes. The microwave works too, but they may get a little soft.
- 5. Can I use store-bought pie crust?
- Yes! A refrigerated pie crust works great and saves time.
- 6. Can I add cream instead of milk?
- Yes! Heavy cream will make the quiches even richer and creamier.
- 7. What are the best cheeses for mini quiches?
- Cheddar, Swiss, feta, gouda, or mozzarella all work well.
- 8. Can I make these dairy-free?
- Use a dairy-free milk alternative and skip the cheese for a dairy-free version.
- 9. How long do mini quiches last in the freezer?
- They can be stored in the freezer for up to 3 months. Just reheat and enjoy!
- 10. Can I use puff pastry instead of pie crust?
- Yes! Puff pastry will create a flakier, lighter crust.

Mini Quiches
- Total Time: 45 min.
Ingredients
For the Crust:
- 1 package store-bought pie crust (or homemade)
- 1 tablespoon flour (for rolling out the dough)
For the Filling:
- 4 large eggs
- ½ cup whole milk or heavy cream
- ½ teaspoon salt
- ¼ teaspoon black pepper
- ¼ teaspoon ground nutmeg (optional)
Mix-In Options:
Choose your favorite ingredients to customize your mini quiches:
- Meats: ½ cup cooked bacon, diced ham, or crumbled sausage
- Vegetables: ½ cup chopped spinach, bell peppers, mushrooms, or onions
- Cheese: ½ cup shredded cheddar, Swiss, or feta
- Herbs: 1 tablespoon fresh chives, parsley, or thyme
Instructions
Prepare the Crust
- Preheat Oven – Set your oven to 375°F (190°C) and grease a mini muffin tin.
- Roll Out the Dough – Lightly flour a clean surface and roll out the pie crust until it’s about ⅛-inch thick.
- Cut Out Circles – Using a round cookie cutter or a glass, cut circles slightly larger than the muffin tin cups.
- Press into the Tin – Gently press each dough circle into the greased muffin tin, making sure it fits snugly.
Prepare the Filling
- Whisk the Eggs and Milk – In a bowl, whisk together the eggs, milk (or cream), salt, pepper, and nutmeg.
- Add the Mix-Ins – Stir in your chosen meats, veggies, cheese, and herbs.
Assemble the Mini Quiches
- Fill the Crusts – Spoon about 1 tablespoon of the filling mixture into each crust-lined muffin cup.
- Bake – Place in the oven and bake for 25-30 minutes, or until the tops are golden and the filling is set.
- Cool and Serve – Let the quiches cool for about 5 minutes before removing from the pan. Serve warm or at room temperature.
- Prep Time: 15 min.
- Cooling Time: 5 min.
- Cook Time: 25-30 minutes
Nutrition
- Serving Size: 24 mini quiches
- Calories: 80 kcal
- Fat: 6g
- Carbohydrates: 5g
- Fiber: 1g
- Protein: 3g
Conclusion
Mini Quiches are a delicious, elegant, and endlessly customizable dish that works for breakfast, brunch, or even a snack. Their flaky crust and rich, creamy filling make them irresistible. Whether you prefer classic flavors or want to get creative with your mix-ins, these bite-sized delights are sure to be a hit.
So, gather your ingredients, preheat your oven, and enjoy baking these little gems! Don’t forget to snap a photo and tag me on social media—I love seeing your delicious creations!