Introduction
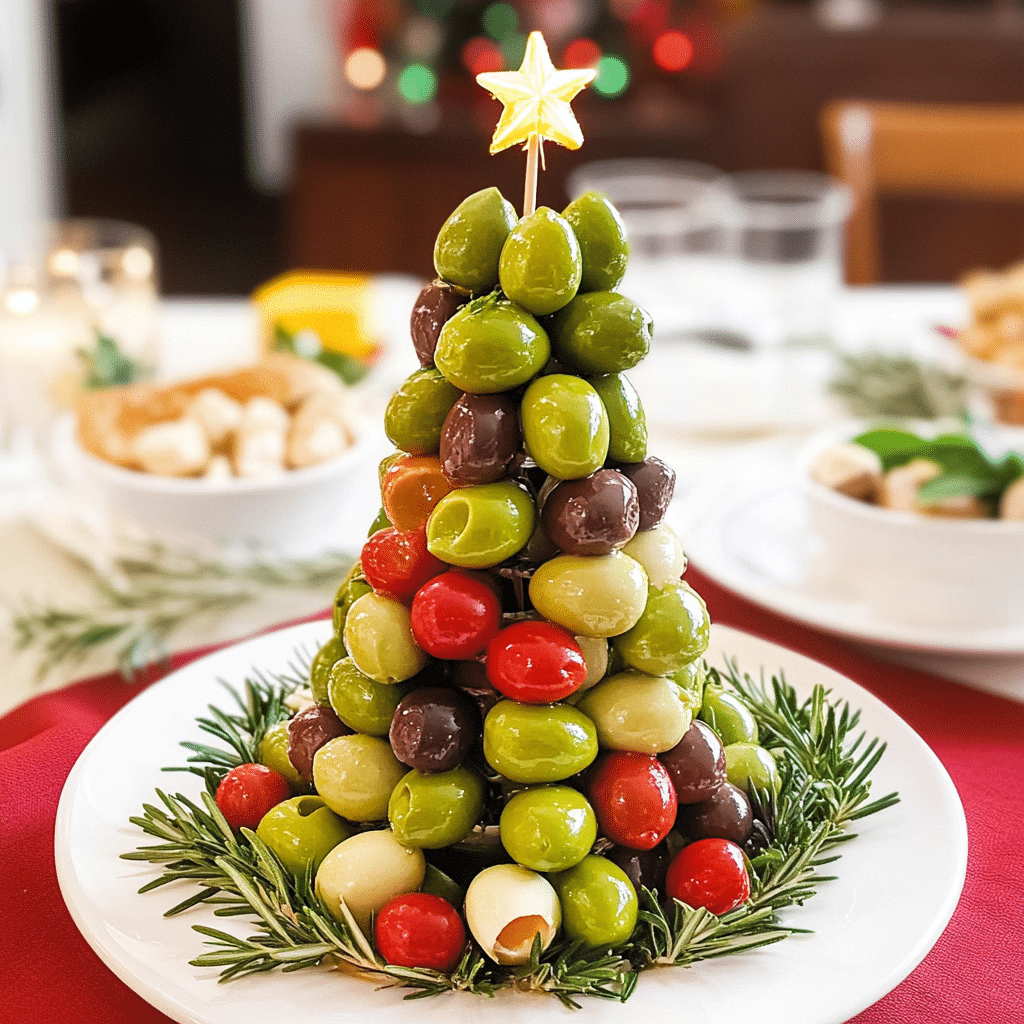
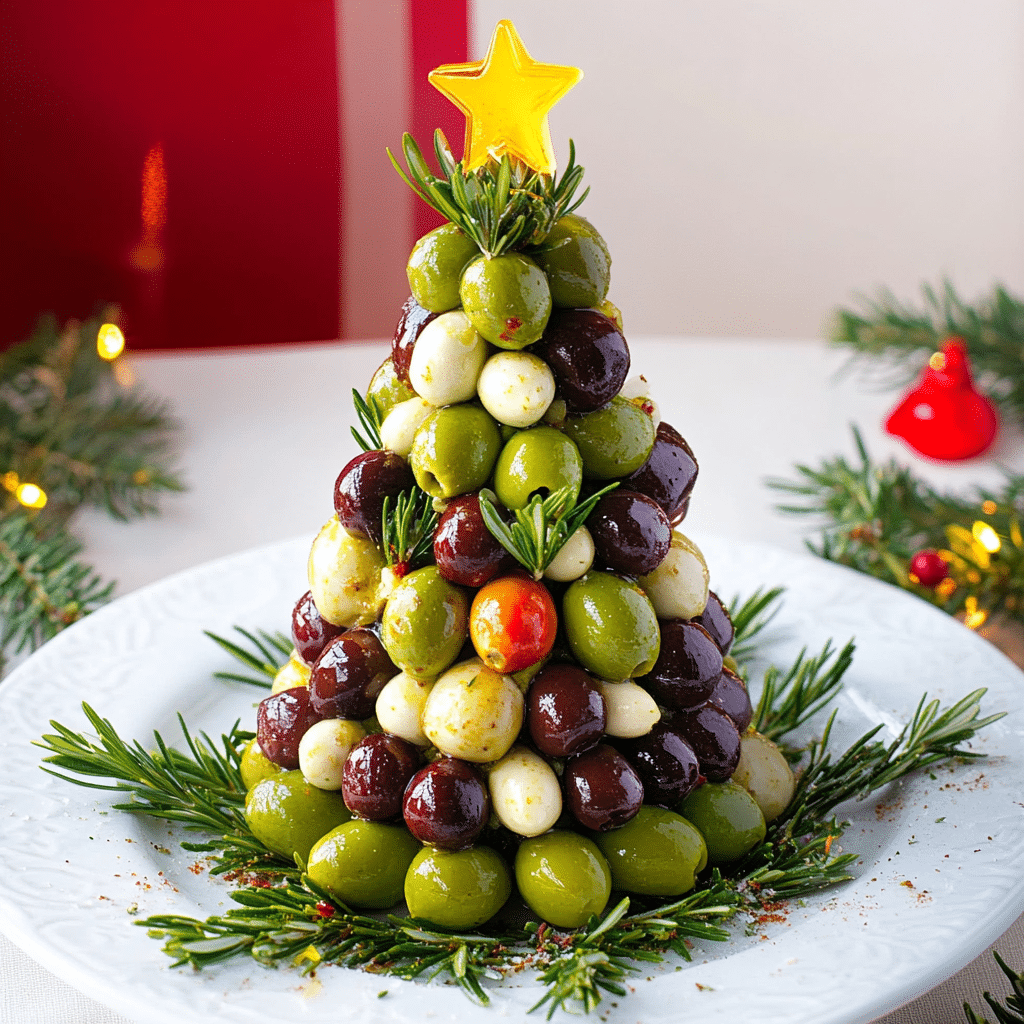
Celebrate the holidays in style with this fun and festive Olive Christmas Tree Appetizer! If you’re looking for a creative way to bring some holiday cheer to your next gathering, this appetizer is the perfect choice. Not only does it look beautiful, but it’s also simple to make and guaranteed to be a crowd-pleaser. The combination of fresh ingredients, like olives, cheese, and colorful veggies, comes together to create a delightful “tree” that will surely brighten up any table.
Whether you’re hosting a Christmas party or attending a family get-together, this Olive Christmas Tree Appetizer offers the perfect balance of flavor, fun, and festivity. Plus, it’s easy to assemble and is sure to spark conversations at the table. So, let’s dive into how you can bring a little holiday magic to your appetizer spread!
Why You’ll Love This Recipe
There’s no shortage of reasons to love this Olive Christmas Tree Appetizer! Here are just a few:
- Visually Stunning: The vibrant colors and tree shape make it a standout centerpiece for your holiday spread.
- Easy to Make: With simple ingredients and minimal prep, you can assemble this appetizer in no time.
- Healthy and Flavorful: Filled with olives, cheese, and fresh veggies, it’s a healthy choice for guests to snack on.
- Customizable: You can adjust the size and ingredients based on your preferences or dietary needs.
- Perfect for All Ages: Kids will love the fun shape, while adults will appreciate the tasty combination of flavors.
- Great for Holiday Parties: This appetizer adds a festive touch to any holiday gathering, whether big or small.
- Quick to Assemble: No complicated steps here—just assemble the ingredients and enjoy!
Preparation Time and Servings
- Total Time: 20 minutes
- Preparation Time: 15 minutes
- Servings: 8-10 people
- Calories per Serving: Approximately 80 calories
- Key Nutrients: Healthy fats from olives, protein from cheese, and fiber from veggies.
Ingredients
Gather these ingredients to create your Olive Christmas Tree Appetizer:
For the Tree:
- 1 jar green olives (about 1 cup)
- 1 jar black olives (about 1 cup)
- 1 block of cream cheese (8 oz)
- 1 block of cheddar cheese (8 oz)
- 1 block of mozzarella cheese (8 oz)
- Cherry tomatoes (about 8-10)
- Fresh basil leaves (for garnish)
- 1 small cucumber
- 1 red bell pepper
For the Tree Trunk:
- 1 small carrot (peeled)
- 1 celery stalk
Ingredient Highlights
- Olives: These add a briny, salty flavor that contrasts beautifully with the creamy cheese.
- Cheese: A mix of cream cheese, cheddar, and mozzarella provides a rich, creamy base and a fun variety of textures.
- Vegetables: Fresh cherry tomatoes, cucumbers, and red bell peppers add color and crunch, making the tree even more eye-catching.
- Fresh Herbs: Fresh basil leaves not only enhance the visual appeal but also provide a pop of green.
Step-by-Step Instructions
Creating your Olive Christmas Tree Appetizer is simple, and the results are stunning! Follow these easy steps:
Prepare the Ingredients
- Slice the Cheese: Begin by cutting the cream cheese, cheddar cheese, and mozzarella into small cubes or slices. This will help with easy assembly.
- Prep the Vegetables: Slice the cucumber into thin rounds, cut the red bell pepper into thin strips, and halve the cherry tomatoes. Set everything aside.
- Make the Trunk: Peel the carrot and cut it into a small rectangle for the trunk of the tree. Then, slice the celery stalk into a small piece for added support.
- Prepare the Olives: Drain the olives and cut the green ones in half to create more visual contrast on the tree.
Assemble the Tree
- Create the Base: Start by placing the celery stalk on a platter as the trunk. Then, arrange the carrot rectangle vertically at the bottom to form the trunk of the tree.
- Build the Tree Shape: Begin stacking the olives (green and black) in the shape of a tree. Start at the top and work your way down, overlapping the olives slightly for a more natural, layered effect.
- Add the Cheese: Place the cheese cubes around the olives, alternating the cream cheese, cheddar, and mozzarella to create layers.
- Layer with Veggies: Add cucumber slices and cherry tomatoes in between the olive layers for a pop of color. Arrange the red bell pepper strips as garland on the tree.
- Top with Basil: Garnish the top of your tree with fresh basil leaves to act as a star or tree topper. Add more basil around the edges to complete the look.
Finishing Touches
- Adjust the Shape: Step back and adjust the layers to make sure everything looks like a tree. If necessary, add more olives or cheese to fill in any gaps.
- Chill Before Serving: For the best presentation, place the tree in the fridge for about 10-15 minutes to allow everything to firm up and hold its shape.
How to Serve
Now that your Olive Christmas Tree Appetizer is ready, here are some fun ideas for serving it:
- Serve as a Showstopper: Place the appetizer in the center of your holiday table for a stunning visual centerpiece.
- With Crackers or Bread: Serve with a side of crackers, baguette slices, or pita chips for guests to scoop up the tree’s olives and cheese.
- Individual Serving Platters: If you’re serving guests in a more intimate setting, divide the tree into smaller portions for individual servings.
- Pair with Dips: Offer a selection of dips, like hummus or a creamy ranch dressing, on the side for extra flavor.
- For the Kids: Arrange small bowls of extra olives, cheese cubes, and veggies so kids can decorate their own mini tree.
Additional Tips
Here are some helpful tips for making the most of your Olive Christmas Tree Appetizer:
- Use Fresh Ingredients: Opt for fresh veggies and high-quality olives to get the best flavor and presentation.
- Make It in Advance: Assemble the tree a day before the event and refrigerate it. Just be sure to garnish it with fresh basil right before serving.
- Get Creative with Decorations: You can swap out ingredients based on your guests’ preferences—swap in pickled vegetables, or add nuts for an extra crunch!
- Keep the Size in Mind: If you’re serving a smaller crowd, feel free to scale down the tree by reducing the amount of olives and cheese.
- Don’t Forget the Garnish: Fresh basil is key to making the tree look like it’s topped with a star, so be generous with the garnish!
Recipe Variations
Here are some ideas for mixing things up and creating a unique version of your Olive Christmas Tree Appetizer:
- Use Different Olives: Try adding Kalamata olives for a deep, rich flavor contrast.
- Include Dried Fruit: Add a few dried cranberries or raisins for a pop of sweetness on the tree.
- Swap the Cheese: Experiment with different cheeses like goat cheese, blue cheese, or feta for a more distinct flavor profile.
- Vegan Version: Replace the cream cheese and regular cheese with vegan alternatives to make the tree vegan-friendly.
- Mini Trees: For smaller gatherings, create mini trees on individual platters, perfect for each guest to enjoy.
- Add Nuts: For added texture, consider adding almonds or pine nuts as “decorative ornaments” on the tree.
Freezing and Storage
While this appetizer is best enjoyed fresh, here’s how to store any leftovers:
- Refrigeration: Cover the tree with plastic wrap and store it in the refrigerator for up to 2 days.
- Freezing: This appetizer does not freeze well, as the vegetables and olives may lose their texture.
- Prep Ahead: You can prep the individual components (cheese, olives, veggies) in advance and assemble the tree on the day of the event.
Special Equipment
To make assembling your Olive Christmas Tree Appetizer a breeze, you might want the following kitchen tools:
- Sharp Knife: For slicing cheese, vegetables, and the carrot trunk.
- Cutting Board: To keep your work surface clean while prepping ingredients.
- Platter: A large, flat platter works best for showcasing your tree.
- Spoon: For arranging and serving any dips or extras alongside the tree.
FAQ Section
Here are answers to common questions about the Olive Christmas Tree Appetizer:
- Can I use different kinds of olives?
Absolutely! You can mix green olives with black olives, or even use Kalamata olives for a different flavor. - How can I make this tree bigger?
Simply add more olives, cheese, and veggies to build a larger tree. You can adjust the size to suit your gathering. - Can I use store-bought cheese?
Yes, pre-sliced cheese or shredded cheese will work, though cubes will give a better structure for your tree. - Can I make this tree vegan-friendly?
Yes! Simply swap the cream cheese and other dairy products for vegan cheese options. - How long does the appetizer last?
This appetizer is best served fresh, but it can last up to two days in the fridge if properly covered.

Olive Christmas Tree Appetizer
- Total Time: 20 min.
Ingredients
For the Tree:
- 1 jar green olives (about 1 cup)
- 1 jar black olives (about 1 cup)
- 1 block of cream cheese (8 oz)
- 1 block of cheddar cheese (8 oz)
- 1 block of mozzarella cheese (8 oz)
- Cherry tomatoes (about 8-10)
- Fresh basil leaves (for garnish)
- 1 small cucumber
- 1 red bell pepper
For the Tree Trunk:
- 1 small carrot (peeled)
- 1 celery stalk
Instructions
Prepare the Ingredients
- Slice the Cheese: Begin by cutting the cream cheese, cheddar cheese, and mozzarella into small cubes or slices. This will help with easy assembly.
- Prep the Vegetables: Slice the cucumber into thin rounds, cut the red bell pepper into thin strips, and halve the cherry tomatoes. Set everything aside.
- Make the Trunk: Peel the carrot and cut it into a small rectangle for the trunk of the tree. Then, slice the celery stalk into a small piece for added support.
- Prepare the Olives: Drain the olives and cut the green ones in half to create more visual contrast on the tree.
Assemble the Tree
- Create the Base: Start by placing the celery stalk on a platter as the trunk. Then, arrange the carrot rectangle vertically at the bottom to form the trunk of the tree.
- Build the Tree Shape: Begin stacking the olives (green and black) in the shape of a tree. Start at the top and work your way down, overlapping the olives slightly for a more natural, layered effect.
- Add the Cheese: Place the cheese cubes around the olives, alternating the cream cheese, cheddar, and mozzarella to create layers.
- Layer with Veggies: Add cucumber slices and cherry tomatoes in between the olive layers for a pop of color. Arrange the red bell pepper strips as garland on the tree.
- Top with Basil: Garnish the top of your tree with fresh basil leaves to act as a star or tree topper. Add more basil around the edges to complete the look.
Finishing Touches
- Adjust the Shape: Step back and adjust the layers to make sure everything looks like a tree. If necessary, add more olives or cheese to fill in any gaps.
- Chill Before Serving: For the best presentation, place the tree in the fridge for about 10-15 minutes to allow everything to firm up and hold its shape.
- Prep Time: 15 min.
Nutrition
- Serving Size: 8-10 servings
- Calories: 80 kcal
Conclusion
If you’re looking for a way to add some festive fun to your holiday table, this Olive Christmas Tree Appetizer is sure to be a hit. It’s not only visually impressive but also a delicious and healthy option for your guests to enjoy. Whether you’re serving it as a main appetizer or a fun side dish, it’s sure to spread holiday cheer!
Don’t forget to snap a photo and tag me on social media – I love seeing your delicious creations!

