


Introduction
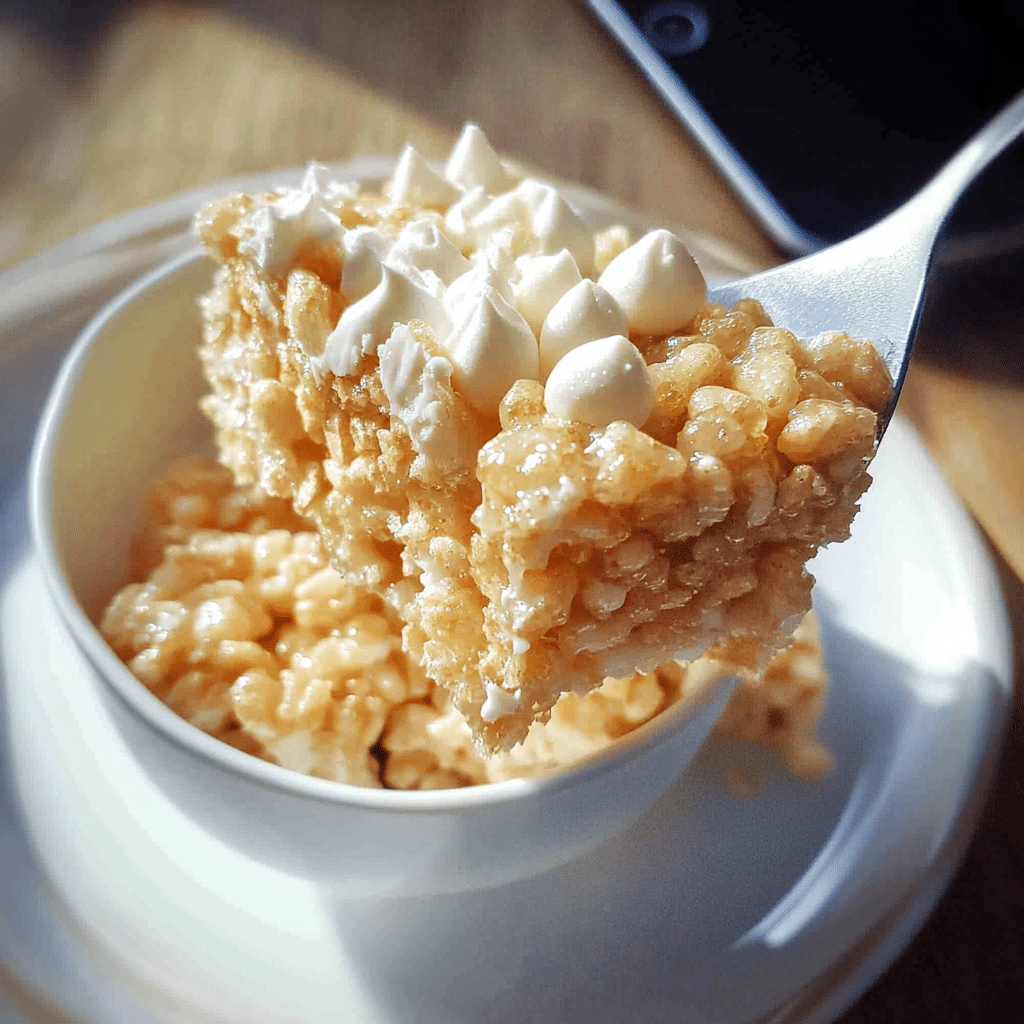
If you’re looking for a treat that’s as nostalgic as it is delicious, Rice Krispie Treats are the way to go! These sweet, crispy, marshmallowy squares have been a beloved snack for generations, and they continue to charm with their simplicity and irresistible flavor. Whether you’re preparing a quick snack for a family gathering, a sweet treat for a party, or just craving a little something extra, these Rice Krispie treats will always hit the spot.
What’s so great about Rice Krispie Treats? Well, first off, they’re incredibly easy to make. With just a few pantry staples, you can whip up a batch in less than 30 minutes. Plus, they’re customizable, fun to make, and perfect for any occasion—birthday parties, school events, or even as a simple dessert at home. Let’s dive into why you should make these Rice Krispie treats and how to perfect them every time!
Why You’ll Love This Recipe
There are many reasons why you’ll fall head over heels for Rice Krispie Treats:
- Simple Ingredients: You only need three basic ingredients to make these treats.
- Quick and Easy: With minimal prep time, you’ll have a batch ready in no time.
- Kid-Friendly: These treats are so easy that even the little ones can get involved in making them.
- Customizable: Add your favorite mix-ins or switch up the flavor to make them your own.
- Perfect for Any Occasion: Whether it’s a casual family treat or a special event, Rice Krispie treats are the ideal go-to snack.
- Affordable: You won’t need to break the bank to make these tasty squares.
- Make-Ahead: Prepare these ahead of time, and they’ll be ready when you need them.
Preparation Time and Cook Time
- Total Time: 25 minutes
- Preparation Time: 10 minutes
- Cook Time: 15 minutes
- Chill Time: 30 minutes
- Servings: 12 squares
- Calories per serving: Approximately 130 calories
- Key Nutrients: Fat: 3g, Carbohydrates: 24g, Protein: 1g
Ingredients
To make these Rice Krispie Treats, gather the following ingredients:
For the Rice Krispie Treats:
- 6 cups Rice Krispies cereal
- 3 tablespoons unsalted butter
- 1 package (10 oz) mini marshmallows
- 1 teaspoon vanilla extract (optional for extra flavor)
Ingredient Highlights
- Rice Krispies Cereal: The classic cereal that gives these treats their signature crisp texture.
- Marshmallows: The gooey, sweet base that holds everything together.
- Butter: Adds richness and flavor to the mix.
- Vanilla Extract: Adds an optional depth of flavor that brings out the sweetness of the marshmallows.
Step-by-Step Instructions


Here’s how to make Rice Krispie Treats from start to finish:
Melt the Marshmallows
- Prepare Your Pan: Start by greasing a 9×13-inch baking pan with butter or non-stick spray. This will ensure the treats come out easily once they’re set.
- Melt the Butter: In a large pot over low heat, melt the butter. Stir it occasionally to make sure it doesn’t burn.
- Add the Marshmallows: Once the butter is fully melted, add the mini marshmallows to the pot. Stir constantly until they’re completely melted and smooth.
- Add Vanilla: Once the marshmallows are melted, add the vanilla extract (if using) and stir it in.
Combine with Rice Krispies
- Mix with Cereal: Pour in the Rice Krispies cereal and stir gently but thoroughly to coat all of the cereal with the melted marshmallow mixture. Be careful not to crush the cereal.
- Transfer to Pan: Immediately pour the mixture into your prepared baking pan, and use a spatula or spoon to gently press the mixture down into the pan. Make sure it’s even and smooth, but avoid pressing too hard, as that can make the treats too dense.
Chill and Set
- Cool: Let the Rice Krispie treats sit at room temperature for about 30 minutes to set. You can also pop them in the fridge for quicker results.
- Cut: Once the treats are cool and set, cut them into squares. Use a sharp knife to get clean edges.
How to Serve
Here are some fun ideas for serving your Rice Krispie Treats:
- Perfect for Parties: Display them on a festive plate, especially if you’re serving them at a themed party.
- Bento Box Treats: Pack a couple of squares into your kids’ lunchboxes for a sweet surprise.
- Gift Idea: Wrap individual squares in plastic wrap and tie them with a cute ribbon for a homemade gift.
- Add Toppings: Sprinkles, chocolate chips, or crushed candy can be sprinkled on top for added flavor and fun.
- Create a Treat Platter: Serve a variety of mix-ins like chocolate chunks or mini marshmallows for a fun snack station.
- Dip in Chocolate: Dip the edges in melted chocolate for an extra layer of sweetness.
- Add Food Coloring: If you’re making these for a specific holiday or occasion, add some food coloring to the marshmallows for a festive look.
- Make S’mores Rice Krispie Treats: Add graham cracker crumbs and mini chocolate chips to the mixture for a s’mores-inspired version.
- Use Cookie Cutters: Shape your treats into fun shapes with cookie cutters, perfect for holidays or special events.
- Serve with Milk: Pair with a tall glass of milk for a nostalgic snack.
Additional Tips
Here are a few tips to help you make the perfect Rice Krispie Treats every time:
- Don’t Overheat the Marshmallows: When melting the marshmallows, do so slowly and gently. High heat can cause them to burn or become too sticky.
- Use Fresh Marshmallows: Older marshmallows can make your treats too hard. Use fresh marshmallows for that perfect gooey texture.
- Don’t Over-Press: Press the mixture into the pan gently, so your treats aren’t too dense.
- Grease Your Hands: If you’re pressing the mixture down by hand, grease your hands lightly with butter to prevent sticking.
- Make Them Gluten-Free: Just make sure to check that your cereal and marshmallows are gluten-free if needed.
- Add Protein: For an extra boost, add some protein powder to the marshmallow mixture for a healthier twist.
- Chill for Faster Results: If you’re in a hurry, place the treats in the fridge for 10-15 minutes to speed up the cooling process.
- Store in an Airtight Container: Keep them fresh by storing your treats in an airtight container at room temperature.
- Double the Recipe: If you’re hosting a larger event, double the recipe to make more treats!
- Try Different Cereals: Feel free to swap Rice Krispies for another type of cereal for a fun twist—think fruity, chocolate, or even oatmeal.
Recipe Variations
Want to switch things up? Here are some fun variations on your Rice Krispie Treats:
- Peanut Butter Rice Krispie Treats: Stir in a few tablespoons of peanut butter with the marshmallows for a nutty flavor.
- S’mores Rice Krispies: Add graham cracker crumbs and chocolate chips to the mix for a s’mores-inspired treat.
- Chocolate-Dipped Rice Krispie Treats: Dip the finished squares in melted chocolate for an indulgent twist.
- Chocolate Rice Krispie Treats: Add cocoa powder to the marshmallow mixture for a chocolatey version of this classic treat.
- Fruity Rice Krispie Treats: Try adding dried fruit, like cranberries or raisins, for a fruity touch.
- Mint Rice Krispies: Add mint extract for a refreshing flavor that pairs well with the sweetness of the marshmallows.
- Candy-Cane Rice Krispies: Crushed candy canes mixed in make these perfect for the holidays.
- Rice Krispie Pops: Make mini treats on sticks for fun, hand-held versions.
- Cinnamon Roll Rice Krispies: Stir in a dash of cinnamon to the mix for a spiced-up version.
Freezing and Storage
To keep your Rice Krispie Treats fresh for longer, follow these storage tips:
- Storage: Store your Rice Krispie treats in an airtight container at room temperature for up to 3 days. They will stay soft and fresh.
- Refrigerate: If you live in a warm area, refrigerate your treats to prevent them from getting too sticky.
- Freezing: You can freeze Rice Krispie treats! Just wrap them tightly in plastic wrap and store them in a freezer-safe bag for up to 3 months.
- Thawing: When you’re ready to eat them, let them thaw at room temperature for 10-15 minutes.
Special Equipment
While you don’t need fancy equipment to make Rice Krispie Treats, a few basic tools will make the process easier:
- 9×13-inch baking pan
- Large saucepan
- Spatula or wooden spoon
- Sharp knife for cutting
faq section
Rice Krispie Treats are such a simple and beloved snack, but sometimes you might have a few questions along the way. Here are answers to some frequently asked questions that will help you make the best batch ever.
1. Can I use a different cereal for this recipe?
Yes! You can use any puffed cereal in place of Rice Krispies. Try Corn Pops, Cocoa Pebbles, or even Special K for a different texture or flavor. Just make sure the cereal is crispy enough to hold the marshmallow mixture.
2. How do I keep the Rice Krispie Treats from being too sticky?
If your treats are too sticky, it’s usually because the marshmallows or butter mixture wasn’t mixed thoroughly enough with the cereal. Be sure to stir gently but thoroughly, and press the mixture lightly into the pan—over-pressing can make them too dense and sticky.
3. Can I add other ingredients like chocolate chips or candy?
Absolutely! Add-ins like mini chocolate chips, M&Ms, or even chopped nuts can be mixed in before pressing the treats into the pan. Just make sure to stir them in gently so they don’t melt too much.
4. How can I make Rice Krispie Treats more flavorful?
If you want to add a flavor twist, consider mixing in some vanilla extract, peanut butter, or even a little bit of cinnamon. You could also dip the finished squares in melted chocolate or drizzle caramel over the top.
5. Can I make these ahead of time?
Yes! Rice Krispie Treats are great for making ahead. They will stay fresh for up to 3 days when stored in an airtight container at room temperature. You can even freeze them for up to 3 months if you want to keep them longer.
6. How do I cut the treats into perfect squares?
Let the treats cool and set completely before cutting. A sharp knife will make clean, straight cuts. If you’re having trouble, lightly grease the knife with some butter to prevent it from sticking to the treats.
Print
Rice Krispie Treats
- Total Time: 25 min.
Ingredients
For the Rice Krispie Treats:
- 6 cups Rice Krispies cereal
- 3 tablespoons unsalted butter
- 1 package (10 oz) mini marshmallows
- 1 teaspoon vanilla extract (optional for extra flavor)
Instructions
Melt the Marshmallows
- Prepare Your Pan: Start by greasing a 9×13-inch baking pan with butter or non-stick spray. This will ensure the treats come out easily once they’re set.
- Melt the Butter: In a large pot over low heat, melt the butter. Stir it occasionally to make sure it doesn’t burn.
- Add the Marshmallows: Once the butter is fully melted, add the mini marshmallows to the pot. Stir constantly until they’re completely melted and smooth.
- Add Vanilla: Once the marshmallows are melted, add the vanilla extract (if using) and stir it in.
Combine with Rice Krispies
- Mix with Cereal: Pour in the Rice Krispies cereal and stir gently but thoroughly to coat all of the cereal with the melted marshmallow mixture. Be careful not to crush the cereal.
- Transfer to Pan: Immediately pour the mixture into your prepared baking pan, and use a spatula or spoon to gently press the mixture down into the pan. Make sure it’s even and smooth, but avoid pressing too hard, as that can make the treats too dense.
Chill and Set
- Cool: Let the Rice Krispie treats sit at room temperature for about 30 minutes to set. You can also pop them in the fridge for quicker results.
- Cut: Once the treats are cool and set, cut them into squares. Use a sharp knife to get clean edges.
- Prep Time: 10 min.
- Chill Time: 30 min.
- Cook Time: 15 min.
Nutrition
- Serving Size: 12 squares
- Calories: 130 kcal
- Fat: 3g
- Carbohydrates: 24g
- Protein: 1g
Conclusion
Making Rice Krispie Treats is a breeze, and the results are always so satisfying. With just a few simple ingredients and a bit of time, you can create a delicious, crowd-pleasing snack that’s sure to bring smiles to everyone. Whether you stick to the classic recipe or add your own spin, these treats are a perfect way to enjoy a bit of nostalgia and a lot of flavor. Don’t forget to snap a photo and tag me on social media—I love seeing your delicious creations! Happy cooking!


