Introduction
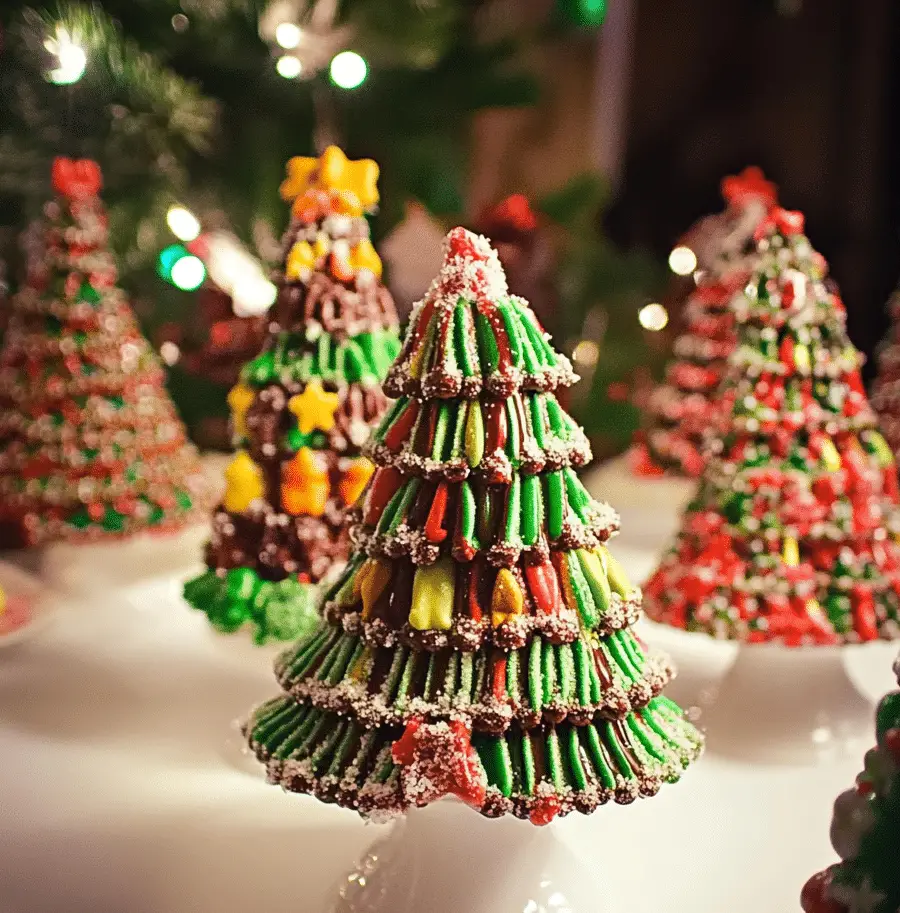
Bring a sprinkle of holiday magic to your dessert table with Candy Christmas Trees! These adorable, edible creations are as fun to make as they are to eat. Perfect for holiday parties, classroom treats, or just a festive family activity, these sweet trees will light up any gathering.
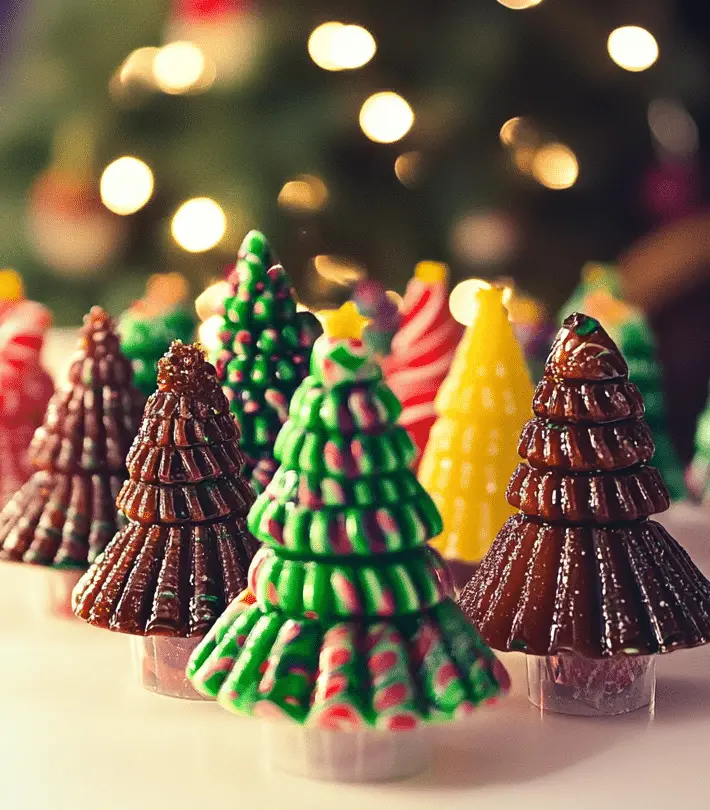
Each “tree” starts with a cone made from sugar or waffle, which serves as the base for your festive creation. Simply decorate with a variety of colorful candies—think gumdrops, sprinkles, and candy canes—and dust with a snowy layer of sugar for that frosty, wintery effect. The best part? No baking required!
Whether you’re crafting these trees with little ones or surprising your guests with a whimsical dessert display, they’re guaranteed to spread joy and Christmas cheer. So gather your favorite candies, let your creativity shine, and watch these delightful trees come to life. They’ll be the sweetest part of your holiday celebrations!
Why You’ll Love This Recipe
Here’s why Candy Christmas Trees will become your new holiday favorite:
- Fun and Festive: A perfect centerpiece for your holiday dessert table.
- Kid-Friendly: A fun activity that’s great for kids of all ages.
- No Baking Required: Simple to assemble with no need for the oven.
- Customizable: Decorate with your favorite candies, sprinkles, and colors.
- Great for Gifting: Wrap them in clear cellophane for adorable holiday gifts.
- Quick to Make: Minimal prep means more time to enjoy with loved ones.
- Showstopper Presentation: Eye-catching and Instagram-worthy!
- Family Bonding: A creative project to share with family and friends.
- Perfect for All Ages: Delight everyone from toddlers to grandparents.
- Budget-Friendly: Uses simple ingredients that won’t break the bank.
Preparation Time
- Total Time: 30 minutes
- Preparation Time: 30 minutes
- Servings: Makes 6 candy Christmas trees
- Calories per tree: Approximately 150 calories
Ingredients
Gather these festive supplies for your Candy Christmas Trees:
- 6 sugar cones or waffle cones (tree bases)
- 1 cup green frosting or melted green candy melts
- Assorted small candies (e.g., mini M&Ms, candy pearls, sprinkles)
- Powdered sugar (for snow effect)
- Edible glitter or shimmer dust (optional)
Ingredient Highlights
- Sugar Cones: The perfect shape to mimic Christmas trees.
- Green Frosting: Acts as the “glue” and gives the trees their festive color.
- Assorted Candies: Let your creativity shine with a variety of decorations.
- Powdered Sugar: Adds a wintry, snowy touch.
Step-by-Step Instructions
Follow these simple steps to craft your Candy Christmas Trees:
Prepare the Trees
- Set Up Your Workspace: Lay out wax paper or a non-stick mat to catch any mess.
- Apply Frosting: Using a knife or piping bag, coat the outer surface of each sugar cone with green frosting or melted candy.
Decorate the Trees
- Add Candy Decorations: Press small candies, pearls, and sprinkles onto the frosting while it’s still soft. Arrange them like ornaments on a tree.
- Create a Star: Place a candy star or a brightly colored candy at the tip of each cone to mimic a tree topper.
Add Final Touches
- Dust with Snow: Lightly sift powdered sugar over the decorated cones for a snowy effect.
- Optional Sparkle: Sprinkle edible glitter or shimmer dust for extra holiday sparkle.
How to Serve
Serve your Candy Christmas Trees with these festive ideas:
- Holiday Dessert Table: Display them as edible decorations on your dessert spread.
- Individual Treats: Place each tree on a cupcake liner for easy serving.
- Pair with Hot Cocoa: A fun and sweet pairing for cold winter nights.
- Gift Wrap: Wrap each tree in clear cellophane and tie with a festive ribbon for an adorable holiday gift.
- Edible Placeholders: Write names on small tags and attach them to the trees for a personalized touch.
Additional Tips
Make your Candy Christmas Trees even better with these tips:
- Work Quickly: Frosting and melted candy can set fast, so decorate while it’s still sticky.
- Use Piping Bags: For precision in applying frosting and decorations.
- Get Creative: Experiment with different candy colors and patterns.
- Involve the Kids: Let little ones design their own trees—it’s a fun holiday activity!
- Store Properly: Keep in an airtight container to maintain freshness.
Recipe Variations
Put your own spin on Candy Christmas Trees with these variations:
- Chocolate Trees: Use chocolate frosting and decorations for a different look.
- Snow-Covered Trees: Swap green frosting for white and create frosty, snowy trees.
- Mini Trees: Use smaller sugar cones for bite-sized versions.
- Vegan Option: Use dairy-free frosting and candies for a vegan-friendly treat.
- Themed Trees: Decorate in monochromatic colors like red and white for a peppermint theme.
Freezing and Storage
Keep your trees fresh for the holidays:
- Storage: Store in an airtight container at room temperature for up to a week.
- Freezing: Not recommended due to potential candy discoloration and texture changes.
- Thawing: When you’re ready to enjoy or serve your candy trees, take them out of the freezer and let them thaw at room temperature for a few hours. This will help prevent condensation from forming on the decorations and keep them looking fresh.
- Packaging for Gifting: If you’re making candy trees as gifts, you can store them in decorative gift boxes or clear plastic bags to keep them safe and make them look extra festive. Be sure to cushion them with tissue paper or bubble wrap to avoid any breakage during transport.
- Avoid Humidity: Humidity can cause candy to soften or melt. Store your candy trees in a dry area and away from any sources of moisture, especially if they have chocolate or sugary decorations.
Special Equipment
You’ll need these tools for your Candy Christmas Trees:
- Piping Bag or Knife: For spreading frosting.
- Wax Paper: To keep your workspace tidy.
- Sifter: For dusting powdered sugar evenly.
- Cone Mold or Ice Cream Cones: If you’re not using a traditional cone shape, these can be used as a base for your candy tree.
- Piping Bags: Perfect for decorating with frosting or melted chocolate, piping bags help you create neat, precise designs for your tree.
- Spatula or Butter Knife: Use a spatula or butter knife to spread frosting or melted chocolate smoothly over the cones.
- Edible Glitter or Sparkling Sugar: For adding a magical touch of sparkle and shine to your candy trees.
- Tweezers: If you’re placing small or delicate candies, tweezers can help you position them with precision.
- Candy Thermometer: If you’re making your own homemade decorations like caramel or chocolate, a thermometer ensures your candy reaches the right temperature
- .Cake Stand or Platter: Display your candy trees on a stand or platter to give them the spotlight they deserve.
- Scissors: A pair of sharp scissors is useful for cutting open candy wrappers or trimming the base of your tree to fit your serving plate.
FAQ Section
Got questions about Candy Christmas Trees? Here are answers:
- Can I make these ahead of time?
Yes! They stay fresh for several days if stored properly. - What if I don’t have green frosting?
Add food coloring to white frosting or use melted green candy melts. - Are they kid-friendly?
Absolutely! Kids will love decorating these festive treats. - Can I use a different cone shape?
- Absolutely! You can experiment with different shapes, such as ice cream cones or even paper cones for a more personalized touch.
- How do I make the tree stay upright?
- If your tree isn’t standing as it should, simply use a dab of icing or melted chocolate at the base to secure it to a plate or platter.
- Can I use homemade frosting instead of store-bought?
- Yes, homemade frosting works wonderfully for decorating! You can whip up a quick batch of buttercream or royal icing for extra sweetness.
- How long will these last?
- These candy trees will stay fresh for up to 2-3 days at room temperature. For longer storage, you can refrigerate them, but the candies may lose some of their crunch.
- Can I make these ahead of time?
- Yes, you can make the trees a day or two in advance. Just store them in an airtight container to keep them looking fresh and delicious.
- What can I use if I don’t have candy canes?
- If you can’t find candy canes, try using chocolate sticks, pretzel rods, or even small candy bars as the “trunk” of your tree.
Candy Christmas Trees
- Total Time: 30 min.
Ingredients
-
- 6 sugar cones or waffle cones (tree bases)
-
- 1 cup green frosting or melted green candy melts
-
- Assorted small candies (e.g., mini M&Ms, candy pearls, sprinkles)
-
- Powdered sugar (for snow effect)
-
- Edible glitter or shimmer dust (optional)
Instructions
Prepare the Trees
-
- Set Up Your Workspace: Lay out wax paper or a non-stick mat to catch any mess.
-
- Apply Frosting: Using a knife or piping bag, coat the outer surface of each sugar cone with green frosting or melted candy.
Decorate the Trees
-
- Add Candy Decorations: Press small candies, pearls, and sprinkles onto the frosting while it’s still soft. Arrange them like ornaments on a tree.
-
- Create a Star: Place a candy star or a brightly colored candy at the tip of each cone to mimic a tree topper.
Add Final Touches
-
- Dust with Snow: Lightly sift powdered sugar over the decorated cones for a snowy effect.
-
- Optional Sparkle: Sprinkle edible glitter or shimmer dust for extra holiday sparkle.
- Prep Time: 30 min.
Nutrition
- Serving Size: 6 servings
- Calories: 150 kcal
Conclusion
Candy Christmas Trees are the perfect blend of fun and festive, bringing both sweetness and creativity to your holiday season. Whether you’re hosting a party, looking for a family-friendly activity, or just want to add a little extra sparkle to your celebration, these edible trees are a great choice. With so many decorating options, each tree can be as unique and colorful as you like, making them a fun project for both kids and adults alike.
The best part? They’re super easy to assemble, so you can spend less time stressing and more time enjoying the holiday spirit. Once you’ve finished decorating, these little treats will be the star of your dessert table!
So, gather your candies, get ready to decorate, and create these fun, festive trees that everyone will love. Don’t forget to snap a photo and tag me on social media—I love seeing your delicious creations!

