Introduction
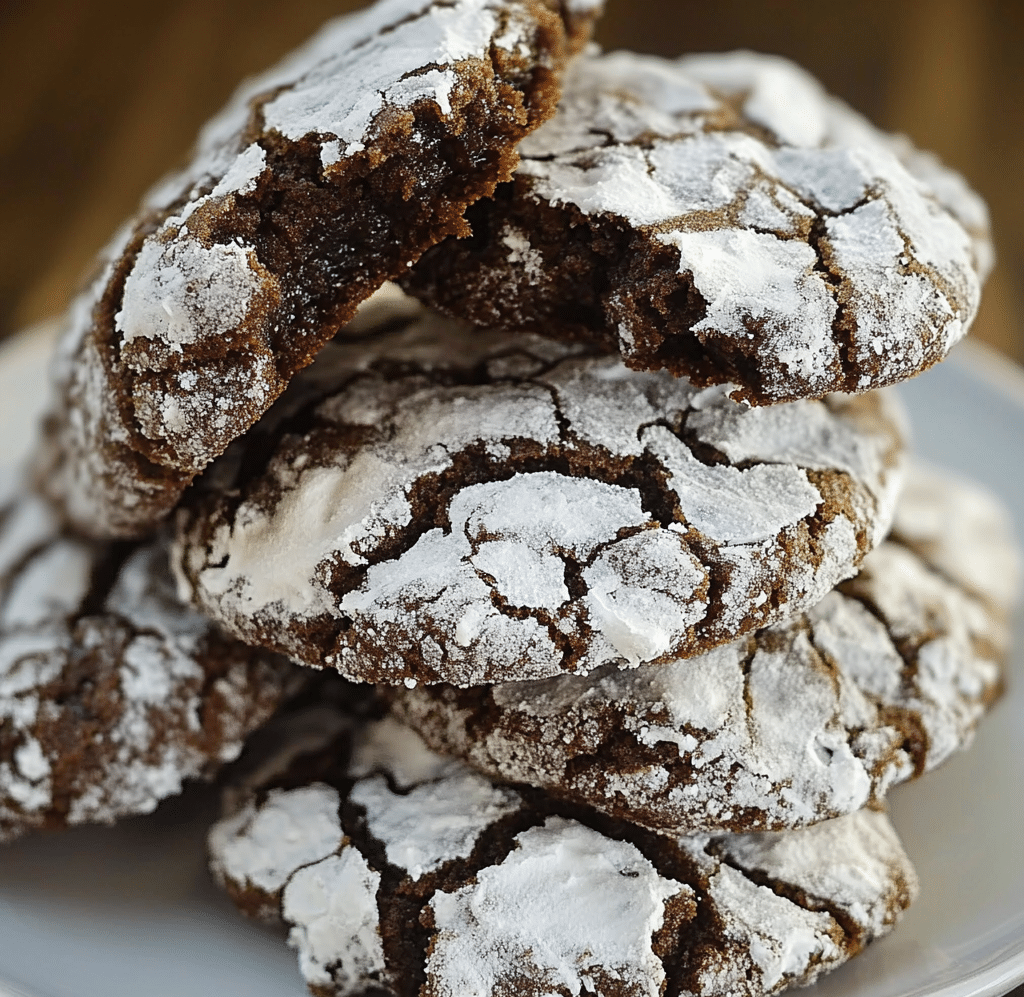
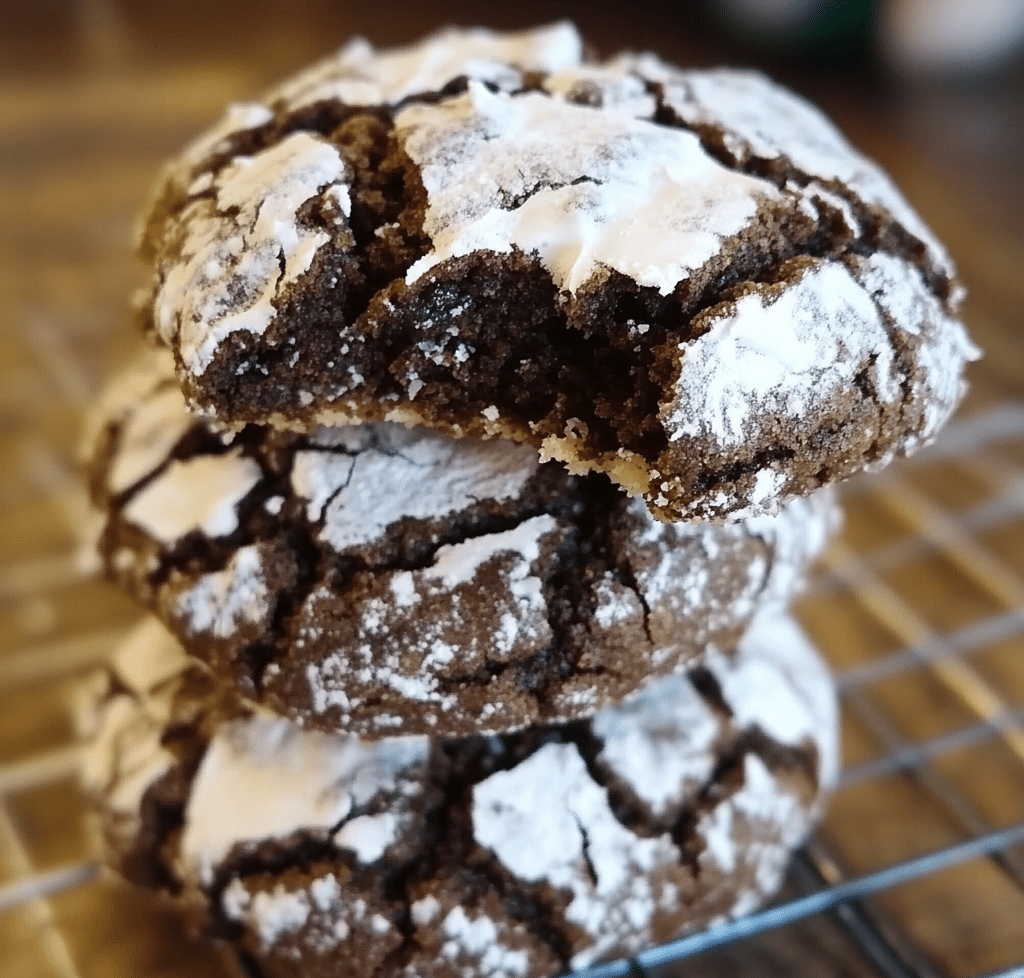
There’s something truly magical about the first bite of a Chocolate Crinkle Cookie. This classic holiday treat brings together the perfect combination of chewy, fudgy goodness with a light, powdered sugar coating that creates that signature crinkly top. Whether you’re baking for a holiday party, a family gathering, or simply indulging in a cozy winter afternoon, these cookies are sure to become a favorite in your recipe box. The best part? They’re so easy to make that even novice bakers will feel like seasoned pros by the time they’re pulling a batch out of the oven. Let’s dive into why these Chocolate Crinkle Cookies are a must-bake this season!
Why You’ll Love This Recipe
Here’s why Chocolate Crinkle Cookies will quickly earn a top spot in your baking repertoire:
- A Classic with a Twist: Chocolate crinkles have been a beloved cookie for years, but their crackled, snowy top never fails to delight.
- Perfectly Chewy: The chewy texture contrasts beautifully with the crisp exterior, giving every bite a satisfying experience.
- Holiday Ready: With their festive look, these cookies make the perfect addition to holiday cookie trays, Christmas parties, and gift boxes.
- Quick and Simple: With just a few ingredients and minimal effort, these cookies are a breeze to make.
- Kid-Friendly Fun: Kids will love rolling the dough in powdered sugar and watching the cookies “crinkle” as they bake.
- Great for Gifting: Wrap these cookies up in cute holiday tins or cellophane bags to share with loved ones.
- Easy to Customize: You can switch up the chocolate flavor or add mix-ins like white chocolate chips, nuts, or even a dash of peppermint extract.
- No Special Equipment Required: All you need is a baking sheet and a basic oven to whip up a batch of these delicious treats.
- Perfect for Any Skill Level: Whether you’re an experienced baker or just starting out, these cookies are easy to follow.
Preparation Time and Cook Time
- Total Time: 1 hour
- Preparation Time: 15 minutes
- Cook Time: 10-12 minutes
- Cooling Time: 10 minutes
- Servings: 24 cookies
- Calories per cookie: Approximately 150 calories
- Key Nutrients: Fat: 7g, Carbohydrates: 21g, Protein: 2g
Ingredients
Gather the following ingredients to create your Chocolate Crinkle Cookies:
For the Cookie Dough:
- 1 cup all-purpose flour
- 1/2 cup unsweetened cocoa powder
- 1 1/2 teaspoons baking powder
- 1/4 teaspoon salt
- 1/2 cup vegetable oil
- 1 cup granulated sugar
- 2 large eggs
- 1 teaspoon vanilla extract
- 1/2 cup powdered sugar (for coating)
Ingredient Highlights
- Unsweetened Cocoa Powder: For a rich, deep chocolate flavor that is the base of the crinkle effect.
- Powdered Sugar: Adds that snowy, crinkled top to the cookies as they bake.
- Vegetable Oil: Gives the cookies their soft, chewy texture.
- Vanilla Extract: Enhances the chocolate flavor and adds a subtle sweetness.
Step-by-Step Instructions
Making Chocolate Crinkle Cookies is as simple as mixing, rolling, and baking! Here’s how to do it:
Prepare the Dough
- Preheat the Oven: Start by preheating your oven to 350°F (175°C). Line two baking sheets with parchment paper for easy cleanup and to prevent the cookies from sticking.
- Mix Dry Ingredients: In a medium bowl, whisk together the flour, cocoa powder, baking powder, and salt until fully combined. This helps to evenly distribute the dry ingredients.
- Mix Wet Ingredients: In a large bowl, combine the vegetable oil and granulated sugar. Beat the mixture until it’s smooth and well blended. Add the eggs, one at a time, beating well after each addition. Stir in the vanilla extract for an extra layer of flavor.
- Combine: Gradually add the dry ingredients to the wet ingredients, stirring until the dough forms. The dough should be thick and slightly sticky—this is perfect for rolling!
Roll the Cookies
- Coat in Powdered Sugar: Pour the powdered sugar into a shallow bowl. Using your hands, roll the dough into 1-inch balls. Next, roll each dough ball in the powdered sugar until fully coated, creating that signature snowy, crinkled effect when baked.
- Place on Baking Sheet: Arrange the sugar-coated dough balls on the prepared baking sheets, spacing them about 2 inches apart to give them room to spread.
Bake the Cookies
- Bake: Place the baking sheets in the preheated oven and bake for 10-12 minutes, or until the cookies have spread and the cracks are visible on top. Don’t over-bake; the cookies will continue to set as they cool, so remove them while they’re still soft in the center.
- Cool: Let the cookies cool on the baking sheets for 5 minutes before transferring them to a wire rack to cool completely. This will ensure they hold their shape while cooling.
How to Serve
Here are some creative ways to serve your Chocolate Crinkle Cookies:
- Holiday Cookie Tray: Arrange the cookies on a festive tray with other treats like gingerbread men, sugar cookies, and peppermint bark.
- Hot Cocoa Pairing: Serve these crinkly delights alongside a steaming mug of hot chocolate for the ultimate cozy treat.
- Gift Wrapped: Place the cookies in holiday tins or clear bags tied with festive ribbons for a thoughtful homemade gift.
- Cookie Decorating Party: If you’re hosting a holiday gathering, let guests decorate the cookies with colored sugar or sprinkles before serving.
- Ice Cream Sandwiches: Use these cookies to make ice cream sandwiches by pairing them with your favorite ice cream flavor.
Additional Tips
To help you get the best possible results from your Chocolate Crinkle Cookies, check out these helpful tips:
- Don’t Skip the Chilling: If you find the dough too sticky to roll, pop it in the fridge for 30 minutes to make it easier to handle.
- Measure Your Ingredients: Baking is all about precision, so be sure to measure your ingredients correctly to get the right texture.
- Don’t Overcrowd the Baking Sheets: The cookies will spread out as they bake, so ensure you leave enough space between each cookie.
- Use Quality Cocoa Powder: A high-quality cocoa powder will elevate the flavor of your cookies.
- Store Properly: To keep the cookies fresh, store them in an airtight container at room temperature for up to a week.
Recipe Variations
There’s no limit to how you can get creative with Chocolate Crinkle Cookies! Here are a few variations to try:
- Peppermint Crinkle Cookies: Add a teaspoon of peppermint extract to the dough for a refreshing minty twist.
- White Chocolate Crinkles: Add white chocolate chips to the dough for a delightful contrast against the dark cocoa.
- Nutty Crinkle Cookies: Fold in chopped walnuts or pecans for a crunchy texture that complements the soft, chewy cookie.
- Spicy Crinkles: Add a pinch of cinnamon or cayenne pepper to the dough for a spicy kick that pairs perfectly with the rich chocolate flavor.
- Gluten-Free Crinkle Cookies: Use a gluten-free flour blend to make these cookies suitable for those with dietary restrictions.
- Dark Chocolate Crinkles: Swap in dark cocoa powder for an even richer chocolate flavor.
Freezing and Storage
Chocolate Crinkle Cookies are perfect for making ahead and storing for later. Here’s how to keep them fresh:
- Storage: Keep your cookies in an airtight container at room temperature for up to one week.
- Freezing: If you want to freeze the dough for later, roll it into balls and coat them in powdered sugar. Arrange the dough balls on a baking sheet and freeze until solid. Once frozen, transfer the dough balls to a freezer-safe bag. When you’re ready to bake, just place them on a baking sheet and bake as directed—no thawing necessary!
- Thawing: If you’ve frozen baked cookies, let them come to room temperature before serving.
Special Equipment
Here are a few kitchen tools you’ll need for this recipe:
- Mixing Bowls: For combining your ingredients.
- Whisk or Electric Mixer: To ensure your wet ingredients are perfectly blended.
- Baking Sheets: For spreading out your cookies.
- Parchment Paper: To prevent sticking and make cleanup easier.
- Wire Rack: For cooling your cookies evenly.
FAQ Section
Let’s answer some of your common questions about Chocolate Crinkle Cookies:
- Can I use butter instead of oil?
Yes, you can substitute the oil for softened butter if you prefer a richer flavor. - Can I use cocoa powder with sugar?
It’s best to use unsweetened cocoa powder for this recipe to maintain the proper balance of sweetness and bitterness. - What if I can’t find powdered sugar?
You can make your own powdered sugar by blending granulated sugar in a blender until it reaches a fine, powdery consistency. - How can I get a crispier exterior?
For a crisper texture, bake the cookies a bit longer—just be careful not to over-bake, as this can cause the cookies to dry out.
Chocolate Crinkle Cookies
- Total Time: 1 hour
Ingredients
- 1 cup all-purpose flour
- 1/2 cup unsweetened cocoa powder
- 1 1/2 teaspoons baking powder
- 1/4 teaspoon salt
- 1/2 cup vegetable oil
- 1 cup granulated sugar
- 2 large eggs
- 1 teaspoon vanilla extract
- 1/2 cup powdered sugar (for coating)
Instructions
Prepare the Dough
- Preheat the Oven: Start by preheating your oven to 350°F (175°C). Line two baking sheets with parchment paper for easy cleanup and to prevent the cookies from sticking.
- Mix Dry Ingredients: In a medium bowl, whisk together the flour, cocoa powder, baking powder, and salt until fully combined. This helps to evenly distribute the dry ingredients.
- Mix Wet Ingredients: In a large bowl, combine the vegetable oil and granulated sugar. Beat the mixture until it’s smooth and well blended. Add the eggs, one at a time, beating well after each addition. Stir in the vanilla extract for an extra layer of flavor.
- Combine: Gradually add the dry ingredients to the wet ingredients, stirring until the dough forms. The dough should be thick and slightly sticky—this is perfect for rolling!
Roll the Cookies
- Coat in Powdered Sugar: Pour the powdered sugar into a shallow bowl. Using your hands, roll the dough into 1-inch balls. Next, roll each dough ball in the powdered sugar until fully coated, creating that signature snowy, crinkled effect when baked.
- Place on Baking Sheet: Arrange the sugar-coated dough balls on the prepared baking sheets, spacing them about 2 inches apart to give them room to spread.
Bake the Cookies
- Bake: Place the baking sheets in the preheated oven and bake for 10-12 minutes, or until the cookies have spread and the cracks are visible on top. Don’t over-bake; the cookies will continue to set as they cool, so remove them while they’re still soft in the center.
- Cool: Let the cookies cool on the baking sheets for 5 minutes before transferring them to a wire rack to cool completely. This will ensure they hold their shape while cooling.
- Prep Time: 15 min.
- Cooling Time: 10 min.
- Cook Time: 10-12 min.
Nutrition
- Serving Size: 24 cookies
- Calories: 150 kcal
- Fat: 7g
- Carbohydrates: 21g
- Protein: 2g
Conclusion
There you have it—a simple, irresistible recipe for Chocolate Crinkle Cookies that will quickly become a family favorite. The rich, fudgy chocolate flavor paired with the powdered sugar coating creates the perfect festive treat. Whether you’re baking for a holiday party, a cozy night in, or gifting them to friends, these cookies are sure to bring a smile to anyone who tries them. Don’t forget to snap a photo and tag me on social media—I love seeing your delicious creations! Happy baking!

