

Introduction
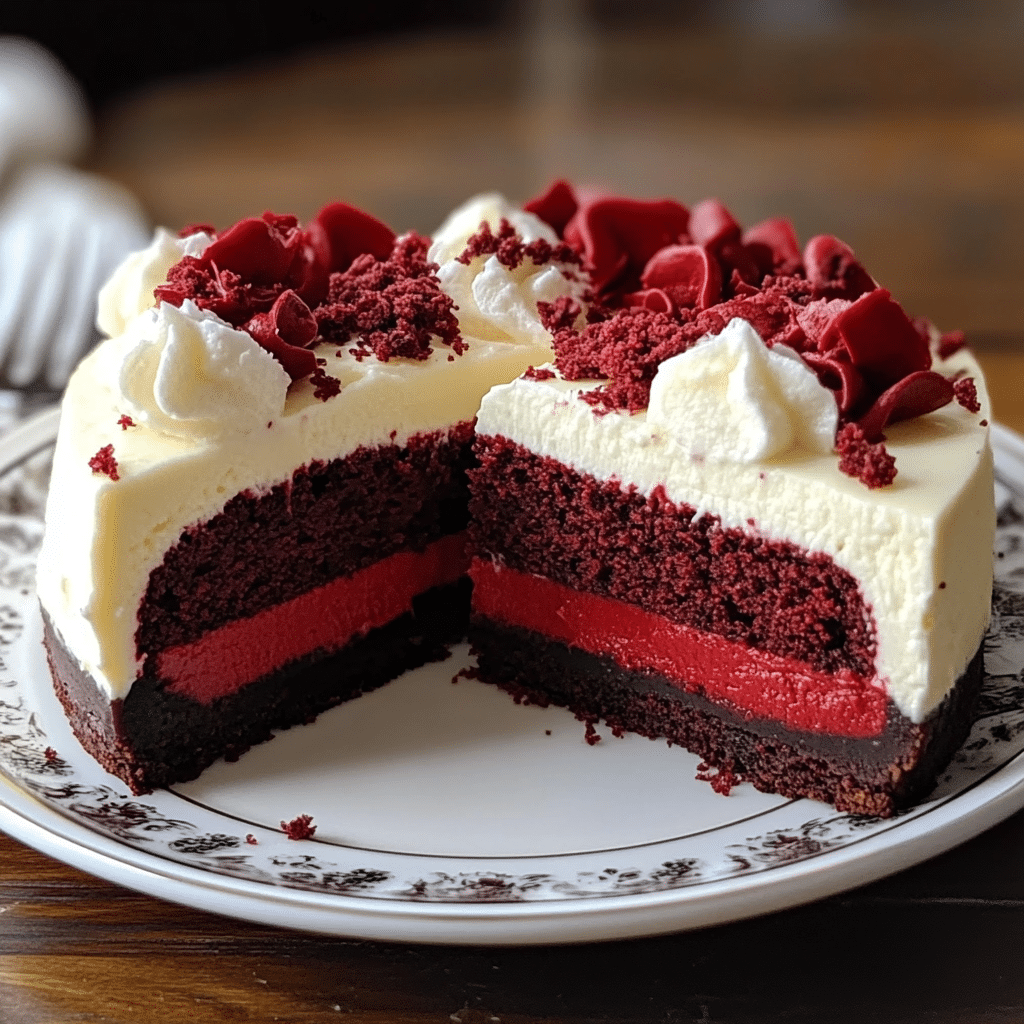
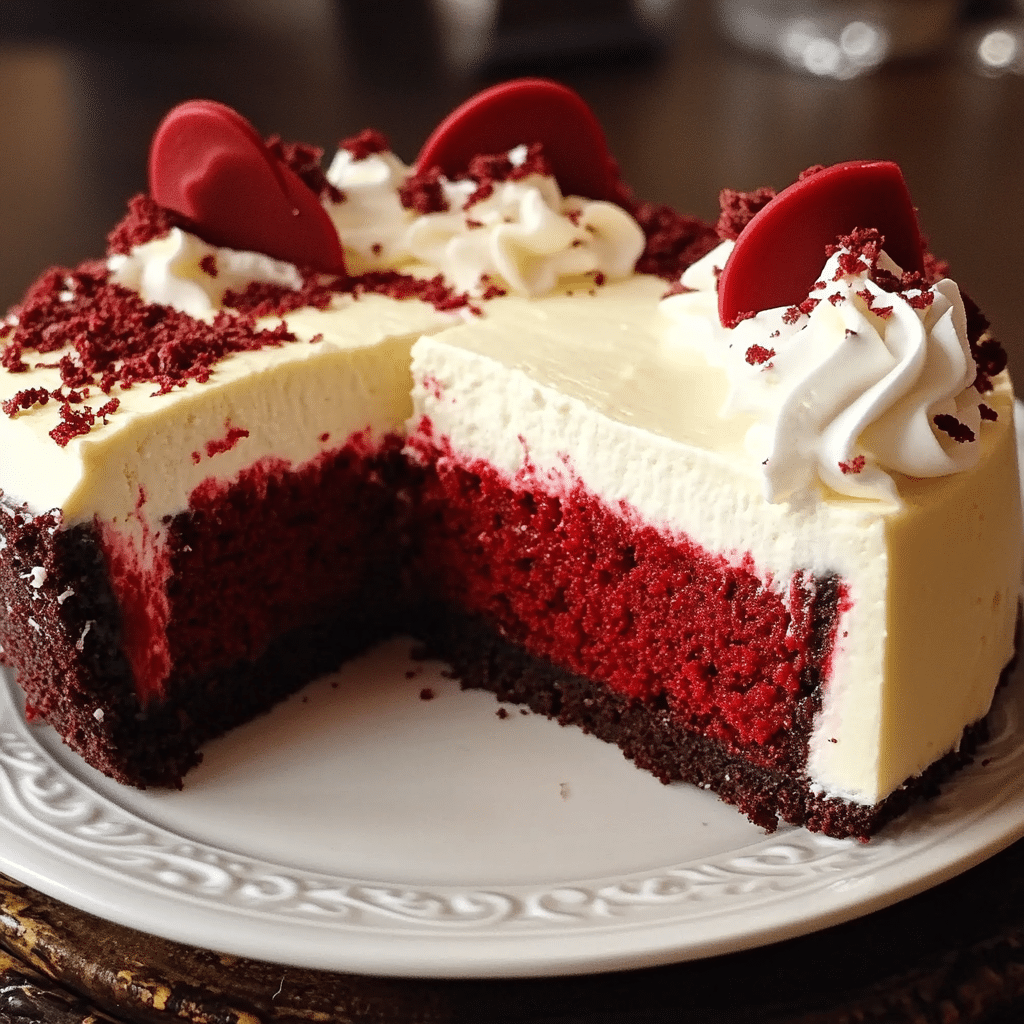
Prepare to indulge in the ultimate dessert decadence with this Red Velvet Cheesecake Recipe! This show-stopping treat combines the best of both worlds: the rich, velvety texture of classic red velvet cake and the creamy, luxurious layers of cheesecake. It’s the perfect centerpiece for celebrations, date nights, or any time you’re in the mood to treat yourself to something extraordinary.
With its vibrant red hue and luscious cream cheese layers, this Red Velvet Cheesecake Recipe doesn’t just taste incredible—it looks absolutely stunning too. And while it may seem like a professional-level dessert, it’s surprisingly approachable with the right guidance. A little patience goes a long way, and the reward? A masterpiece that’s as eye-catching as it is delicious.
So, grab your apron and prepare to create a dessert that’s guaranteed to impress your family, friends, and most importantly—yourself. Let’s get baking!
Why You’ll Love This Recipe
If you’re looking for a dessert that’s both indulgent and memorable, this recipe has it all. Here’s why you’ll adore making and serving Red Velvet Cheesecake Recipe:
- Perfect Balance of Flavors: The tangy cream cheese perfectly complements the rich cocoa notes in the red velvet cake.
- Visually Stunning: With vibrant layers, it’s a treat for the eyes as well as the palate.
- Crowd-Pleaser: Ideal for birthdays, holidays, or any special gathering.
- Do-Ahead Dessert: Can be prepared in advance, making it stress-free for entertaining.
- Homemade Elegance: Offers a bakery-quality result from the comfort of your kitchen.
- Flexible Serving Options: Pairs beautifully with a variety of toppings like whipped cream or fresh berries.
Preparation Time and Cook Time
- Total Time: Approximately 6 hours (including chilling time)
- Preparation Time: 40 minutes
- Bake Time: 1 hour 30 minutes
- Cooling & Chilling Time: 4 hours
- Servings: 12 slices
- Calories per slice: 450 calories
Ingredients
Here’s what you’ll need to make this decadent Red Velvet Cheesecake Recipe:
For the Red Velvet Cake Layers
- 2 cups all-purpose flour
- 1 ½ cups granulated sugar
- 2 tablespoons cocoa powder
- 1 teaspoon baking soda
- ½ teaspoon salt
- 2 large eggs
- 1 ½ cups buttermilk
- 1 cup vegetable oil
- 2 teaspoons vanilla extract
- 1 teaspoon white vinegar
- 2 tablespoons red food coloring
the Cheesecake Layer
- 16 oz cream cheese, softened
- ¾ cup granulated sugar
- 2 large eggs
- 1 teaspoon vanilla extract
- ½ cup sour cream
For the Cream Cheese Frosting
- 8 oz cream cheese, softened
- ½ cup unsalted butter, softened
- 4 cups powdered sugar
- 1 teaspoon vanilla extract
- 2–3 tablespoons heavy cream (as needed)
Ingredient Highlights
- Buttermilk: Adds tanginess and tenderness to the red velvet cake.
- Cocoa Powder: Provides a subtle chocolate flavor that’s classic in red velvet recipes.
- Sour Cream: Enhances the creaminess of the cheesecake layer.
- Cream Cheese Frosting: Ties everything together with its rich and tangy sweetness.
Step-by-Step Instructions


1: Prepare the Cheesecake Layer
- Preheat Oven: Preheat your oven to 325°F (163°C). Grease a 9-inch springform pan and line the bottom with parchment paper.
- Mix Ingredients: In a large bowl, beat the cream cheese and sugar until smooth. Add eggs one at a time, followed by vanilla and sour cream. Mix until creamy.
- Bake: Pour the cheesecake batter into the prepared pan. Bake for 40–45 minutes or until set. Let it cool completely, then refrigerate for at least 2 hours.
2: Prepare the Red Velvet Cake Layers
- Preheat Oven: Preheat your oven to 350°F (177°C). Grease and flour two 9-inch round cake pans.
- Mix Dry Ingredients: In a medium bowl, sift together flour, sugar, cocoa powder, baking soda, and salt.
- Combine Wet Ingredients: In a large bowl, whisk eggs, buttermilk, oil, vanilla, vinegar, and red food coloring.
- Combine Wet and Dry: Gradually add the dry ingredients to the wet mixture, stirring until just combined.
- Bake: Divide the batter evenly between the prepared pans and bake for 25–30 minutes. Cool completely before assembling.
3: Prepare the Cream Cheese Frosting
- Beat Ingredients: In a large bowl, beat the cream cheese and butter until creamy. Gradually add powdered sugar, followed by vanilla and heavy cream, until smooth and spreadable.
4: Assemble the Cake
- Layer: Place one red velvet cake layer on a serving plate. Spread a thin layer of frosting, then place the chilled cheesecake layer on top. Add another thin layer of frosting, followed by the second red velvet layer.
- Frost the Cake: Frost the entire cake with the cream cheese frosting, smoothing the edges for a polished look.
- Decorate: Garnish with red velvet crumbs, chocolate shavings, or fresh fruit for a finishing touch.
how to serve
Here are some creative ways to serve your Red Velvet Cheesecake Recipe:
- Elegant Plating: Serve slices with a drizzle of chocolate syrup and a dollop of whipped cream.
- Festive Touch: Add sprinkles or themed decorations for holidays or parties.
- Accompanying Drinks: Pair with coffee, tea, or a glass of sparkling wine for a delightful treat.
Tips for Success
- Don’t Overmix: Overmixing the batter can lead to dense cake layers. Mix until just combined.
- Room Temperature Ingredients: Ensure all dairy ingredients are at room temperature for smoother blending.
- Use Parchment Paper: Lining the pans helps ensure the cake layers release easily.
- Chill Thoroughly: Allow the assembled cake to chill for at least 2 hours for easier slicing.
freezing and storage
Here’s an expanded answer on freezing and storage to ensure your cupcakes stay fresh and delicious:
- How do I store the cupcakes for the best freshness?
For short-term storage, keep the frosted cupcakes in an airtight container at room temperature for up to 3 days. If the weather is warm, it’s better to refrigerate them to keep the frosting firm. Place the cupcakes in a single layer in a container to avoid smudging the decorations. Let refrigerated cupcakes sit at room temperature for about 30 minutes before serving for the best flavor and texture. - Can I freeze the cupcakes?
Yes, freezing is an excellent option if you want to make these cupcakes in advance! Here’s how:- For Unfrosted Cupcakes: Allow the cupcakes to cool completely after baking. Wrap each one tightly in plastic wrap to prevent freezer burn, then place them in a freezer-safe bag or container. Store in the freezer for up to 3 months. When you’re ready to decorate, let them thaw at room temperature before adding frosting and decorations.
- For Frosted Cupcakes: Freezing frosted cupcakes is possible, but you’ll need to take extra care to preserve the frosting and decorations. Place the cupcakes on a baking sheet and freeze uncovered for 1-2 hours, or until the frosting is firm. Once frozen, wrap each cupcake in plastic wrap and store them in an airtight container. Thaw them in the refrigerator overnight, and let them come to room temperature before serving.
- Any tips for reheating or refreshing frozen cupcakes?
If the cupcakes feel slightly dry after freezing, you can refresh them by placing a damp paper towel over them and microwaving them in short bursts (5-10 seconds). This trick adds a touch of moisture and warmth, making them taste as if they were freshly baked!
FAQ Section
Whether you’re curious about substitutions, storage tips, or creative alternatives, these answers will guide you to perfecting this dessert:
What if I can’t find candy corn?
No worries! You can substitute candy corn with other Halloween-themed candies, like gumdrops, mini marshmallows, or even small chocolate truffles. The key is to get creative with what you have on hand while keeping the whimsical witch hat theme intact.
Can I use homemade cake instead of a box mix?
Absolutely! If you prefer to skip the box mix, feel free to use your favorite homemade chocolate cake recipe. Just make sure the recipe yields enough batter for 12 cupcakes. Keep in mind that the baking time may vary slightly, so watch your cupcakes carefully as they bake.
How long can I store the cupcakes?
These cupcakes can be stored at room temperature for up to 3 days if kept in an airtight container. If your kitchen is particularly warm, it’s a good idea to refrigerate them to keep the frosting from melting. Just let them come to room temperature before serving for the best taste.
Can I freeze these cupcakes?
Yes! If you’d like to prepare them ahead of time, you can freeze the unfrosted cupcakes. Wrap each one tightly in plastic wrap, place them in a freezer-safe bag or container, and freeze for up to 3 months. When ready to enjoy, thaw them at room temperature before adding the frosting and decorations.

Red Velvet Cheesecake recipe
- Total Time: 6 hours (including chilling time)
Ingredients
For the Red Velvet Cake Layers
- 2 cups all-purpose flour
- 1 ½ cups granulated sugar
- 2 tablespoons cocoa powder
- 1 teaspoon baking soda
- ½ teaspoon salt
- 2 large eggs
- 1 ½ cups buttermilk
- 1 cup vegetable oil
- 2 teaspoons vanilla extract
- 1 teaspoon white vinegar
- 2 tablespoons red food coloring
For the Cheesecake Layer
- 16 oz cream cheese, softened
- ¾ cup granulated sugar
- 2 large eggs
- 1 teaspoon vanilla extract
- ½ cup sour cream
For the Cream Cheese Frosting
- 8 oz cream cheese, softened
- ½ cup unsalted butter, softened
- 4 cups powdered sugar
- 1 teaspoon vanilla extract
- 2–3 tablespoons heavy cream (as needed)
Instructions
Step 1: Prepare the Cheesecake Layer
- Preheat Oven: Preheat your oven to 325°F (163°C). Grease a 9-inch springform pan and line the bottom with parchment paper.
- Mix Ingredients: In a large bowl, beat the cream cheese and sugar until smooth. Add eggs one at a time, followed by vanilla and sour cream. Mix until creamy.
- Bake: Pour the cheesecake batter into the prepared pan. Bake for 40–45 minutes or until set. Let it cool completely, then refrigerate for at least 2 hours.
Step 2: Prepare the Red Velvet Cake Layers
- Preheat Oven: Preheat your oven to 350°F (177°C). Grease and flour two 9-inch round cake pans.
- Mix Dry Ingredients: In a medium bowl, sift together flour, sugar, cocoa powder, baking soda, and salt.
- Combine Wet Ingredients: In a large bowl, whisk eggs, buttermilk, oil, vanilla, vinegar, and red food coloring.
- Combine Wet and Dry: Gradually add the dry ingredients to the wet mixture, stirring until just combined.
- Bake: Divide the batter evenly between the prepared pans and bake for 25–30 minutes. Cool completely before assembling.
Step 3: Prepare the Cream Cheese Frosting
- Beat Ingredients: In a large bowl, beat the cream cheese and butter until creamy. Gradually add powdered sugar, followed by vanilla and heavy cream, until smooth and spreadable.
Step 4: Assemble the Cake
- Layer: Place one red velvet cake layer on a serving plate. Spread a thin layer of frosting, then place the chilled cheesecake layer on top. Add another thin layer of frosting, followed by the second red velvet layer.
- Frost the Cake: Frost the entire cake with the cream cheese frosting, smoothing the edges for a polished look.
- Decorate: Garnish with red velvet crumbs, chocolate shavings, or fresh fruit for a finishing touch.
- Prep Time: 40 min.
- Cooling Time: 4 hours
- Cook Time: 1 hour 30 minutes
Nutrition
- Serving Size: 12 slices
- Calories: 450 kcal
Conclusion
This Red Velvet Cheesecake is a show-stopping dessert that blends the best of two beloved treats: rich, velvety red cake and creamy cheesecake. Perfect for any celebration, its striking layers and luxurious texture make it an unforgettable centerpiece on your dessert table.
Whether you’re hosting a holiday gathering, celebrating a special milestone, or simply indulging in a sweet treat, this recipe is sure to impress everyone who takes a bite. The rich flavors, coupled with the vibrant red hue, create a dessert that’s as delightful to eat as it is to look at.
One of the best things about this recipe is its versatility. You can prepare components ahead of time, making it an excellent choice for those busy hosting schedules. Plus, the decoration possibilities are endless—top it with whipped cream, fresh berries, or a drizzle of chocolate for that extra wow factor.
Gather your ingredients and get ready to whip up a dessert that’s guaranteed to become a favorite. Don’t forget to share your version! Snap a photo and tag me on social media—I absolutely love seeing your delicious creations. Happy baking!


