

Introduction
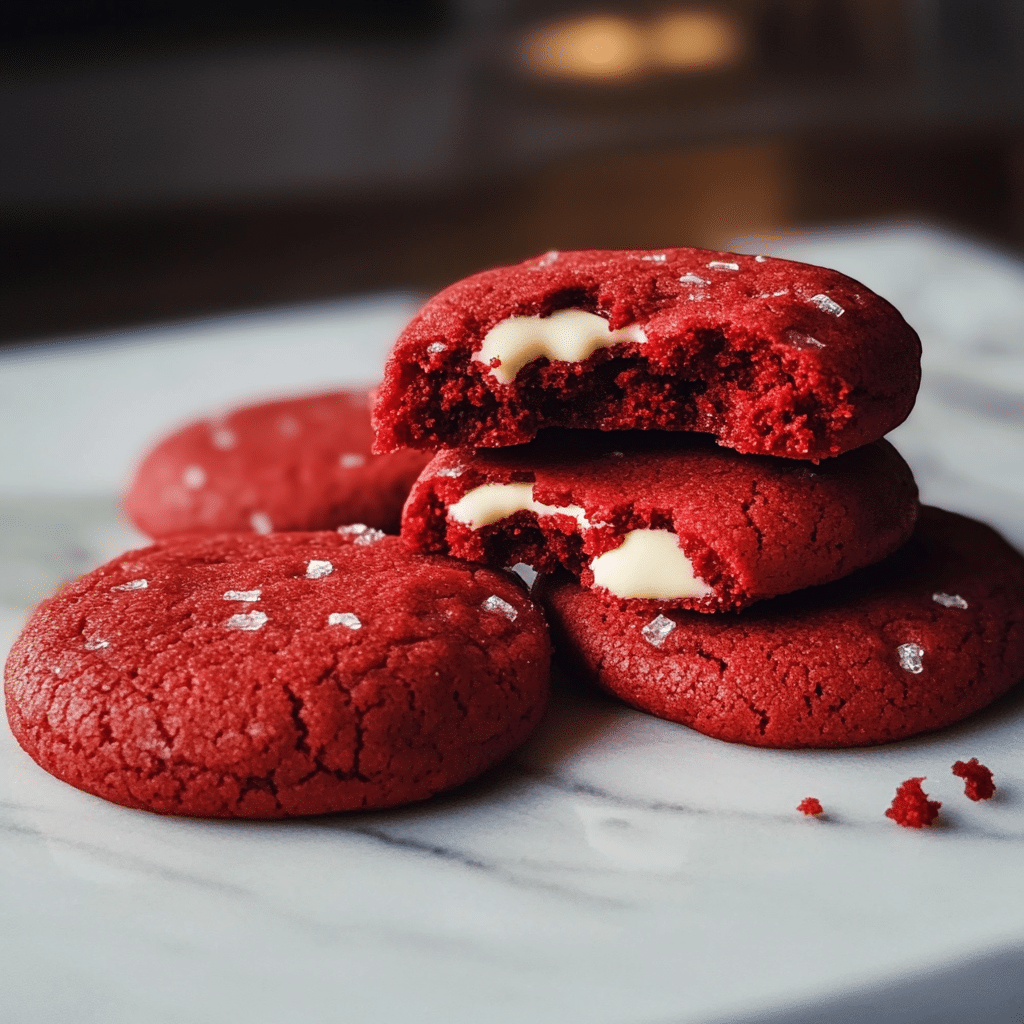
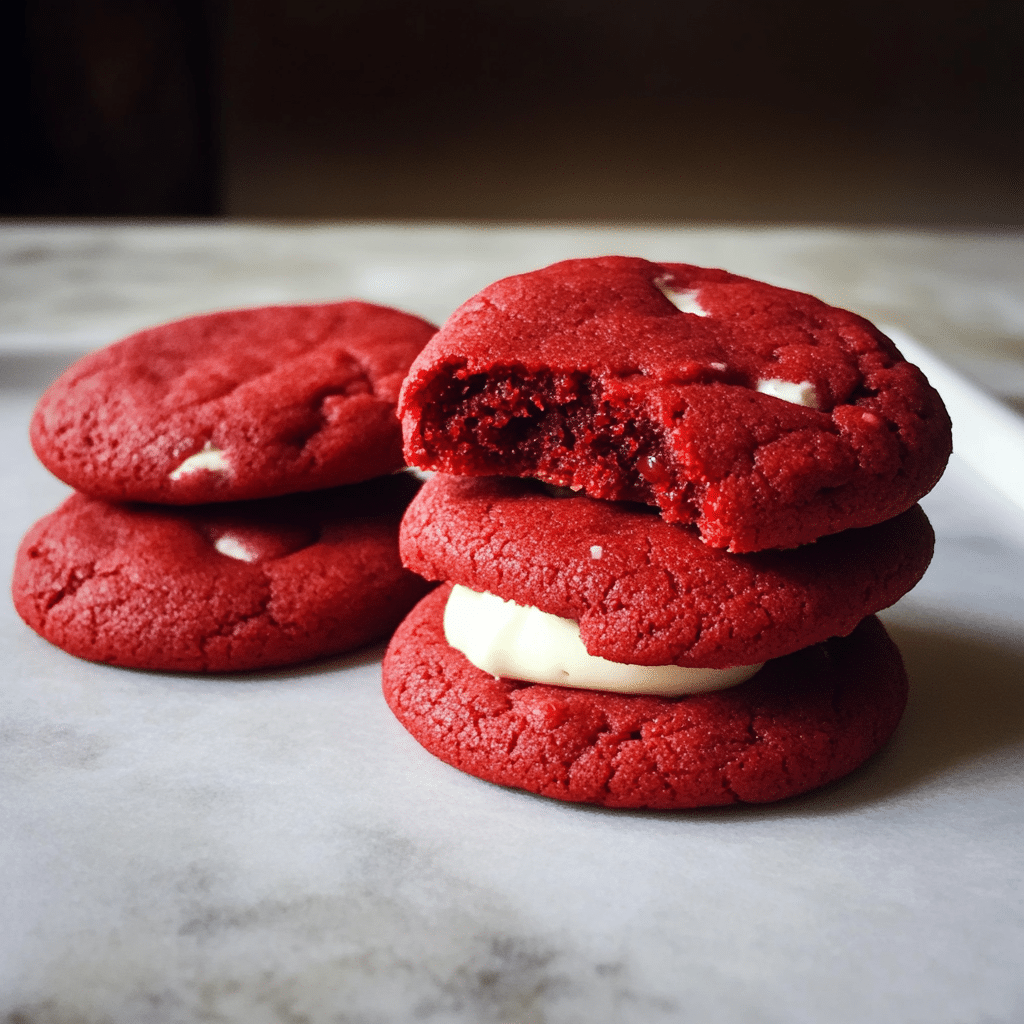
If you’re searching for a dessert that’s equal parts indulgent and eye-catching, look no further than Soft Red Velvet Cookies. These cookies capture the essence of classic red velvet cake in a handheld form, complete with a rich cocoa flavor, vibrant color, and melt-in-your-mouth texture. They’re perfect for holidays, special occasions, or just because you’re craving something irresistibly sweet. And don’t worry if baking feels intimidating—this recipe is straightforward and fun, with steps designed to make you feel like a pro in the kitchen.
Not only are these cookies delicious, but they also add a festive touch to any table. Whether you’re baking for Valentine’s Day, Christmas, or a casual get-together, they’re guaranteed to impress. Let’s dive into this simple yet decadent recipe that’s sure to become a favorite!
Why You’ll Love This Recipe
Here’s why Soft Red Velvet Cookies are a must-try:
- Incredibly Soft Texture: These cookies are pillowy soft and moist, with a slight chewiness.
- Stunning Appearance: The vibrant red hue makes them a standout on any dessert table.
- Rich Cocoa Flavor: Subtle chocolate notes balance the sweetness beautifully.
- Quick and Easy: Minimal prep and bake time make this recipe doable for anyone.
- Crowd-Pleaser: Perfect for parties, gifts, or just a sweet treat at home.
- Make-Ahead Friendly: The dough can be prepped and chilled in advance.
- Versatile: Add white chocolate chips, nuts, or a cream cheese glaze for variety.
Preparation Time and Cook Time
- Total Time: 30 minutes
- Preparation Time: 15 minutes
- Cook Time: 10-12 minutes
- Servings: 24 cookies
- Calories per cookie: Approximately 130 calories
Ingredients
Here’s what you’ll need to whip up these cookies:
For the Cookies
- 1 ½ cups all-purpose flour
- 2 tablespoons cocoa powder
- 1 teaspoon baking soda
- ¼ teaspoon salt
- ½ cup unsalted butter, softened
- ¾ cup granulated sugar
- ¼ cup brown sugar, packed
- 1 large egg
- 1 tablespoon red food coloring
- 1 teaspoon vanilla extract
- 1 teaspoon white vinegar
Optional Add-Ins
- ½ cup white chocolate chips
- ½ cup chopped pecans or walnuts
Ingredient Highlights
- Cocoa Powder: Adds the signature red velvet flavor with subtle chocolate undertones.
- White Vinegar: A classic ingredient that enhances the texture and activates the baking soda for that soft, fluffy result.
- Red Food Coloring: Gives the cookies their vibrant hue—use gel for a more concentrated color.
Step-by-Step Instructions


Prepare the Dough
- Preheat Your Oven: Preheat to 350°F (175°C) and line baking sheets with parchment paper.
- Mix Dry Ingredients: In a medium bowl, whisk together the flour, cocoa powder, baking soda, and salt. Set aside.
- Cream Butter and Sugars: In a large mixing bowl, beat the softened butter, granulated sugar, and brown sugar until light and fluffy.
- Add Wet Ingredients: Mix in the egg, vanilla extract, red food coloring, and white vinegar until fully combined.
- Combine: Gradually add the dry ingredients to the wet mixture, stirring just until no streaks of flour remain.
- Optional Add-Ins: Fold in white chocolate chips or nuts if using.
Shape and Bake
- Scoop Dough: Use a cookie scoop or tablespoon to drop dough onto the prepared baking sheets, spacing about 2 inches apart.
- Bake: Bake for 10-12 minutes, or until the edges are set but the centers look slightly underdone.
- Cool: Allow the cookies to cool on the baking sheet for 5 minutes, then transfer to a wire rack to cool completely.
How to Serve
Here are a few fun and creative ways to serve your cookies:
- Classic Style: Serve warm with a glass of cold milk.
- With Ice Cream: Sandwich vanilla or cream cheese ice cream between two cookies for a decadent treat.
- Gift Idea: Pack in a decorative tin or box for a thoughtful homemade gift.
- Cookie Platter: Pair with other cookies for a colorful dessert platter.
- Drizzle with Glaze: Drizzle a simple cream cheese glaze over the cookies for extra flavor and flair.
Additional Tips
- Chill the Dough: For thicker cookies, chill the dough for at least 30 minutes before baking.
- Don’t Overbake: The cookies will continue to set as they cool, so don’t wait until they look completely done in the oven.
- Use Gel Food Coloring: For a more vibrant color, opt for gel food coloring instead of liquid.
- Room Temperature Ingredients: Ensure the butter and egg are at room temperature for easier mixing.
- Store Properly: Keep cookies in an airtight container to maintain their soft texture.
Recipe Variations
- Cream Cheese Frosting Sandwich Cookies: Spread cream cheese frosting between two cookies for a red velvet sandwich.
- Chocolate Drizzle: Drizzle melted dark or white chocolate over the cookies for added elegance.
- Nut-Free: Omit nuts for a smoother texture.
- Mini Cookies: Use a smaller scoop to make bite-sized versions.
- Gluten-Free: Substitute all-purpose flour with a 1:1 gluten-free flour blend.
Freezing and Storage
Proper storage ensures your Soft Red Velvet Cookies stay fresh and delicious. Here’s how to store and freeze them effectively:
- Storage
- At Room Temperature: Place cookies in an airtight container or resealable plastic bag. Store at room temperature for up to 4-5 days. Adding a slice of bread to the container helps maintain their softness by keeping them moist.
- Refrigeration: If you live in a warm climate or want them to last a little longer, refrigerate the cookies. They can be stored in an airtight container in the refrigerator for up to 1 week.
- Freezing Baked Cookies
- Cool Completely: Make sure the cookies have cooled completely to room temperature before freezing.
- Freeze Individually: Lay the cookies in a single layer on a baking sheet and freeze for about an hour to prevent them from sticking together.
- Store in a Bag or Container: Transfer the frozen cookies to a freezer-safe bag or container, separating layers with parchment paper.
- Freeze Time: Cookies can be frozen for up to 3 months.
- Thawing: Remove the desired number of cookies from the freezer and let them sit at room temperature for about 30 minutes before serving.
Special Equipment
To make Soft Red Velvet Cookies, you don’t need a lot of fancy tools, but having the right equipment can make the process much easier and more efficient. Here’s what you might want to have on hand:
- Hand Mixer or Stand Mixer: For creaming the butter and sugar to achieve that perfect soft texture.
- Cookie Scoop: Ensures evenly-sized cookies for consistent baking results.
- Parchment Paper or Silicone Baking Mat: Prevents sticking and makes cleanup a breeze.
- Baking Sheets: A good-quality, flat baking sheet ensures even heat distribution.
- Wire Cooling Rack: Allows the cookies to cool evenly without becoming soggy on the bottom.
- Spatula: Handy for transferring cookies from the baking sheet to the cooling rack.
- Mixing Bowls: Multiple sizes for combining dry and wet ingredients separately.
- Measuring Cups and Spoons: Accurate measurements are key to baking success.
FAQ Section
Have questions about Soft Red Velvet Cookies? We’ve got you covered!
- Can I make these cookies ahead of time?
- Absolutely! These cookies are perfect for making ahead. You can prepare the dough a day or two in advance and store it in the refrigerator until you’re ready to bake. Just let the dough come to room temperature for about 10 minutes before scooping and baking. Alternatively, baked cookies can be stored in an airtight container for up to five days or frozen for up to three months.
- What makes these cookies so soft and chewy?
- The secret to soft, chewy cookies is a combination of ingredients and techniques. Creaming the butter and sugar properly creates air pockets, giving the cookies a tender texture. Using just the right balance of brown sugar keeps the cookies moist, while chilling the dough helps prevent spreading during baking, ensuring a thicker, chewier texture.
- Can I use a different type of food coloring?
- Yes, you can use gel food coloring for a more vibrant red hue, or natural food coloring if you prefer to avoid artificial options. Keep in mind that natural dyes might produce a subtler color.
- What should I do if my cookies spread too much?
- If your cookies spread too much, the dough may be too warm. Try chilling it in the refrigerator for 30 minutes before baking. Also, double-check your measurements—too much butter or not enough flour can cause excessive spreading.

Soft Red Velvet Cookies
- Total Time: 30 min.
Ingredients
Instructions
For the Cookies
- 1 ½ cups all-purpose flour
- 2 tablespoons cocoa powder
- 1 teaspoon baking soda
- ¼ teaspoon salt
- ½ cup unsalted butter, softened
- ¾ cup granulated sugar
- ¼ cup brown sugar, packed
- 1 large egg
- 1 tablespoon red food coloring
- 1 teaspoon vanilla extract
- 1 teaspoon white vinegar
Optional Add-Ins
- ½ cup white chocolate chips
- ½ cup chopped pecans or walnuts
Notes
Prepare the Dough
- Preheat Your Oven: Preheat to 350°F (175°C) and line baking sheets with parchment paper.
- Mix Dry Ingredients: In a medium bowl, whisk together the flour, cocoa powder, baking soda, and salt. Set aside.
- Cream Butter and Sugars: In a large mixing bowl, beat the softened butter, granulated sugar, and brown sugar until light and fluffy.
- Add Wet Ingredients: Mix in the egg, vanilla extract, red food coloring, and white vinegar until fully combined.
- Combine: Gradually add the dry ingredients to the wet mixture, stirring just until no streaks of flour remain.
- Optional Add-Ins: Fold in white chocolate chips or nuts if using.
Shape and Bake
- Scoop Dough: Use a cookie scoop or tablespoon to drop dough onto the prepared baking sheets, spacing about 2 inches apart.
- Bake: Bake for 10-12 minutes, or until the edges are set but the centers look slightly underdone.
- Cool: Allow the cookies to cool on the baking sheet for 5 minutes, then transfer to a wire rack to cool completely.
- Prep Time: 15 min.
- Cook Time: 10-12 min.
Nutrition
- Serving Size: 24 cookies
- Calories: 130 kcal
Conclusion
Soft Red Velvet Cookies bring a splash of color and a burst of flavor to any occasion, making them a treat that’s both stunning and satisfying. Their tender, chewy texture pairs perfectly with the rich, subtle cocoa flavor that red velvet is known for, creating a cookie that’s as delightful to eat as it is to look at. The striking red hue makes these cookies a standout on any dessert table, whether you’re celebrating a special event, surprising someone you love, or just adding a little sweetness to your day.
One of the best parts of baking these cookies is how easily you can make them your own. Want to add a bit of crunch? Toss in some chopped pecans or walnuts. Feeling extra indulgent? Mix in white chocolate chips or a cream cheese swirl for an added layer of decadence. You can even experiment with festive sprinkles to match the season or occasion!
They’re not just fun to bake—they’re also a joy to share. Pack them up for gifting, bring them to a gathering, or simply enjoy them warm from the oven with a cold glass of milk. Whatever the occasion, these cookies are sure to impress and leave everyone reaching for seconds.
Give them a try, and let your creativity shine. Don’t forget to snap a photo and tag me on social media—I love seeing your delicious creations! Happy baking!


